> ## Documentation Index
> Fetch the complete documentation index at: https://help.getvero.com/llms.txt
> Use this file to discover all available pages before exploring further.
# Creating an HTML subscribe form
> Build HTML subscribe forms to capture customer details and trigger events in Vero.
If you are coming from an email or messaging service provider such as Mailchimp, you will be familiar with the concept of HTML forms as a way to capture subscriber and customer details.
These forms allow you to collect a subscriber or customer's email address, name, and other details easily using a little HTML on your website.
## Vero subscribe forms
Vero also supports HTML forms, with one key difference. Traditionally, when a contact fills out an email form, they are added to a list.
In Vero, rather than being added to a list, a customer that fills out a web form triggers an event. That event could be as simple as `Subscribes to blog`.
You can then use this event to create a segment or [trigger a workflow](/vero-1/workflows/creating-a-new-workflow) to automatically send email and/or push messages: so you get twice the power from a single web form!
## Step 1. Create a form
To generate a HTML form, head to *[Forms](https://app.getvero.com/tools/forms)* and you'll be shown Vero's point-and-click interface to create a form:
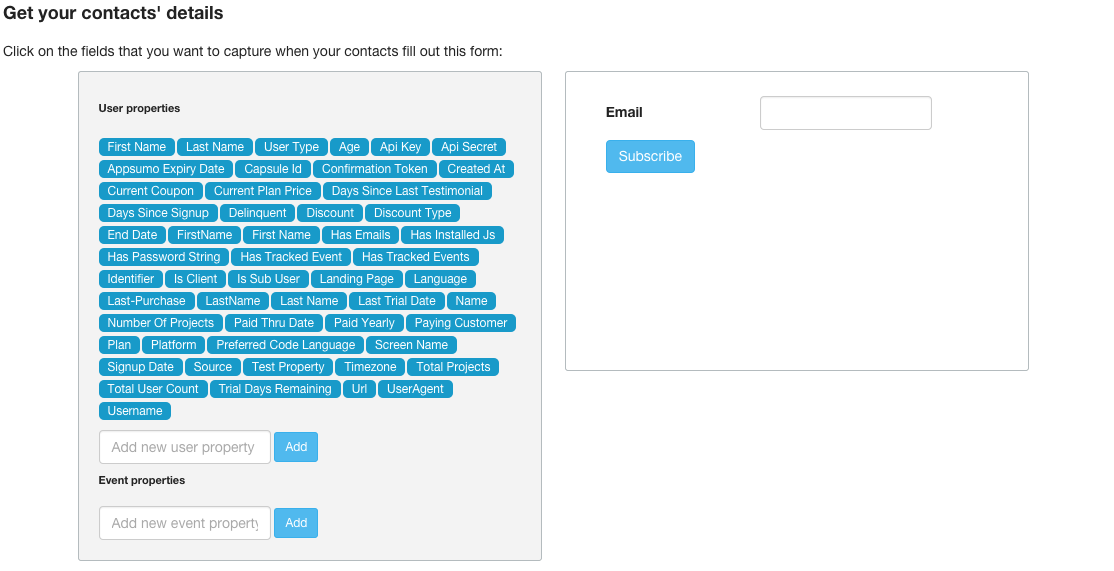 Vero forms always collect the customer's `email address` by default, but you can collect any fields you want. You can view the fields you've used in previously, on the left-hand side.
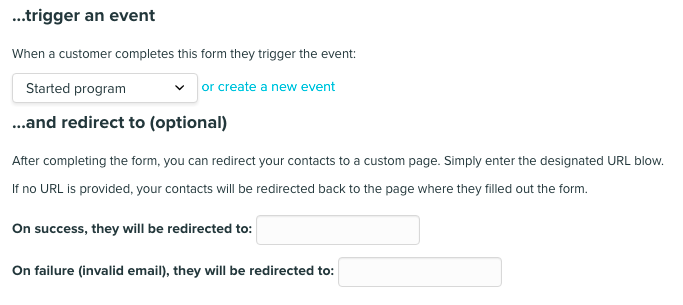
You must then define the event that will be triggered when the customer fills out this particular form.
The final part of our form builder allows you to define what your customers see after completing the form:
Vero forms always collect the customer's `email address` by default, but you can collect any fields you want. You can view the fields you've used in previously, on the left-hand side.
You must then define the event that will be triggered when the customer fills out this particular form.
The final part of our form builder allows you to define what your customers see after completing the form:
 ## Step 2: Copy and paste your new form
Select 'Generate form' to generate the HTML for your new form:
## Step 2: Copy and paste your new form
Select 'Generate form' to generate the HTML for your new form:
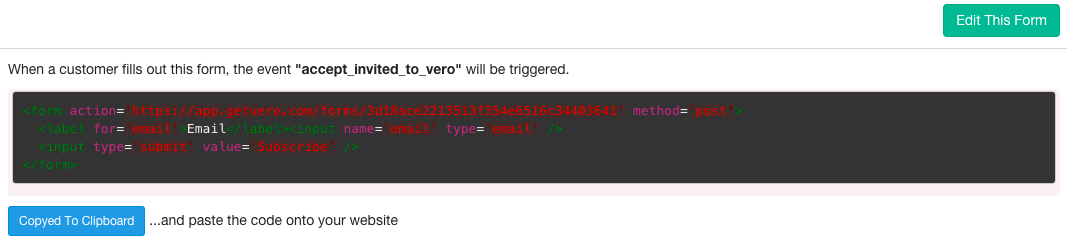 Select **copy to clipboard** and paste this code in your CMS or website and you are good to go!
You can define a screen/landing page to direct contacts to if they fail to complete the form successfully (i.e., enter an invalid email) or when they do complete the form successfully. Generally, this would be a custom "Thanks for subscribing" page.
Select **copy to clipboard** and paste this code in your CMS or website and you are good to go!
You can define a screen/landing page to direct contacts to if they fail to complete the form successfully (i.e., enter an invalid email) or when they do complete the form successfully. Generally, this would be a custom "Thanks for subscribing" page.