> ## Documentation Index
> Fetch the complete documentation index at: https://help.getvero.com/llms.txt
> Use this file to discover all available pages before exploring further.
# Import a list of customers via CSV
> Add or update customer profiles in bulk by importing CSV files.
You can add or update customers in Vero using CSV.
You can only import CSV files up to 50,000 rows. For files larger than this, please email [support@getvero.com](mailto:support@getvero.com) and we will help you import your data.
Note: power users can run the following commands in a shell terminal (on Unix-based systems): `sed -n "1, 50000p" path/first/file > path/first_portion/file` to get the first 50,000 rows, then `sed -n "50001, 100000p" path/first/file > path/second_portion/file`, etc. to break your list up for import.
## Required data and user stitching
To successfully import a CSV, it must contain at least an `id` or `email` column.
❗️ *Note: If you do not have the[**Match customer via email and update the users profile**](https://app.getvero.com/settings/labs) setting turned on, you **must** include an `id` column to avoid creating duplicate user profiles.*
You can also include other columns for customer **properties**. An example would be a `first_name` column, or a `location` column. Vero will store these properties against the customer's profile.
Here's an example of a CSV file that can be successfully imported:
```
id, email, first_name, last_name, location
1859, tyrion.lannister@casterlyrock.com, Tyrion, Lannister, Casterly Rock
```
CSV imports respect the "identity stitching" rules that are setup on your account. By default Vero will stitch (de-duplicate) user records based on the following rules:
* Users are matched on `id` where provided.
* When no `id` is provided, `email` is used as the `id` value and users are then matched based on the `id` value.
You can configure your "identity stitching" rules under *Settings > Labs*. For example, you can set Vero to match directly on the `email` value.
## How to import a CSV
To import a CSV click on [*Import/Export*](https://app.getvero.com/imports) menu at the left of the Vero dashboard.
 In Vero, after import, this data would look like this on the profile of this customer:
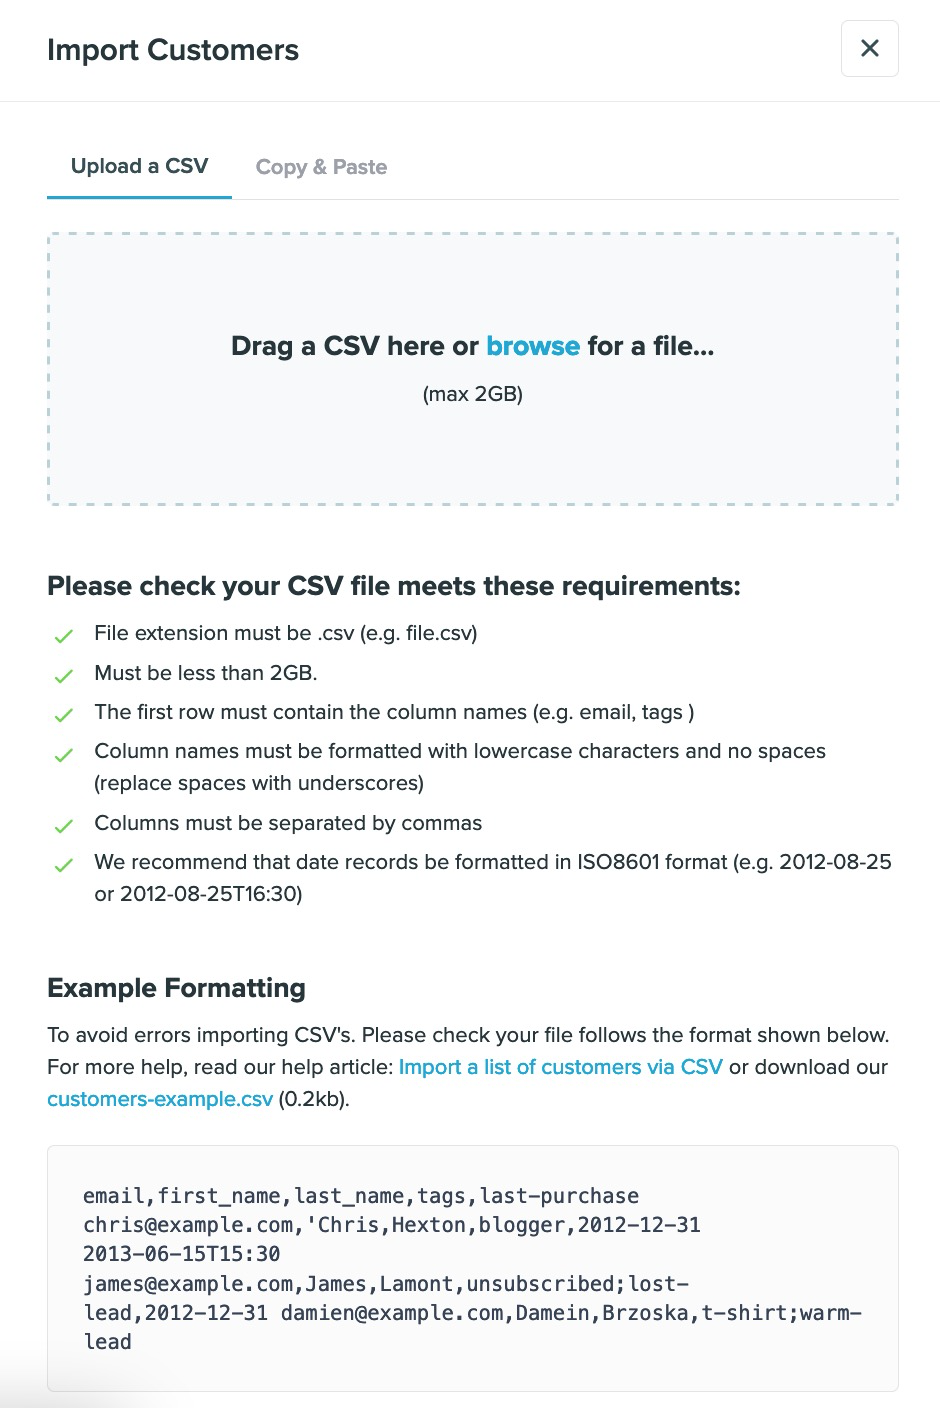
 You can only import `.csv` files. If you are using Microsoft Excel or Mac Sheets, select *File > Save as... > CSV* to export your data in the correct format. `.xls`, `.xlsx` and other formats will not be accepted when you try to upload your file.
After uploading your CSV file you'll be asked to check Vero has correctly detected each of your columns. If you have imported a CSV before, or connected Vero's API, we'll also ask you to map your columns to any properties that you have already stored in Vero.
You can only import `.csv` files. If you are using Microsoft Excel or Mac Sheets, select *File > Save as... > CSV* to export your data in the correct format. `.xls`, `.xlsx` and other formats will not be accepted when you try to upload your file.
After uploading your CSV file you'll be asked to check Vero has correctly detected each of your columns. If you have imported a CSV before, or connected Vero's API, we'll also ask you to map your columns to any properties that you have already stored in Vero.
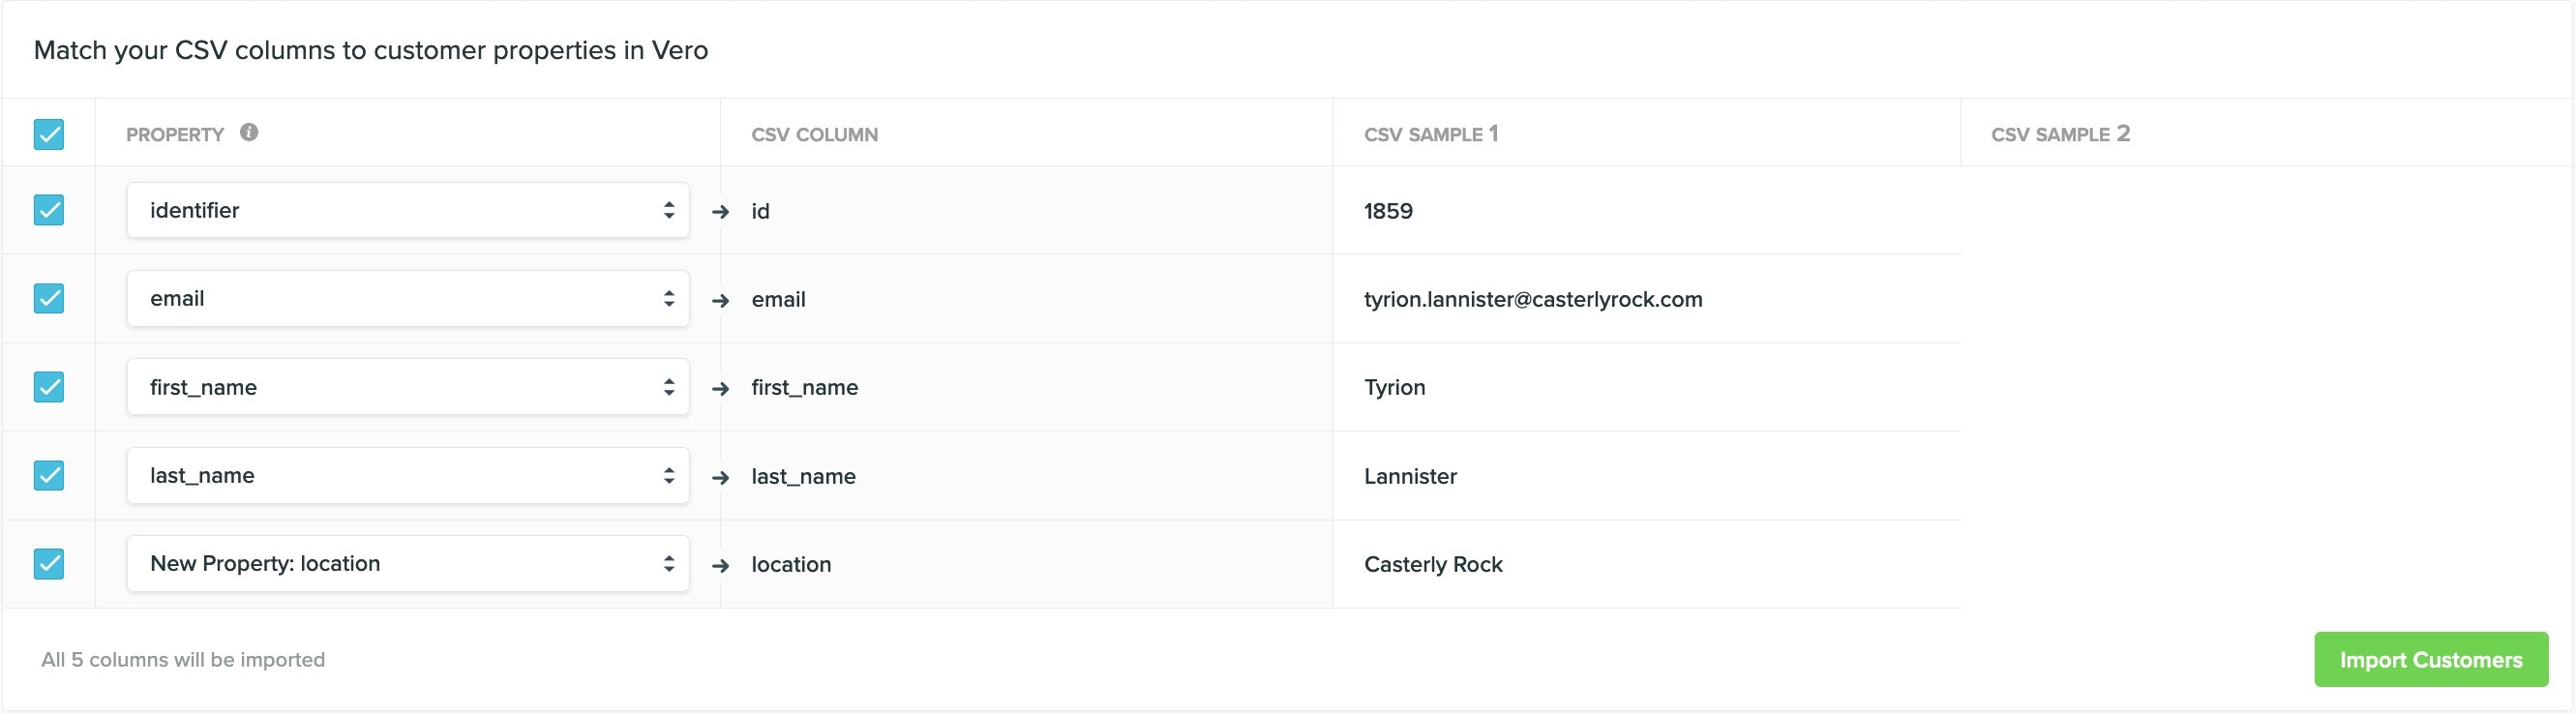 When importing, Vero will use the `email` column to match customers' profiles and will update all other properties with the latest values from your spreadsheet.
You will receive an email once your CSV has been successfully imported, or if your CSV import fails. **You will always receive a confirmation email**. For unsuccessful imports, Vero lists the rows of the CSV that were affected. You should review these rows, export them to a new CSV and import them again.
When importing, Vero will use the `email` column to match customers' profiles and will update all other properties with the latest values from your spreadsheet.
You will receive an email once your CSV has been successfully imported, or if your CSV import fails. **You will always receive a confirmation email**. For unsuccessful imports, Vero lists the rows of the CSV that were affected. You should review these rows, export them to a new CSV and import them again.