> ## Documentation Index
> Fetch the complete documentation index at: https://help.getvero.com/llms.txt
> Use this file to discover all available pages before exploring further.
# How to setup a custom sending domain
> Configure your own sending domain with DKIM, CNAME, and MX records for better deliverability.
By default, Vero will send your emails using a shared IP and domain configuration. We use a variety of domains and tiers to help ensure we get customers emails into inboxes. We work with [Mailgun](https://www.mailgun.com/) to deliver your emails.
To improve your deliverability, we recommend setting up your own custom sending domain. This tells your recipients' mail servers that you are authenticated to send from your domain.
This also means that Vero is truly invisible to your customers.
## Sending without DNS verification
If you have not set up DNS verification for your own domain, Vero will automatically adjust the ‘From’ address of your emails to meet the email authentication requirements from Google and Yahoo.
Specifically, we will use either `veromailer.com` or `getveromail.com` as the sending domain to ensure alignment with DMARC policies. This means that when you send a campaign, your email address will be transformed to match the sending domain.
For example, if your original email address is `sellingsomething@example.com`, it will be modified to `sellingsomething.example.com@veromailer.com`. This ensures that the sending domain and the ‘From’ domain align correctly, improving deliverability and compliance with authentication requirements.
To remove this automatic adjustment and send from your own domain without modification, we recommend setting up your Vero DNS records.
## Add your DNS records
To sign your domain you will need to add two to three records to your domain's DNS configuration.
Add the domain you want to send from under *Settings > Email Delivery* in Vero.
Once this is done, visit *Settings > Email Delivery* and select *Request DNS records*. Vero will then generate the DKIM, CNAME and MX records you need to add to your domain to show that you are authenticated to use it for sending.)
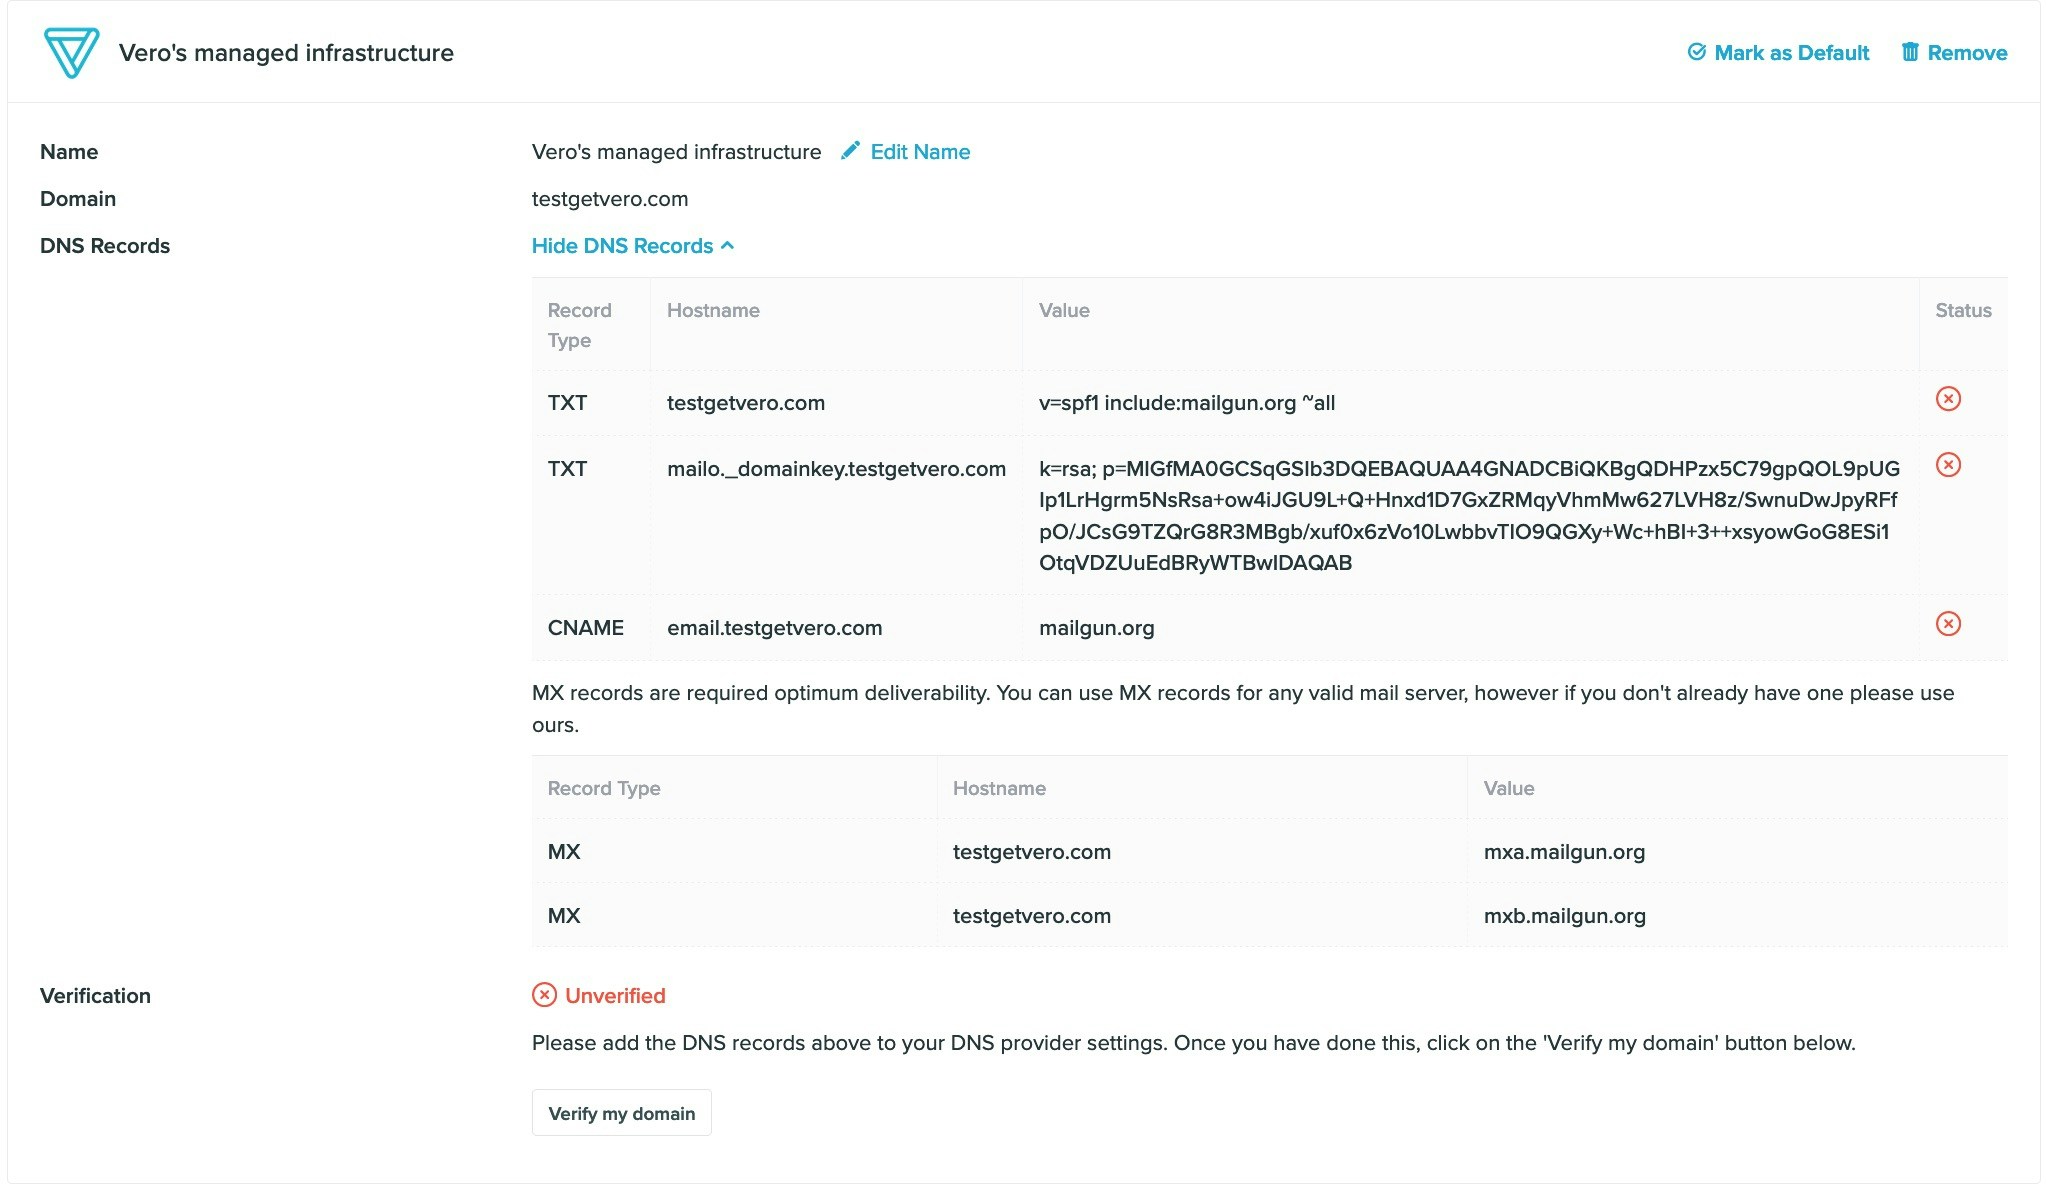 To add the DNS records to your domain, you'll need to look at the how to for your specific domain host. Googling "Setup DNS records" is typically the fastest way to find your provider's specific instructions. If you need a hand, just [email us](mailto:support@getvero.com).
### Setting up a custom CNAME
By default, we provide a CNAME record for the subdomain `email.yourdomain.com`. This CNAME is used to track links.
If you already have a CNAME setup on the `email` subdomain, please [email us](mailto:support@getvero.com) and we will update the subdomain to something else that works for you.
### MX records
MX records can have an affect on delivery as missing MX records may raise suspicion when a recipient server is decided whether to accept an email for delivery or not.
We recommend sticking to one provider for MX records. For example, if you've already got Google records set up, to remedy this you'll want to remove the Mailgun records.
### SPF records
It is possible to have more than one SPF. The key is to ensure you don't have more than **10 lookups** associated with the records which relate to IPs.
## Verify your records
Once you have added the DNS records to your domain, return to *Settings > Email Delivery* and select the *Verify DNS* link.the
Verify DNS Records button.
To add the DNS records to your domain, you'll need to look at the how to for your specific domain host. Googling "Setup DNS records" is typically the fastest way to find your provider's specific instructions. If you need a hand, just [email us](mailto:support@getvero.com).
### Setting up a custom CNAME
By default, we provide a CNAME record for the subdomain `email.yourdomain.com`. This CNAME is used to track links.
If you already have a CNAME setup on the `email` subdomain, please [email us](mailto:support@getvero.com) and we will update the subdomain to something else that works for you.
### MX records
MX records can have an affect on delivery as missing MX records may raise suspicion when a recipient server is decided whether to accept an email for delivery or not.
We recommend sticking to one provider for MX records. For example, if you've already got Google records set up, to remedy this you'll want to remove the Mailgun records.
### SPF records
It is possible to have more than one SPF. The key is to ensure you don't have more than **10 lookups** associated with the records which relate to IPs.
## Verify your records
Once you have added the DNS records to your domain, return to *Settings > Email Delivery* and select the *Verify DNS* link.the
Verify DNS Records button.
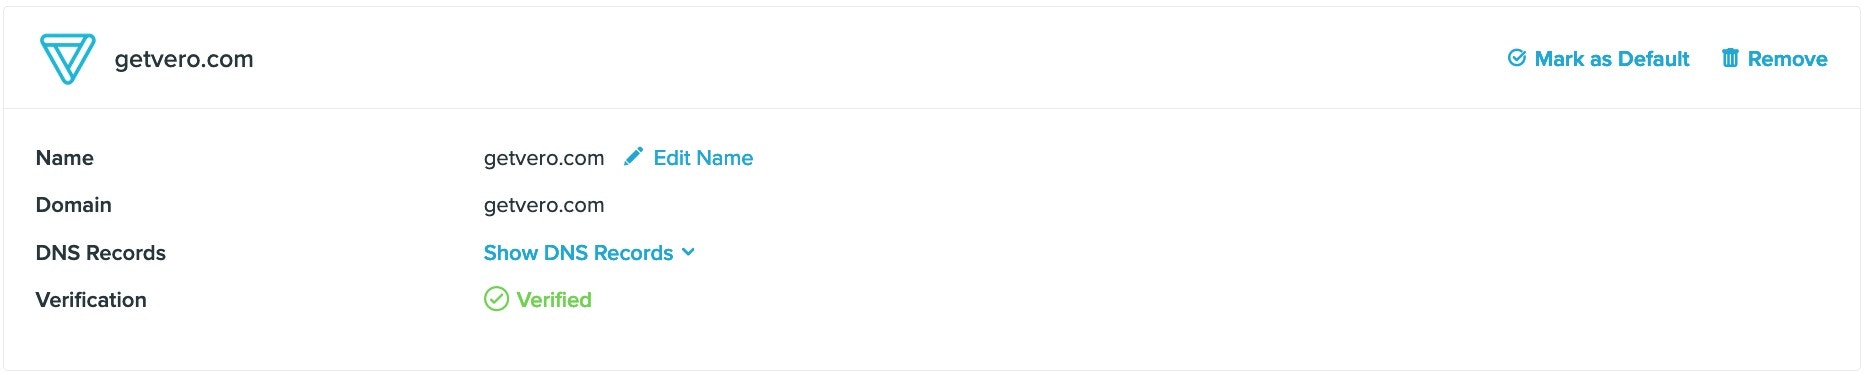 Vero will check, in real time, that the DNS records are setup correctly on your domain. Once setup correctly, Vero will make your configuration as `Good` meaning everything is setup correctly. At this point, emails will begin going out from the domain you have elected.
Note that it can take as many as 24 hours for your DNS records to propagate and for Vero to recognise the valid records.
Once your DNS records are verified, https click-tracking links can be enabled by contacting [support](mailto:support@getvero.com).
Vero will check, in real time, that the DNS records are setup correctly on your domain. Once setup correctly, Vero will make your configuration as `Good` meaning everything is setup correctly. At this point, emails will begin going out from the domain you have elected.
Note that it can take as many as 24 hours for your DNS records to propagate and for Vero to recognise the valid records.
Once your DNS records are verified, https click-tracking links can be enabled by contacting [support](mailto:support@getvero.com).