> ## Documentation Index
> Fetch the complete documentation index at: https://help.getvero.com/llms.txt
> Use this file to discover all available pages before exploring further.
# Project send modes
> Control whether your project sends real emails, routes everything to a test address, or captures data without sending.
Switch your project between Live, Test, and Offline modes to control how emails are sent during setup and testing.
## Send modes
Each project operates in one of three send modes:
* **Live** — All emails are triggered and sent normally to your customers.
* **Test** — All emails triggered by customer events are redirected to a single test email address. For newsletters, only a single email is sent to your test address.
* **Offline** — Data is still captured and emails are triggered, but nothing is sent. You can see triggered emails in the logs.
## Changing your project's send mode
By default, new projects are set to **Test** mode, indicated by the label in the project menu in the sidebar.
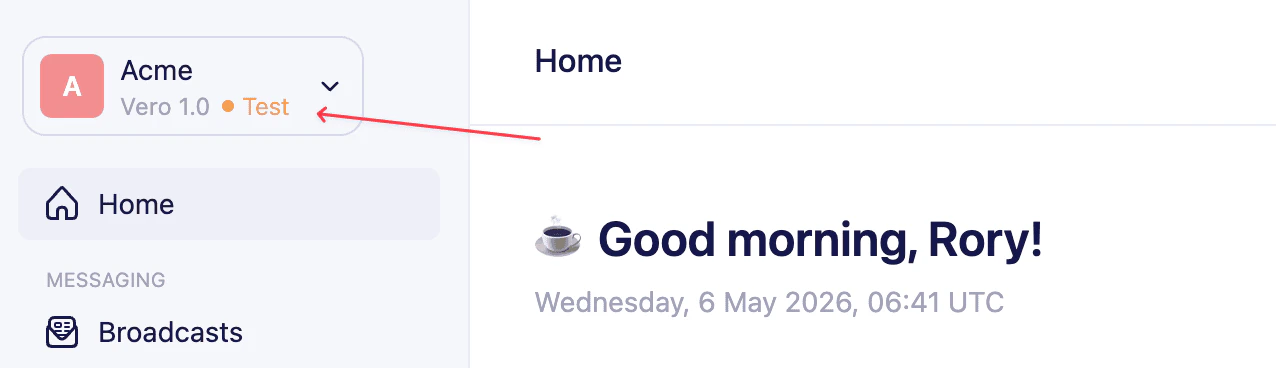 1. In the sidebar, click the project you want to configure.
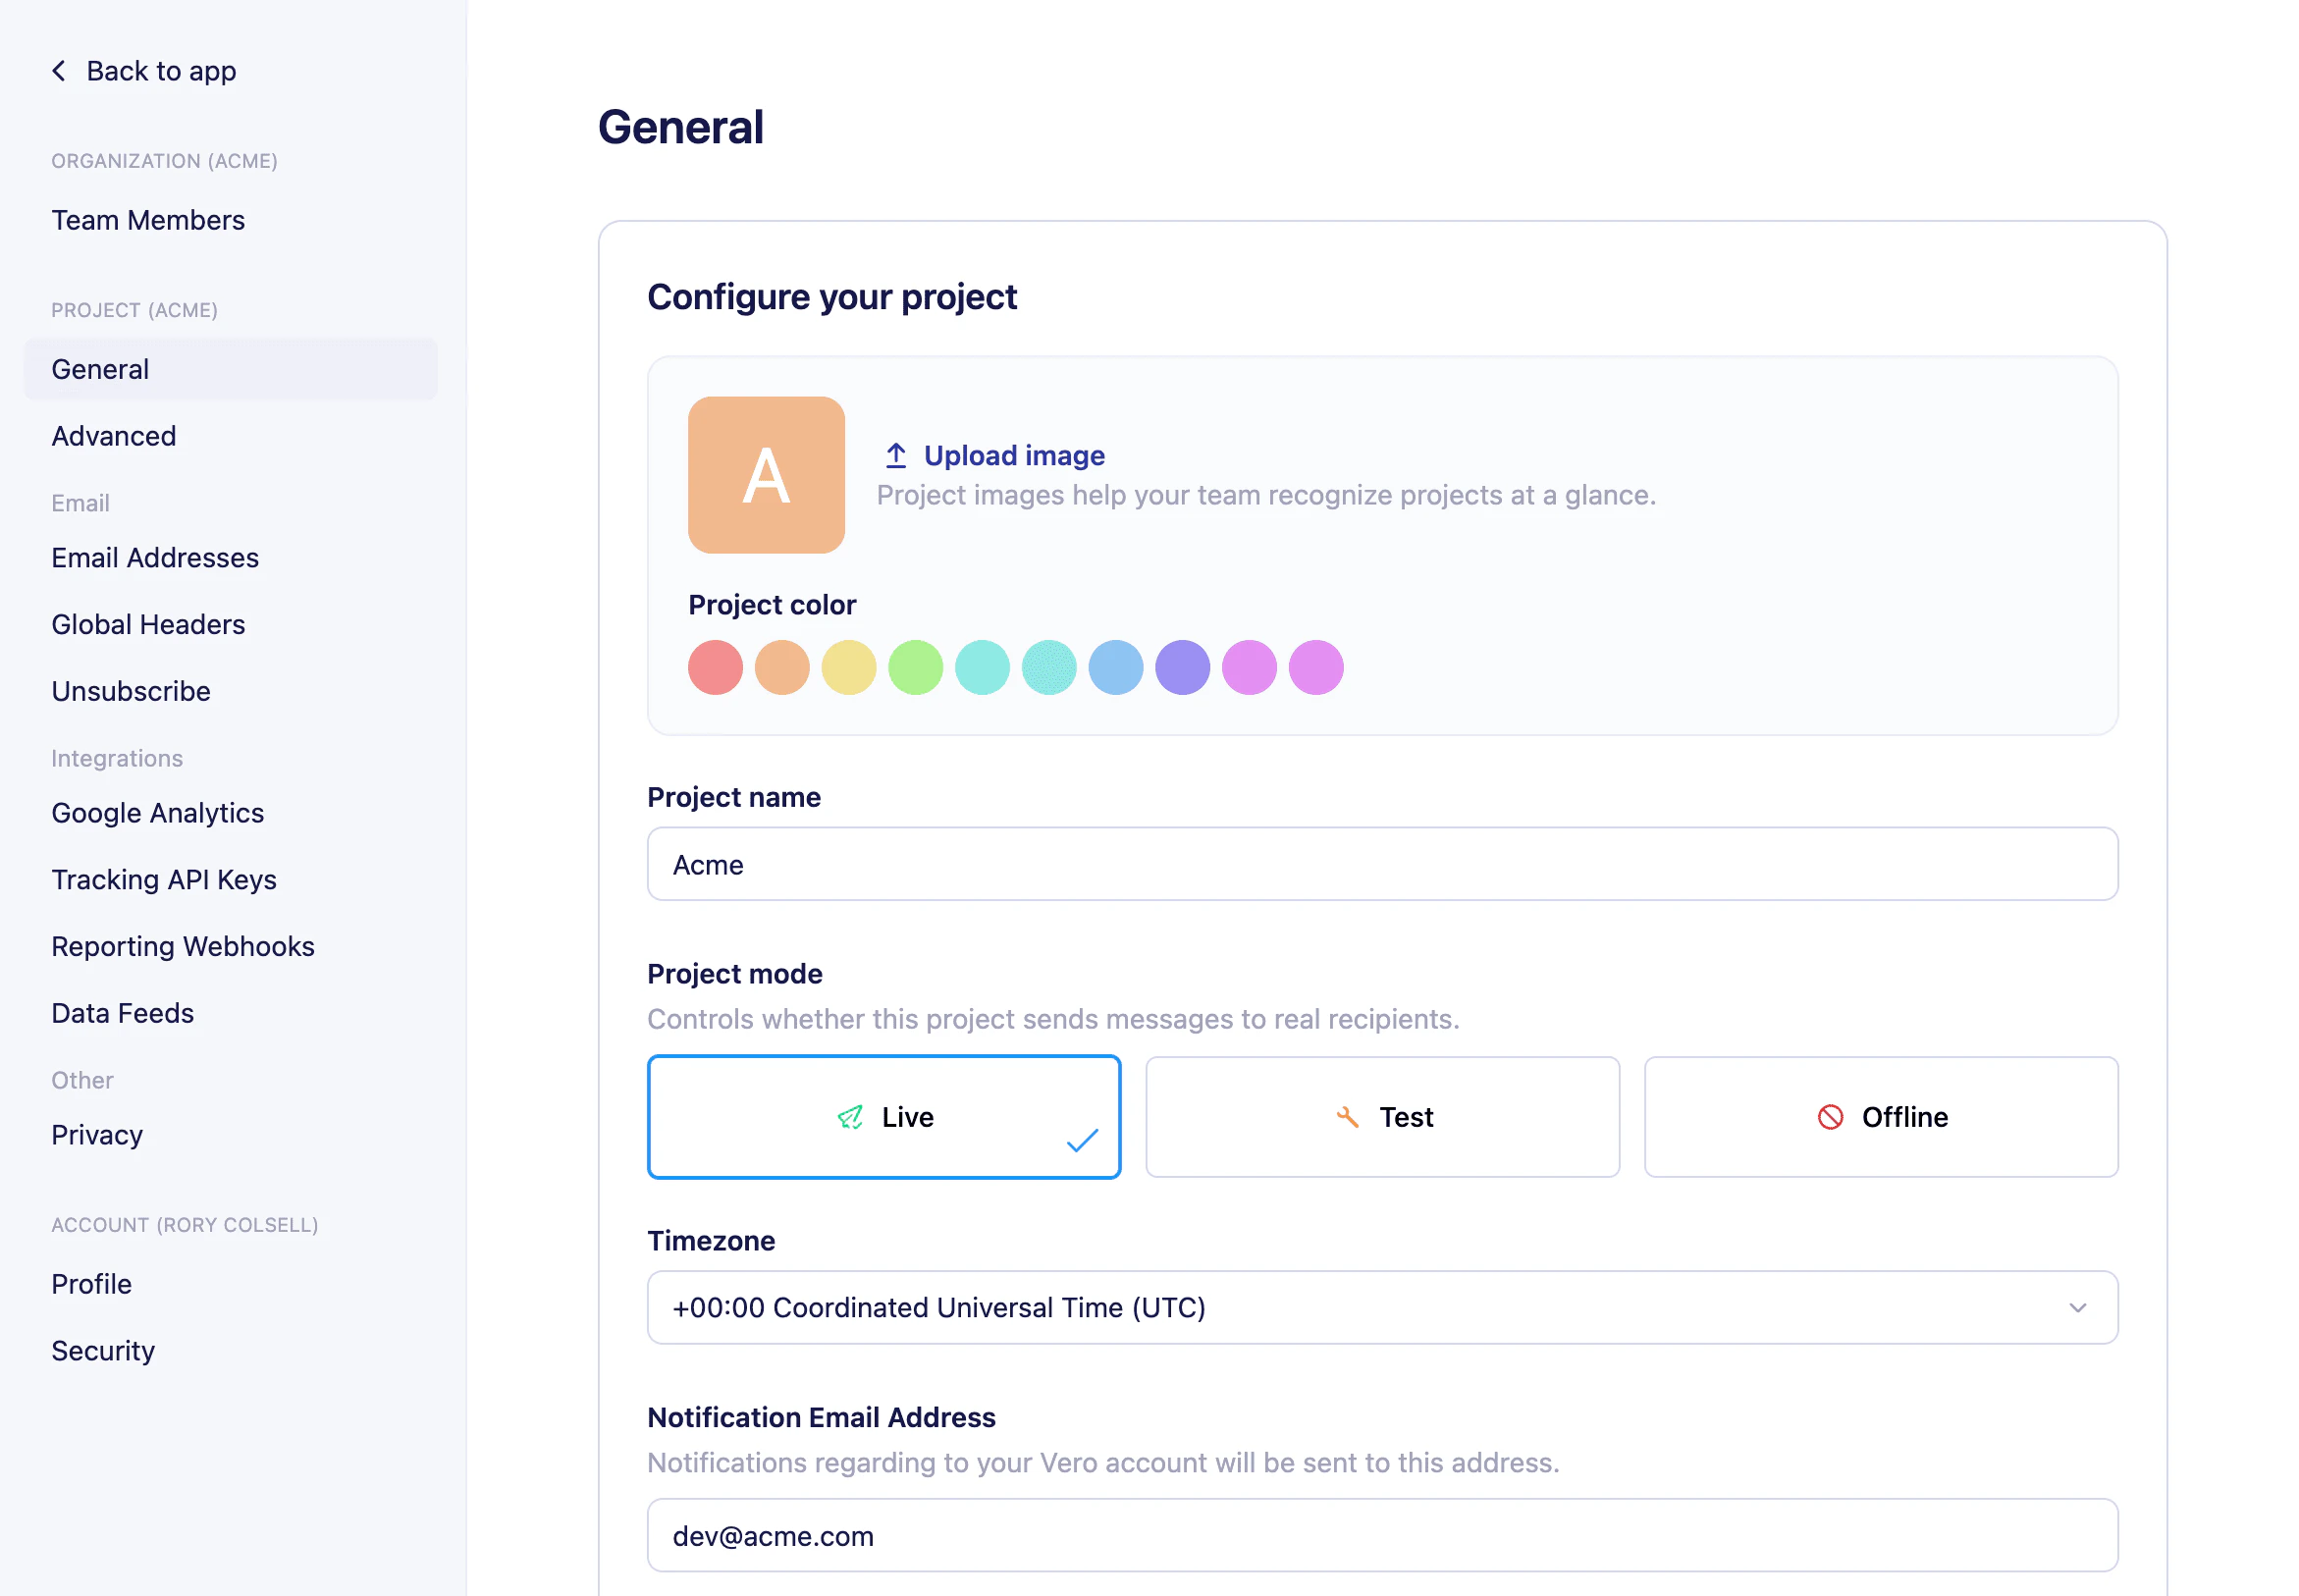
2. From the project menu, navigate to **Project settings**.
3. Under **Project mode**, select **Live**, **Test**, or **Offline**.
4. If you selected **Test**, enter a **Test email address**. All emails will be sent to this address instead of real users.
5. Click **Save**.
1. In the sidebar, click the project you want to configure.
2. From the project menu, navigate to **Project settings**.
3. Under **Project mode**, select **Live**, **Test**, or **Offline**.
4. If you selected **Test**, enter a **Test email address**. All emails will be sent to this address instead of real users.
5. Click **Save**.
 ## Recommended workflow
Keep your project in **Test** mode while you get set up. This prevents any emails from being sent to real customers before you're ready.
Once you have completed the following, switch to **Live** mode:
1. [Set up event tracking](../events/setting-up-event-tracking) — connect your application and start sending events.
2. [Add your customer data](../user-profiles/how-to-add-or-update-user-profiles) — bring in your existing user records.
When everything looks correct in your logs and test inbox, flip the project to **Live** to start sending real emails.
Switching to **Live** mode requires a paid and verifiedaccount. If you're on a free plan or haven't verified your account, contact [support@getvero.com](mailto:support@getvero.com) for help.
You can have as many projects as you like. A common setup is a **Sandbox** project in Test mode connected to your staging environment, and a **Production** project in Live mode connected to your live environment.
## Need Help?
If you have any questions, reach out to us at [support@getvero.com](mailto:support@getvero.com).
## Recommended workflow
Keep your project in **Test** mode while you get set up. This prevents any emails from being sent to real customers before you're ready.
Once you have completed the following, switch to **Live** mode:
1. [Set up event tracking](../events/setting-up-event-tracking) — connect your application and start sending events.
2. [Add your customer data](../user-profiles/how-to-add-or-update-user-profiles) — bring in your existing user records.
When everything looks correct in your logs and test inbox, flip the project to **Live** to start sending real emails.
Switching to **Live** mode requires a paid and verifiedaccount. If you're on a free plan or haven't verified your account, contact [support@getvero.com](mailto:support@getvero.com) for help.
You can have as many projects as you like. A common setup is a **Sandbox** project in Test mode connected to your staging environment, and a **Production** project in Live mode connected to your live environment.
## Need Help?
If you have any questions, reach out to us at [support@getvero.com](mailto:support@getvero.com).