> ## Documentation Index
> Fetch the complete documentation index at: https://help.getvero.com/llms.txt
> Use this file to discover all available pages before exploring further.
# Creating and editing a Journey
> Build multi-message, event-triggered campaigns using a visual canvas with delays and branching logic.
Journeys allow you to build multi-message, event-triggered campaigns in Vero 2.0 using a visual canvas. Setting up a journey is similar to creating a single message campaign with a few key differences. Read on to learn how to set up a multi-message campaign.
***💡 Beta Notice** - The Journeys feature is currently in beta and not all planned functionality is available yet. We’re actively working on new features and improvements, so you may notice some limitations or missing options for now. If you have feedback or questions, please let us know—we appreciate your input as we continue to build out Journeys!*
## Creating a new Journey
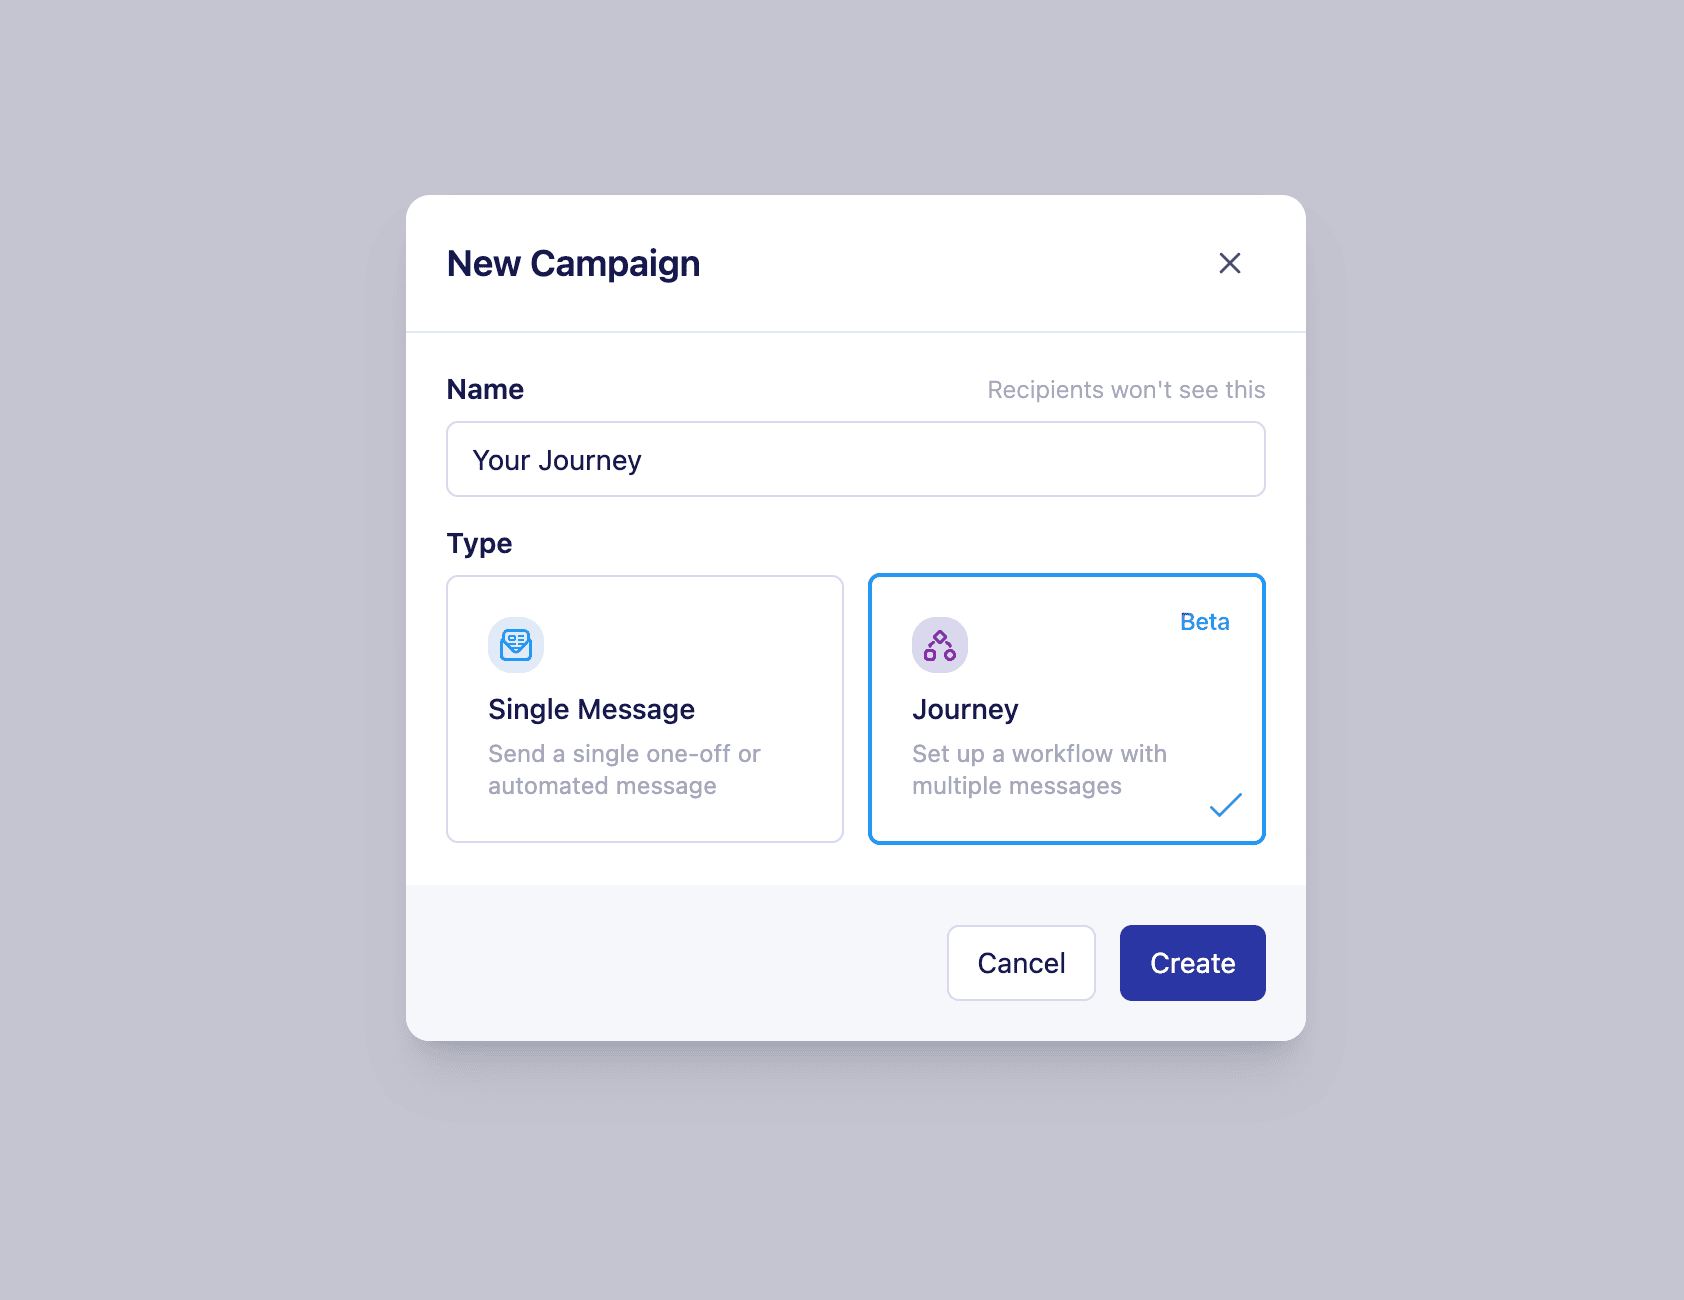
To create a Journey campaign:
1. Go to the **Campaigns** page.
2. Click **Add Campaign**.
3. In the popup, select **Journey** as the campaign type.
 ## Setting up the Journey
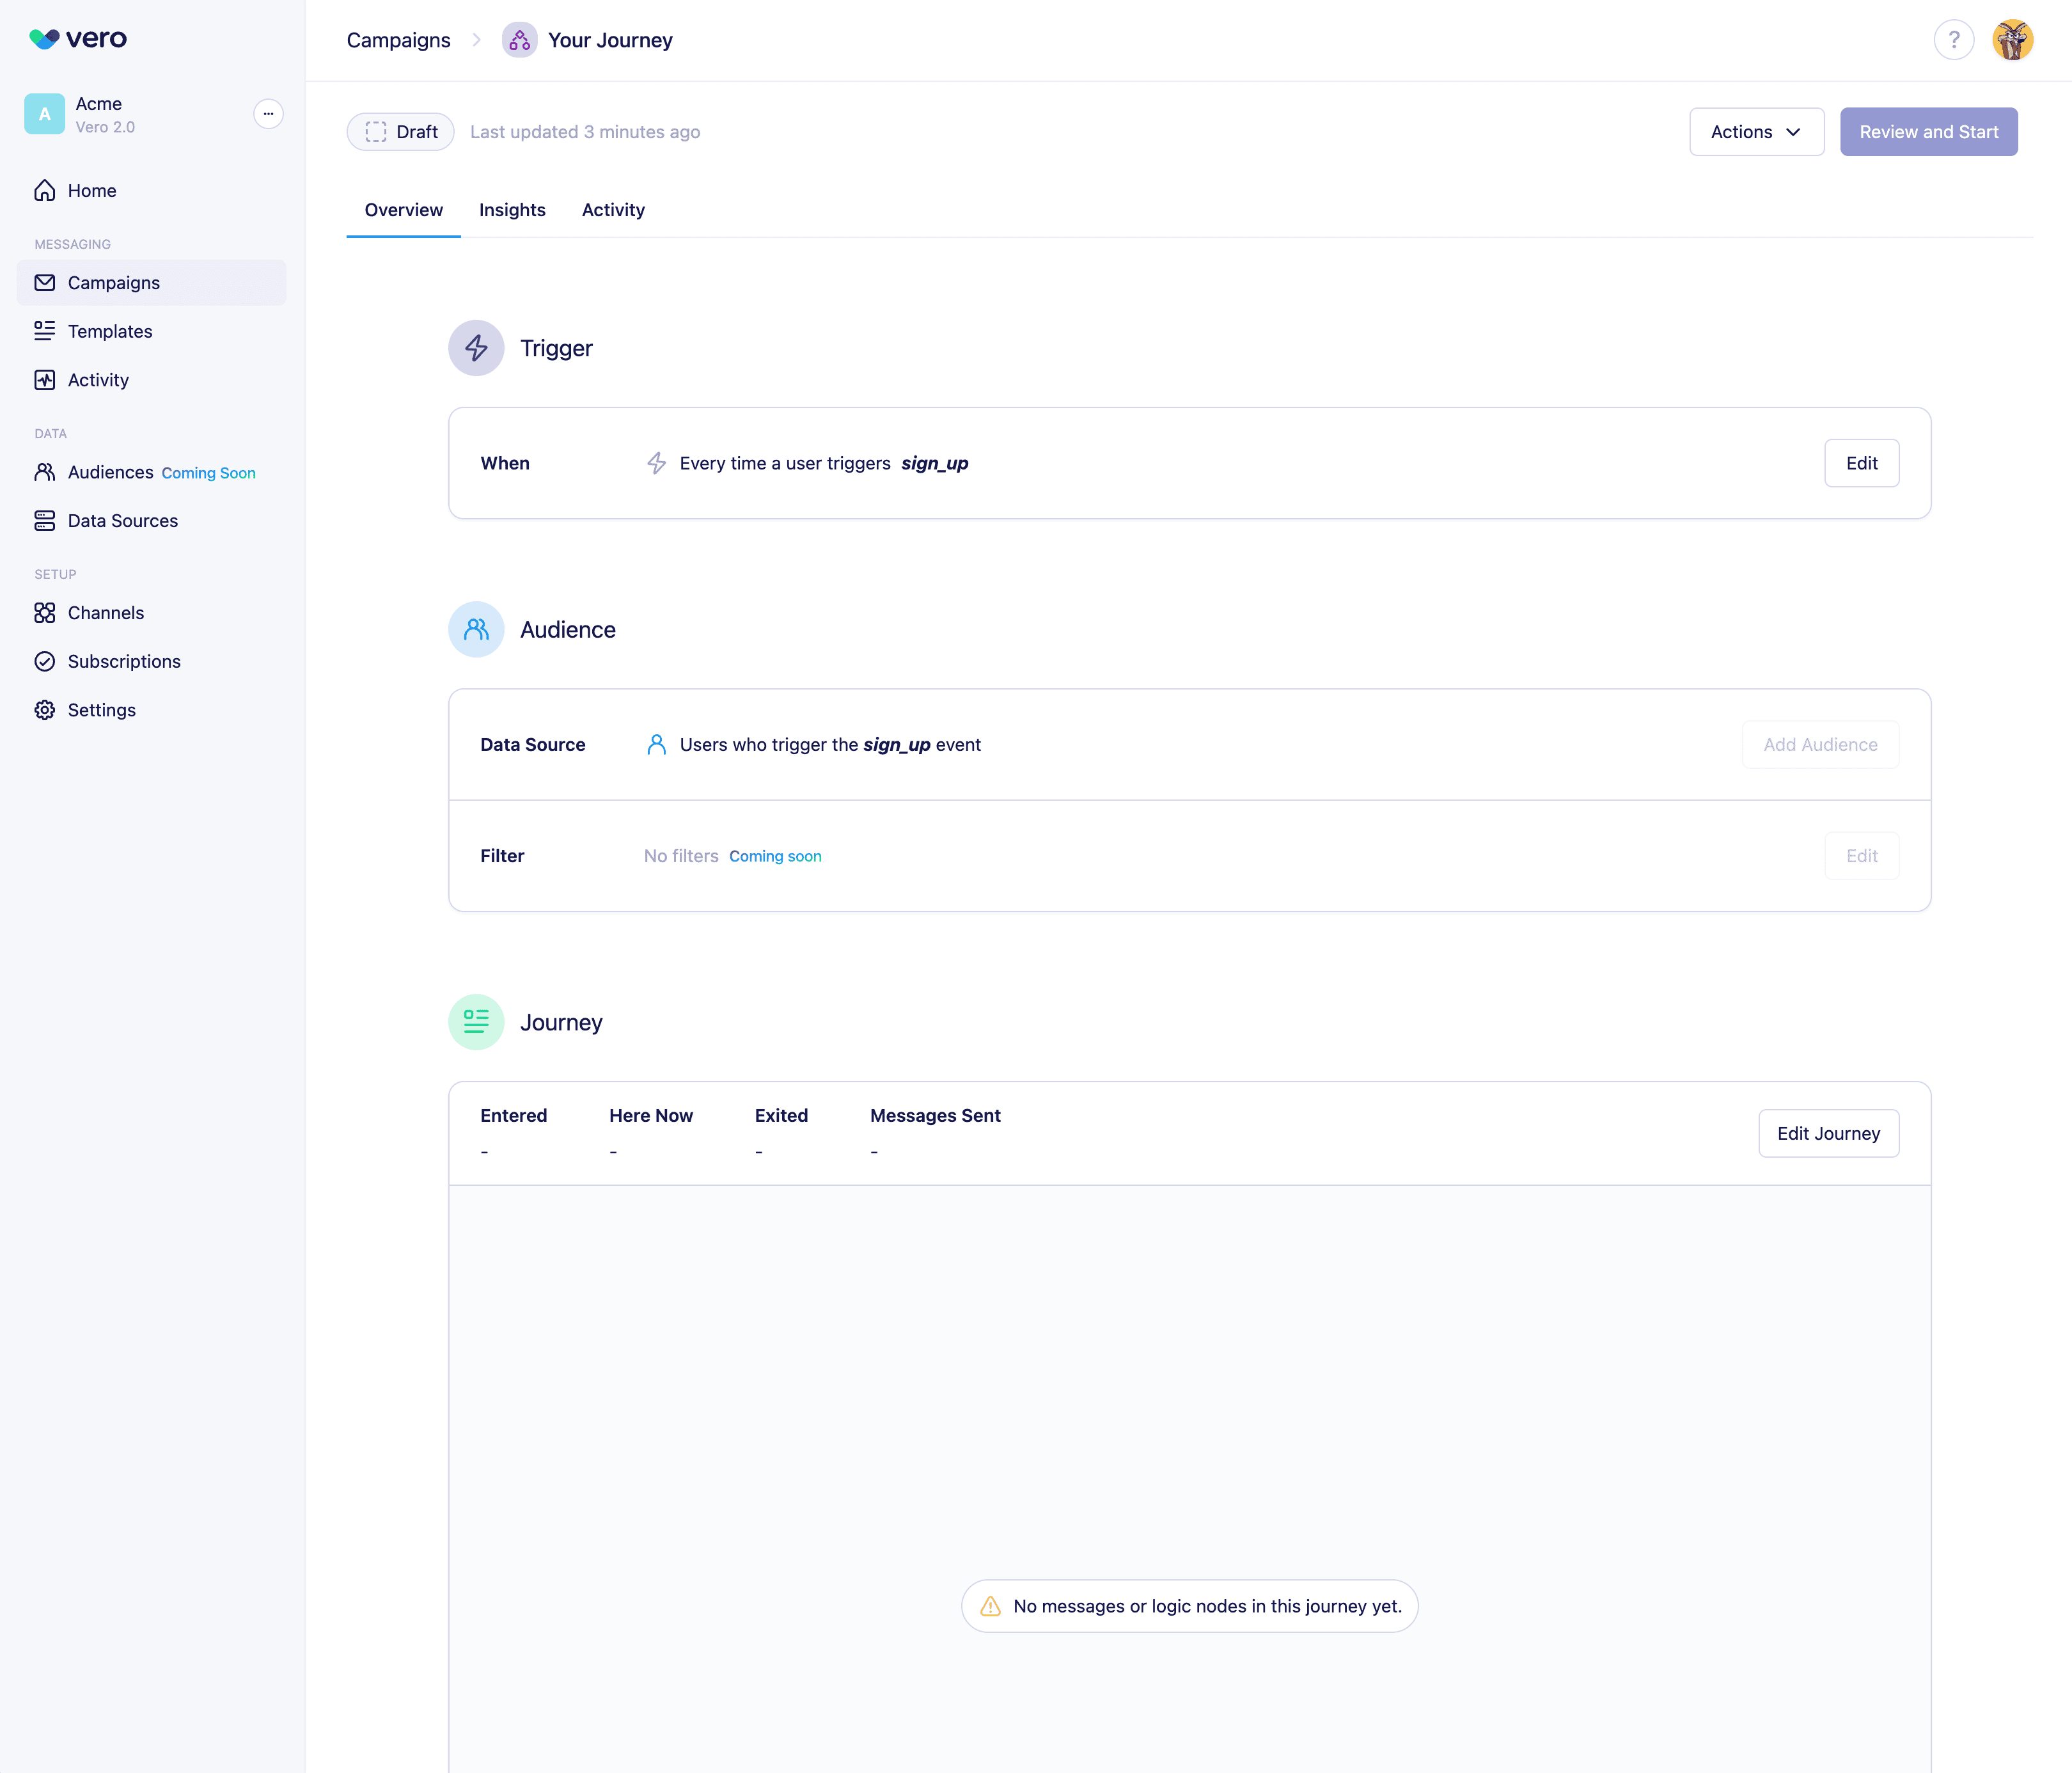
After creating your Journey, you'll configure the core settings that define how and when users enter the journey on the campaign overview page:
## Setting up the Journey
After creating your Journey, you'll configure the core settings that define how and when users enter the journey on the campaign overview page:
 ### 1. Event Trigger
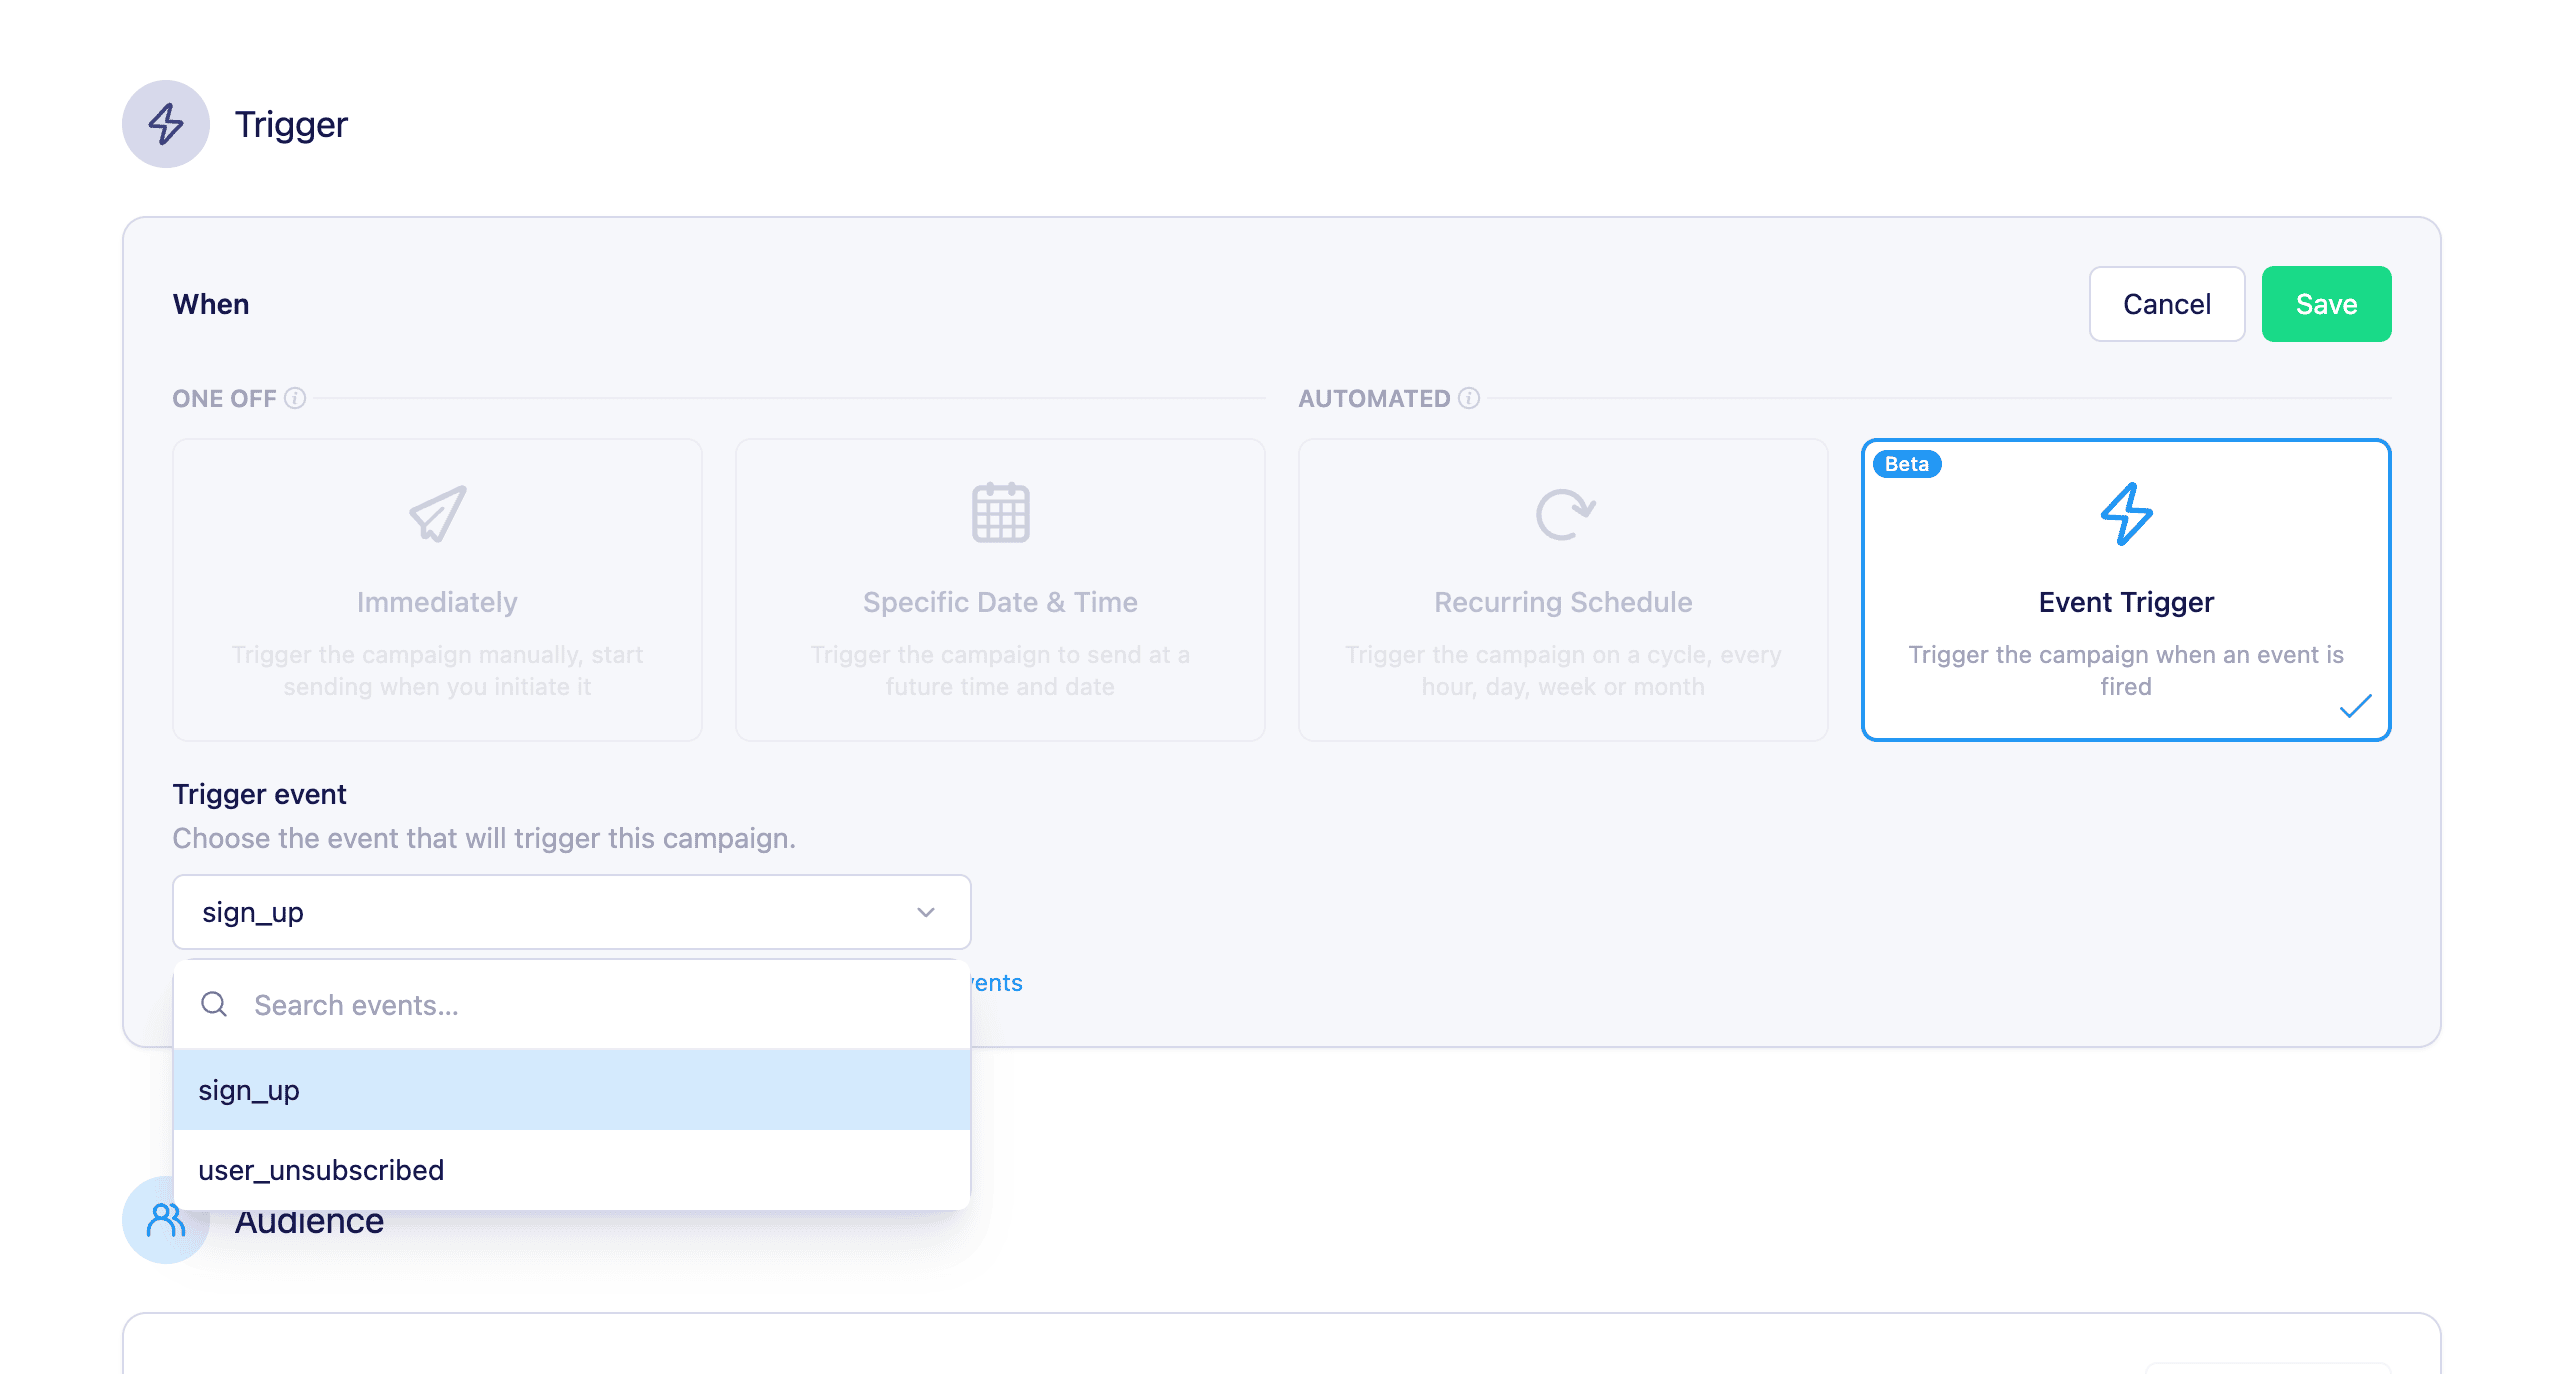
Choose an event that will trigger entry into the journey. Only event-based triggers are supported for Journeys for the time being. [Read more about Event Triggers](/vero-2/campaigns/journeys/event-trigger)
### 1. Event Trigger
Choose an event that will trigger entry into the journey. Only event-based triggers are supported for Journeys for the time being. [Read more about Event Triggers](/vero-2/campaigns/journeys/event-trigger)
 ### 2. Audience Filters (Coming soon)
Journeys are triggered for the user who performs the event.
*🚧 We’re working on adding more advanced filtering options soon, so you’ll be able to target specific segments based on attributes, behaviours, and other criteria in the future.*
### 3. Accessing the Canvas
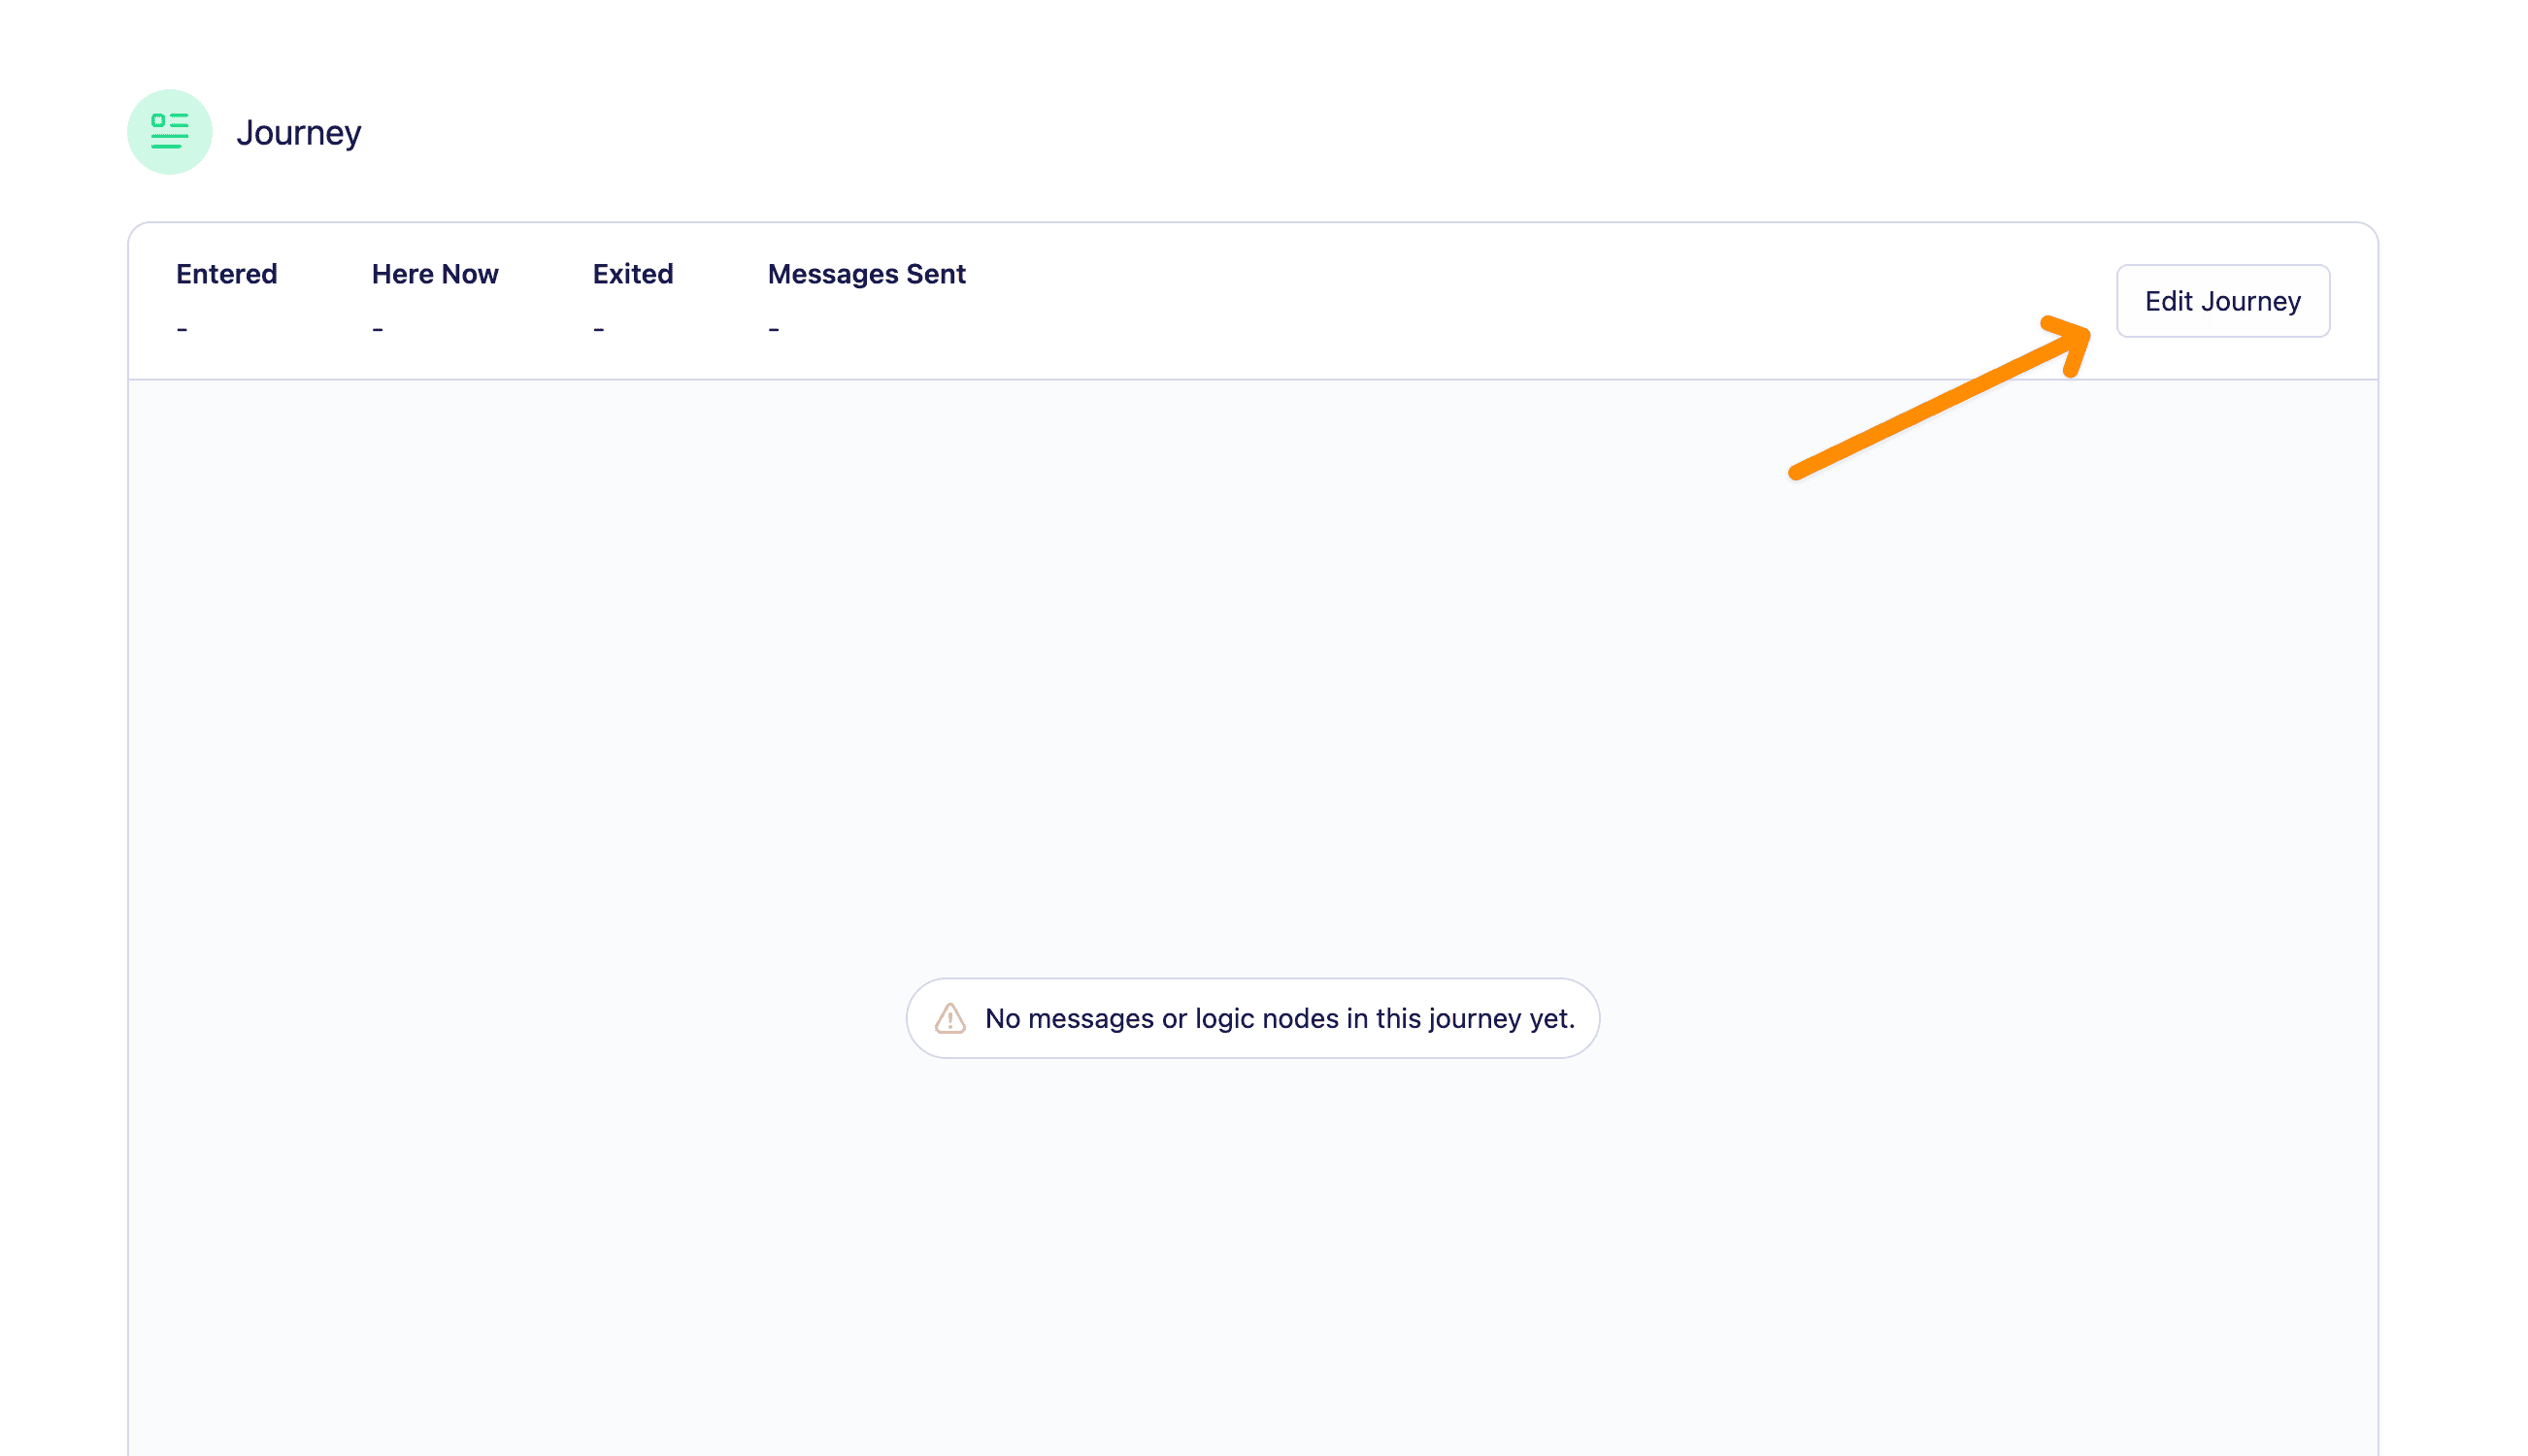
Once your trigger and audience are configured, click Edit Journey to open the visual canvas where you can build and customize your journey.
### 2. Audience Filters (Coming soon)
Journeys are triggered for the user who performs the event.
*🚧 We’re working on adding more advanced filtering options soon, so you’ll be able to target specific segments based on attributes, behaviours, and other criteria in the future.*
### 3. Accessing the Canvas
Once your trigger and audience are configured, click Edit Journey to open the visual canvas where you can build and customize your journey.
 ## Building the Journey
Journeys are built on a visual canvas using nodes. You can connect nodes to map the logic of your messaging flow.
## Building the Journey
Journeys are built on a visual canvas using nodes. You can connect nodes to map the logic of your messaging flow.
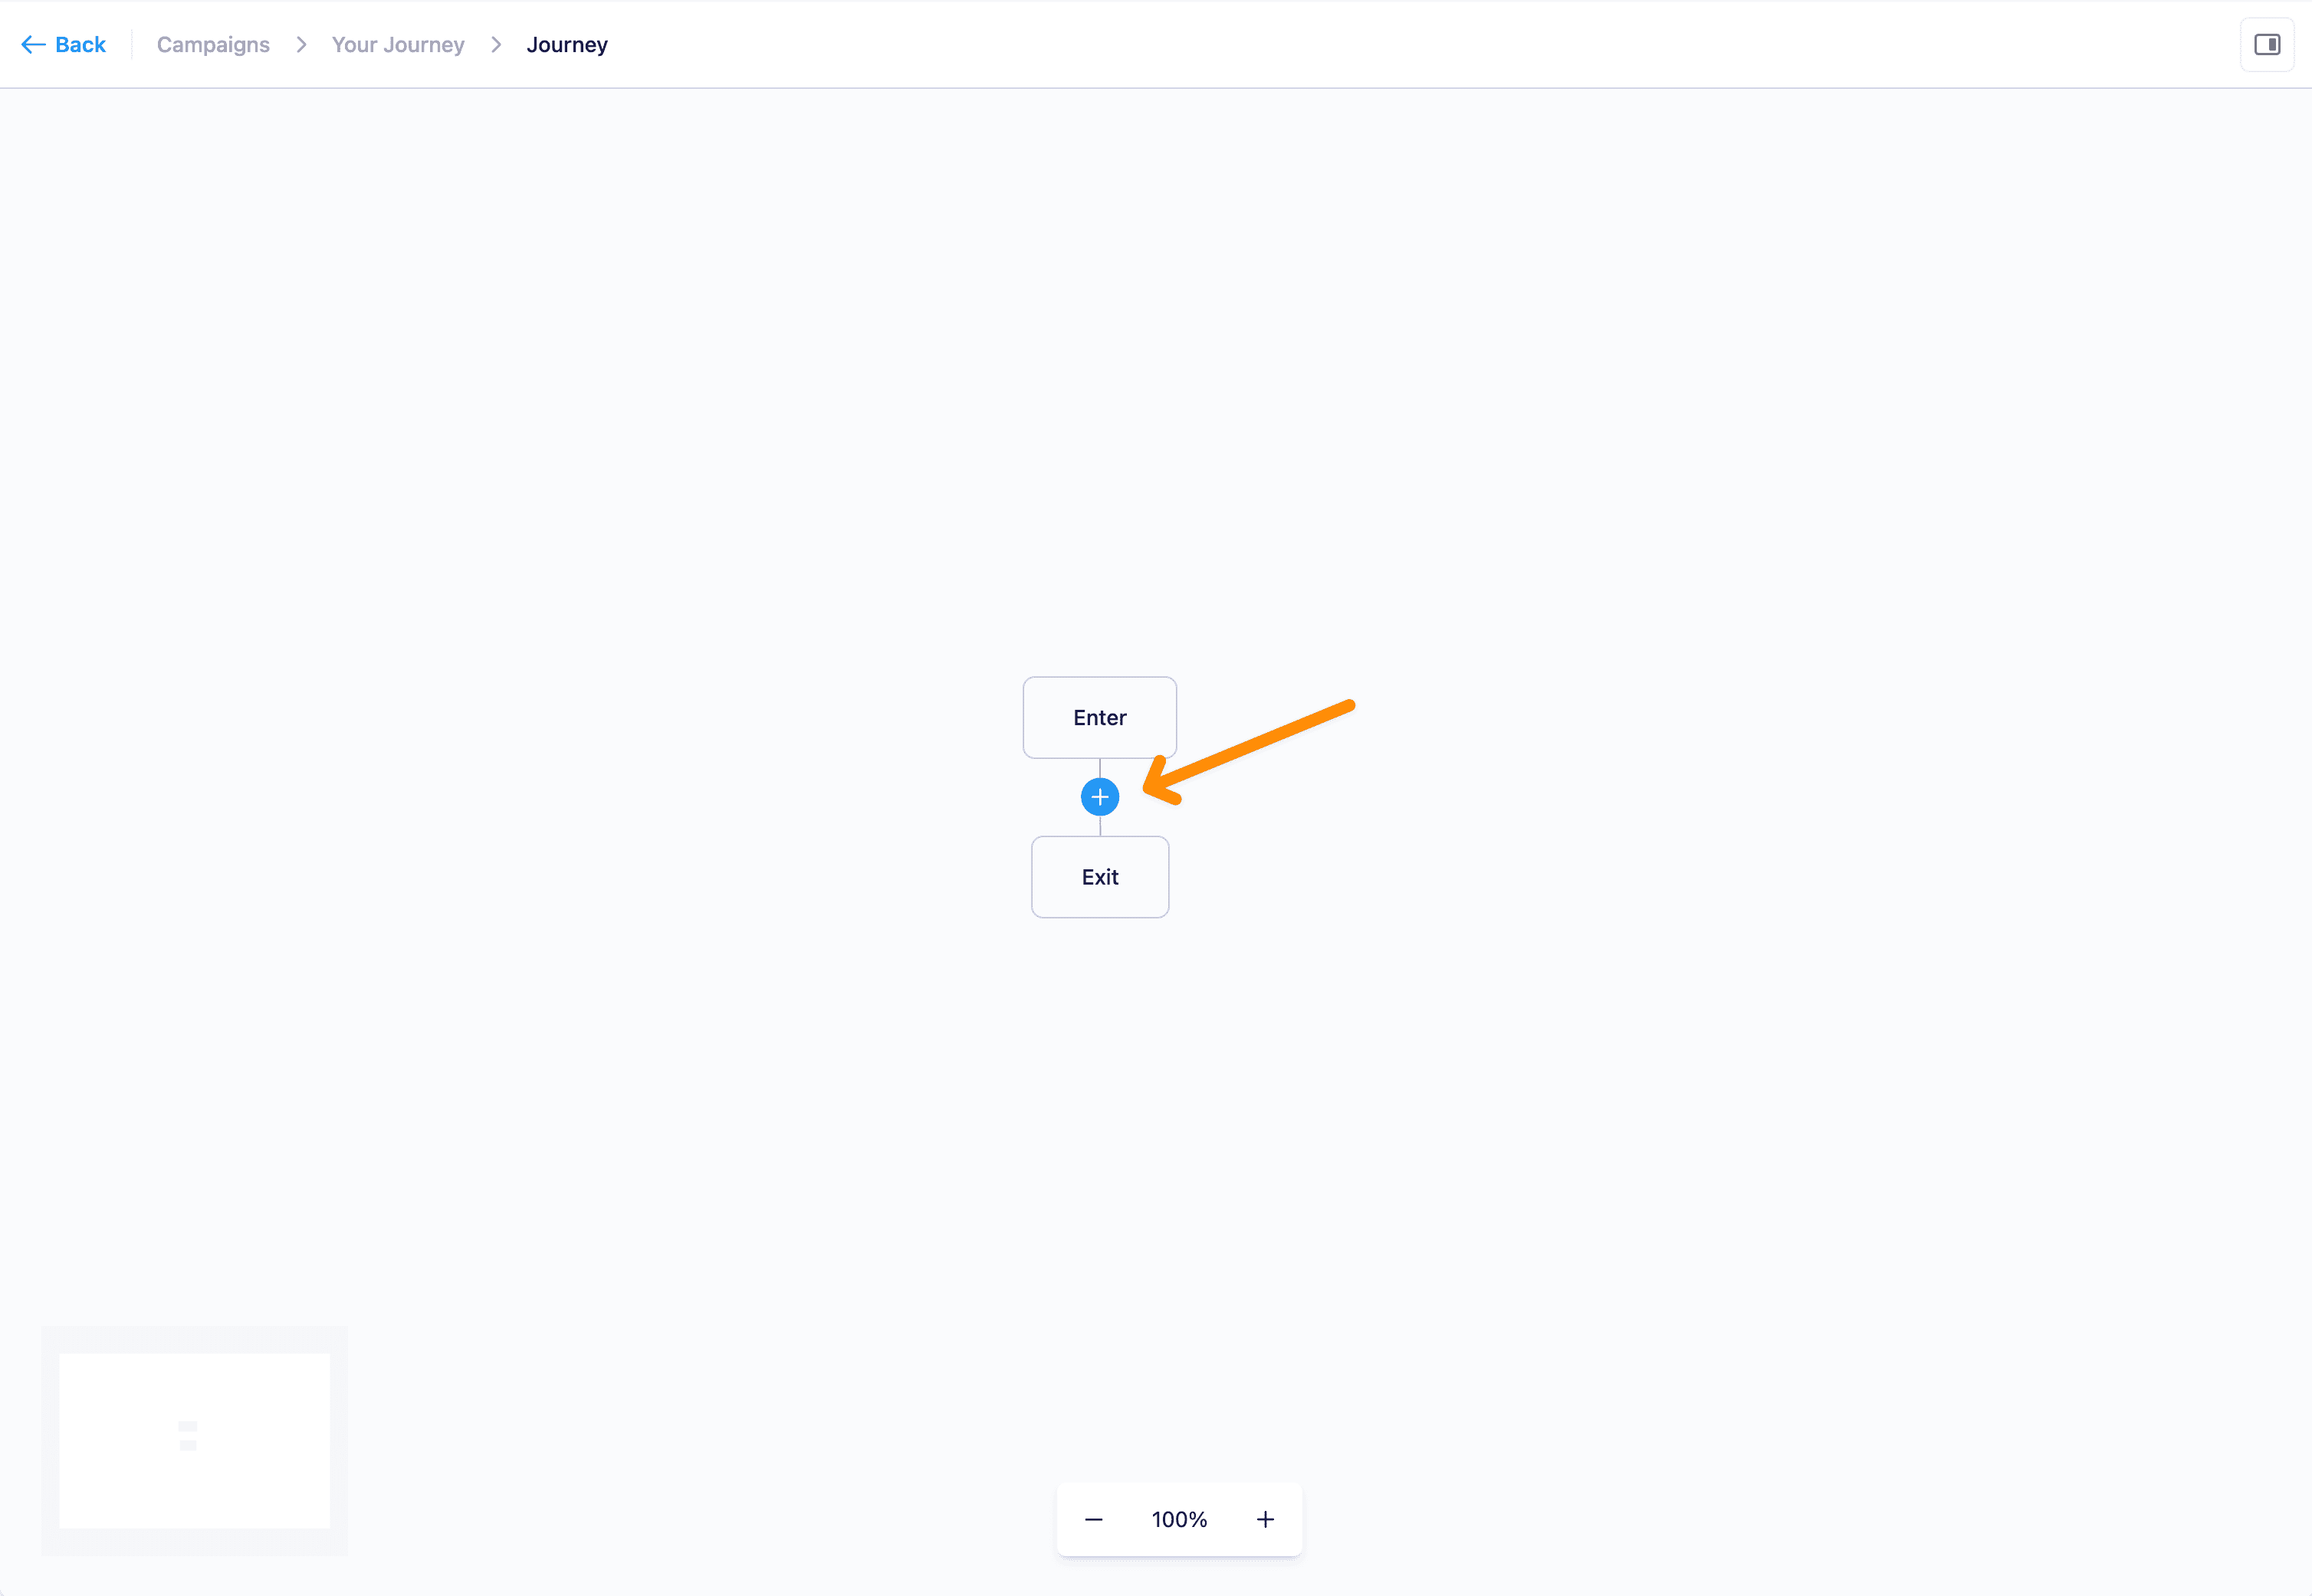 To add your first node, click the “+” button to show the ‘add node’ menu.
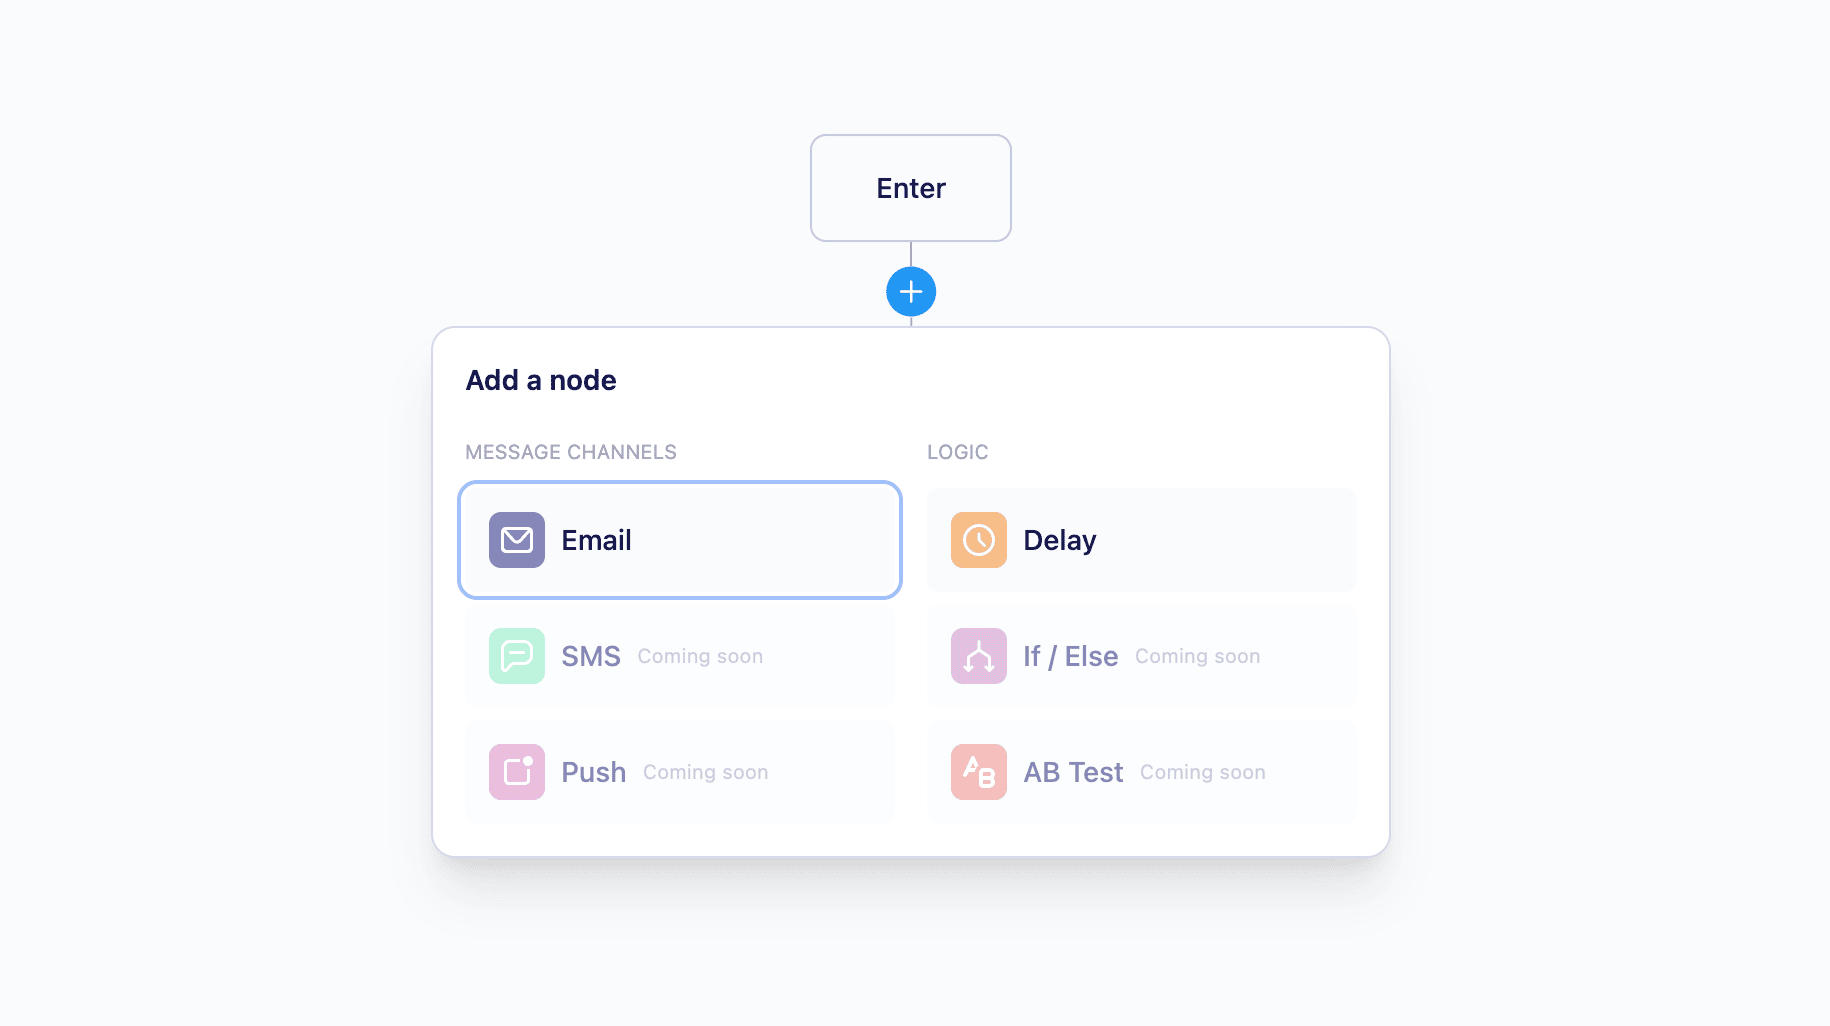 Available node types include:
* **Email** : Sends an email message to the user's `email` address.
* **SMS** : Sends an SMS message to the user's `phone_number`. Users without a phone number on record will skip the node and continue to the next step. [Learn more](/vero-2/campaigns/journeys/sms-node)
* **Delay** : Pauses between steps, e.g., wait 3 hours or 3 days before sending the next email.
* **True/False** : Uses conditional logic to route users down different paths based on their behaviour and properties.
* **Enter (non editable)** : Indicates where users begin the journey. This is determined by the event trigger and cannot be modified in the journey view.
* **Exit (non editable)** : Marks where users leave the journey. Automatically added at the end of each branch.
*Enter and Exit nodes are non-editable; they visualize the user’s journey path. Entry is configured in the ‘trigger’ section on the campaign overview page.*
To edit each node simply click on the node on the canvas to select it and edit the details of each node on the side panel.
Available node types include:
* **Email** : Sends an email message to the user's `email` address.
* **SMS** : Sends an SMS message to the user's `phone_number`. Users without a phone number on record will skip the node and continue to the next step. [Learn more](/vero-2/campaigns/journeys/sms-node)
* **Delay** : Pauses between steps, e.g., wait 3 hours or 3 days before sending the next email.
* **True/False** : Uses conditional logic to route users down different paths based on their behaviour and properties.
* **Enter (non editable)** : Indicates where users begin the journey. This is determined by the event trigger and cannot be modified in the journey view.
* **Exit (non editable)** : Marks where users leave the journey. Automatically added at the end of each branch.
*Enter and Exit nodes are non-editable; they visualize the user’s journey path. Entry is configured in the ‘trigger’ section on the campaign overview page.*
To edit each node simply click on the node on the canvas to select it and edit the details of each node on the side panel.
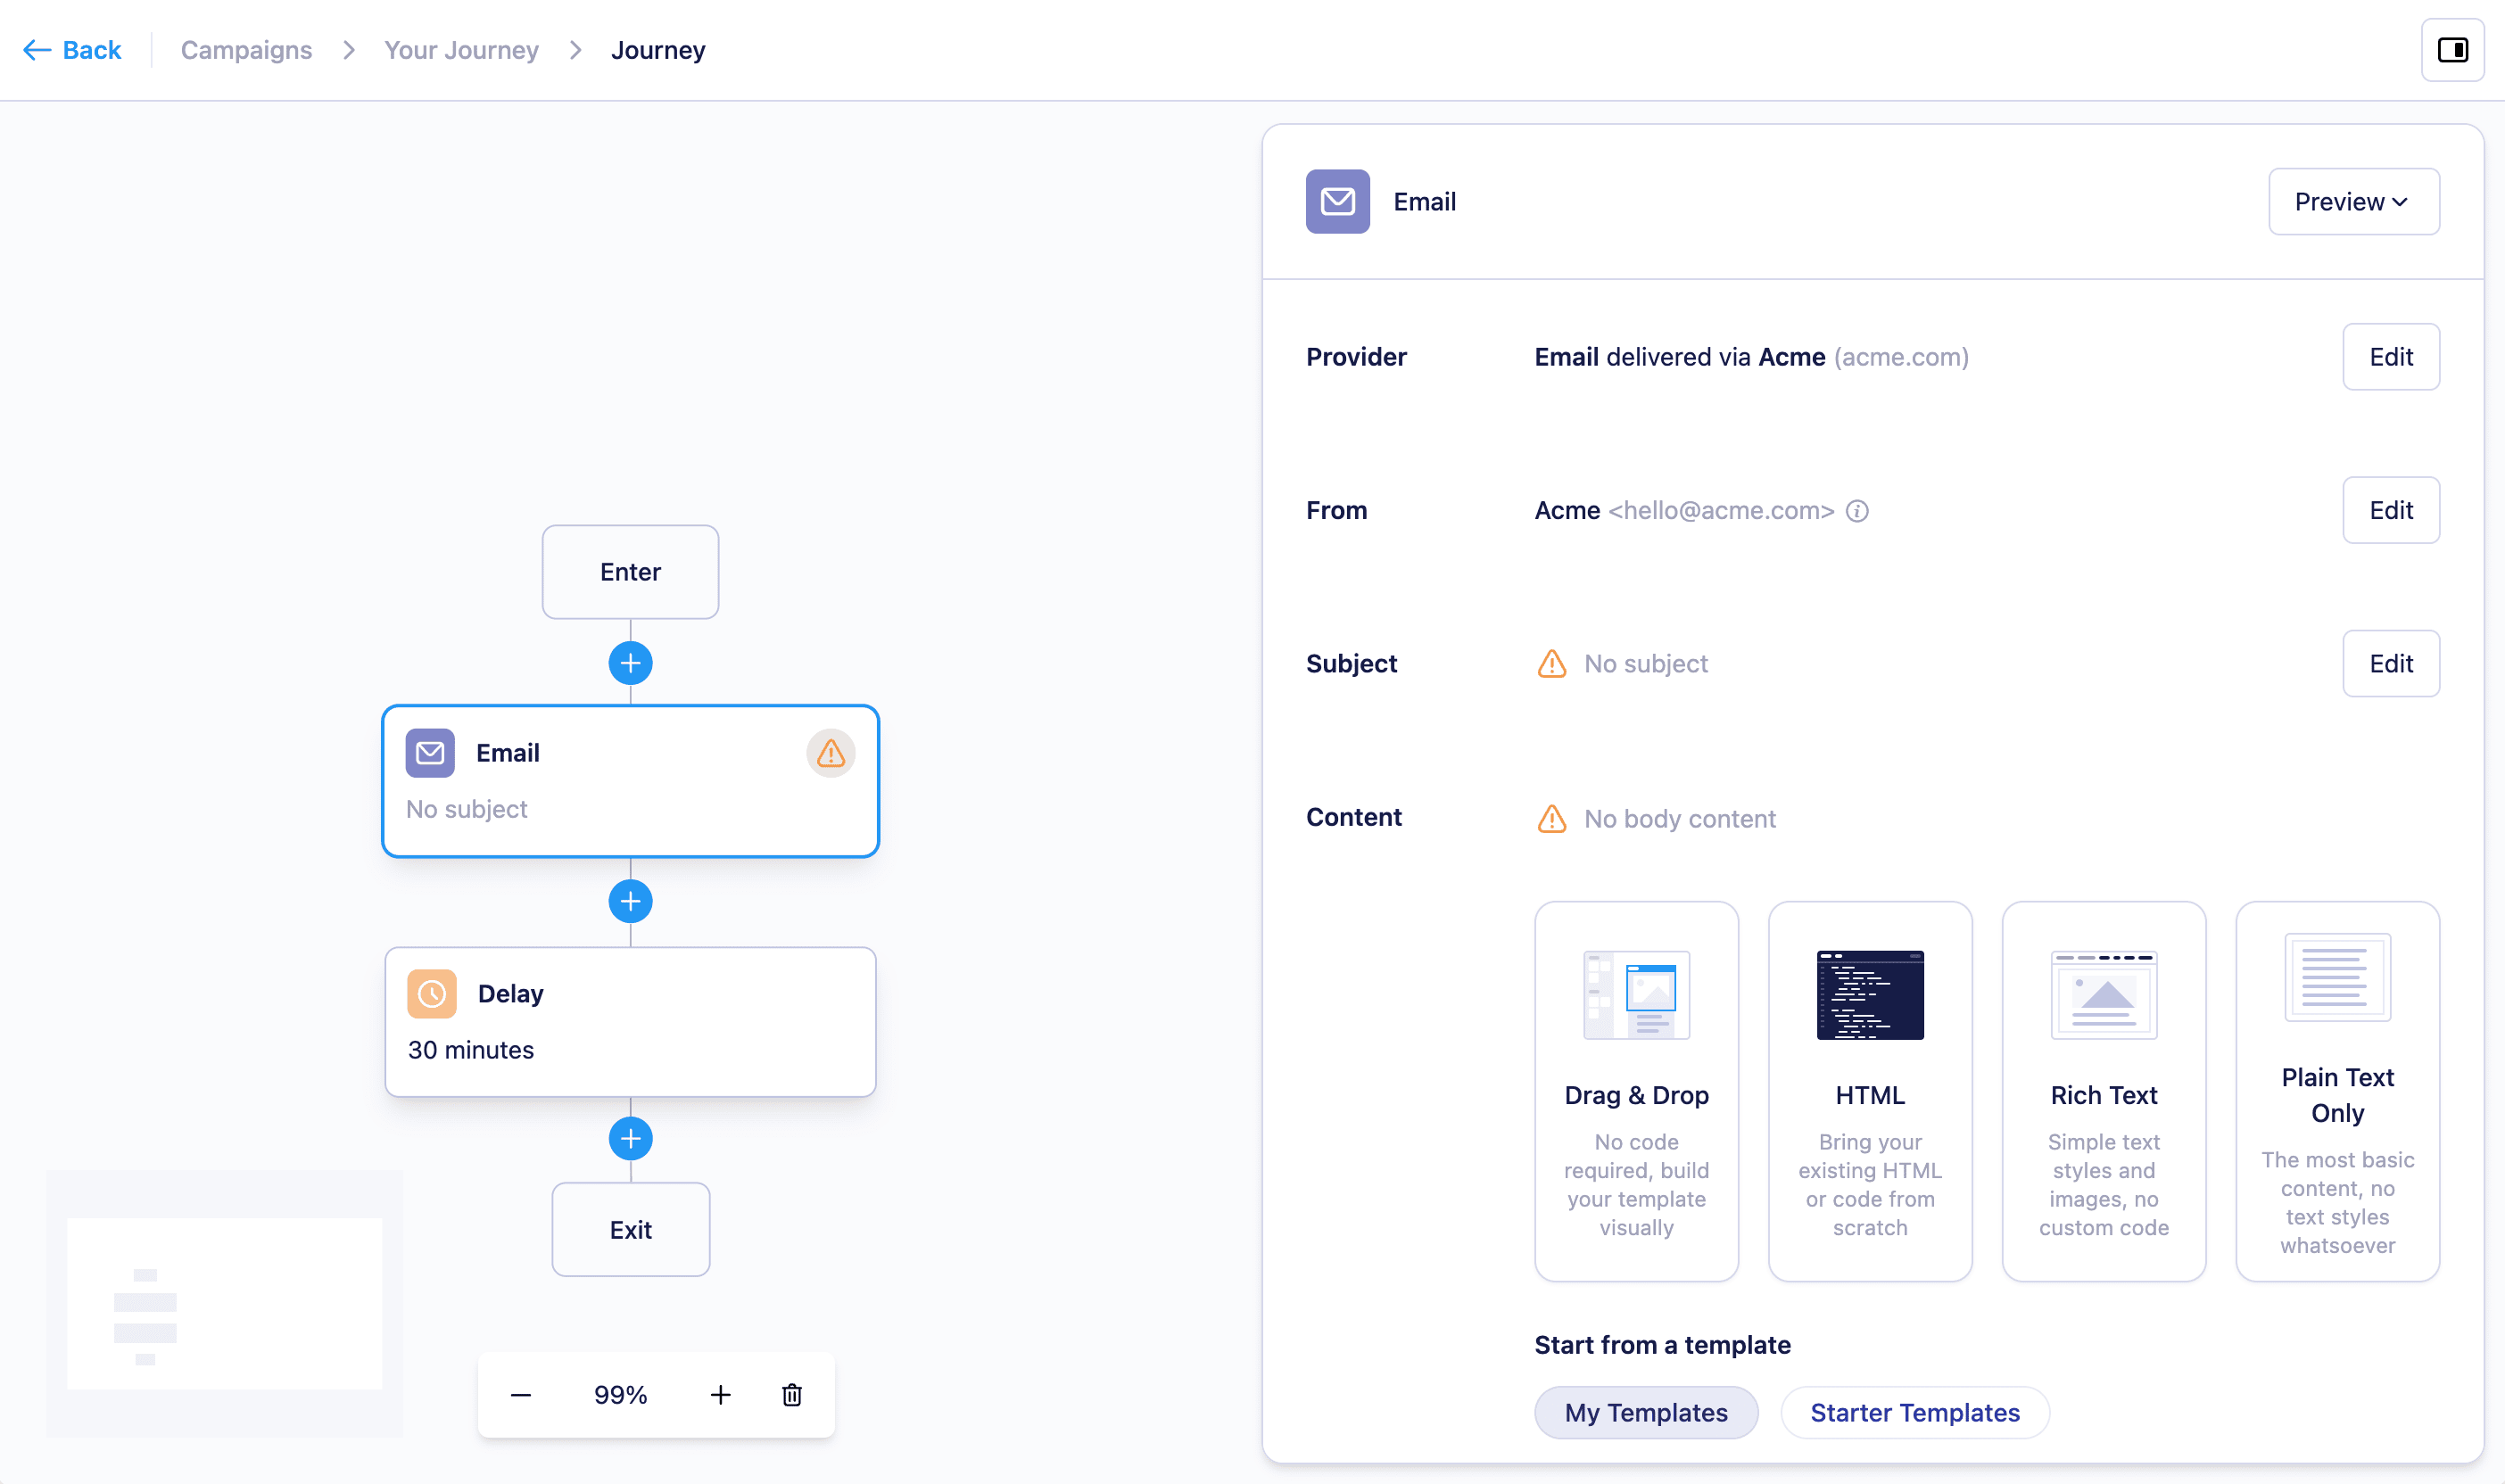 Each node section (subject, content etc) can be saved independently. Once you’re happy, hit ‘back’ to return to the Journey overview page and launch it.
## Launching a Journey
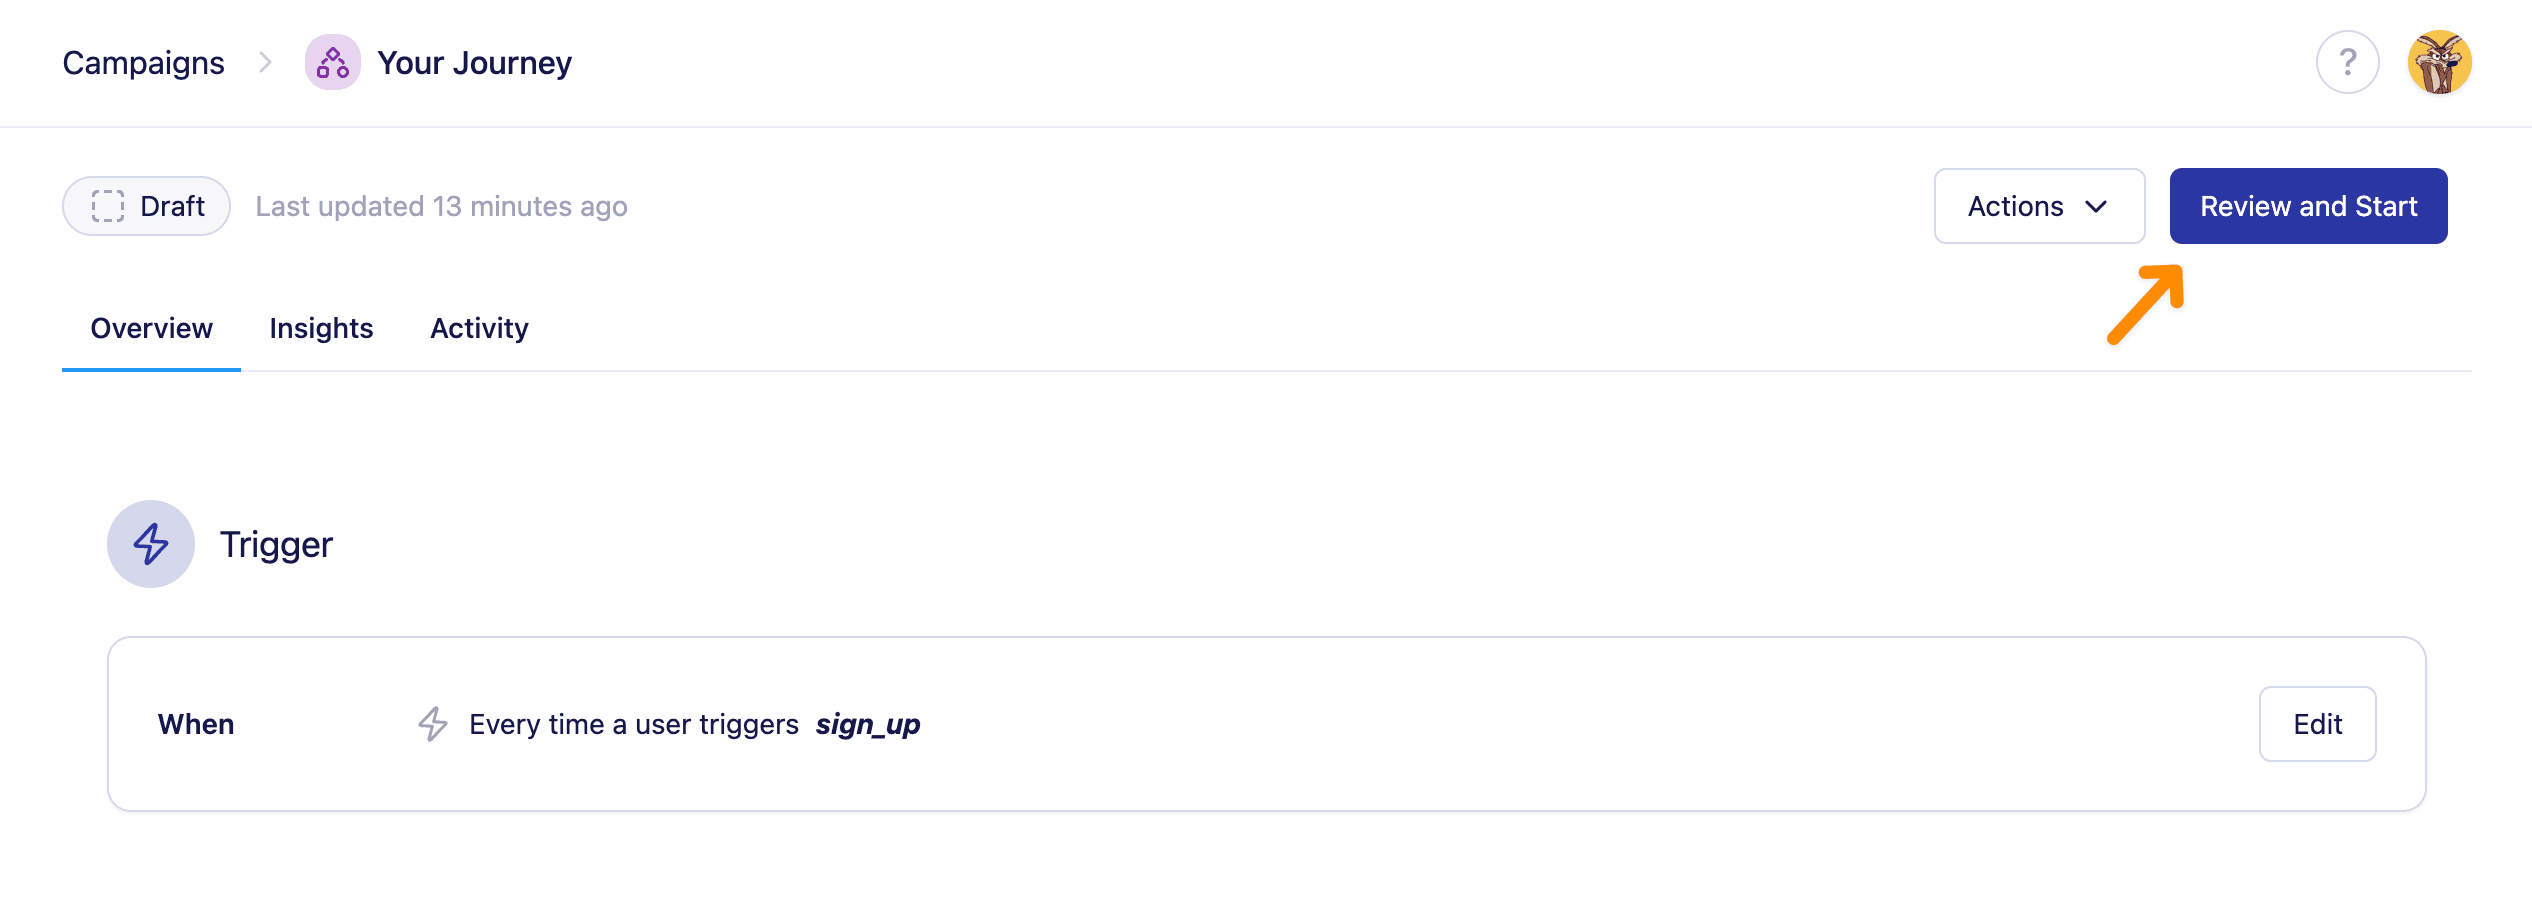
Once you’ve set up your journey and are happy with the messages and nodes, you can launch your campaign from the overview page. After you launch, whenever a user triggers the event, they’ll automatically enter the journey and receive each message in order before exiting.
Each node section (subject, content etc) can be saved independently. Once you’re happy, hit ‘back’ to return to the Journey overview page and launch it.
## Launching a Journey
Once you’ve set up your journey and are happy with the messages and nodes, you can launch your campaign from the overview page. After you launch, whenever a user triggers the event, they’ll automatically enter the journey and receive each message in order before exiting.
 ## Editing Journeys
* Journeys **must be stopped** to make any changes.
* While a Journey is stopped:
* You can add, edit, or remove nodes.
* Deleted nodes will cause any users waiting at that point to exit the journey.
* Changes are saved immediately—there is no manual save button.
## Reporting and Insights
Vero provides detailed reporting for each Journey campaign. On the canvas, you can see:
* **Entered** : Number of unique users and total entries into the journey.
* **Currently in journey** : Users currently waiting at delay nodes.
* **Messages** : Total messages included in the journey.
* **Messages sent/delivered** : Total messages sent and successfully delivered.
### Detailed Message Reporting
You can also access individual message reports directly from the campaign report page without opening the journey canvas. In this view you can view and compare message interaction stats for all messages included in your journey. [Learn more about Campaign Reports](/vero-2/reporting/viewing-campaign-metrics)
## Limitations
* Journeys support up to **150 nodes**.
* Maximum delay length is **365 days**.
* Campaign type (Journey vs. Broadcast) **cannot be changed** after creation.
## Need Help?
If you have any questions or need assistance setting up your Journey campaigns, reach out to us at [support@getvero.com](mailto:support@getvero.com).
## Editing Journeys
* Journeys **must be stopped** to make any changes.
* While a Journey is stopped:
* You can add, edit, or remove nodes.
* Deleted nodes will cause any users waiting at that point to exit the journey.
* Changes are saved immediately—there is no manual save button.
## Reporting and Insights
Vero provides detailed reporting for each Journey campaign. On the canvas, you can see:
* **Entered** : Number of unique users and total entries into the journey.
* **Currently in journey** : Users currently waiting at delay nodes.
* **Messages** : Total messages included in the journey.
* **Messages sent/delivered** : Total messages sent and successfully delivered.
### Detailed Message Reporting
You can also access individual message reports directly from the campaign report page without opening the journey canvas. In this view you can view and compare message interaction stats for all messages included in your journey. [Learn more about Campaign Reports](/vero-2/reporting/viewing-campaign-metrics)
## Limitations
* Journeys support up to **150 nodes**.
* Maximum delay length is **365 days**.
* Campaign type (Journey vs. Broadcast) **cannot be changed** after creation.
## Need Help?
If you have any questions or need assistance setting up your Journey campaigns, reach out to us at [support@getvero.com](mailto:support@getvero.com).