> ## Documentation Index
> Fetch the complete documentation index at: https://help.getvero.com/llms.txt
> Use this file to discover all available pages before exploring further.
# Delay node
> Pause a user's progress through a Journey for a set amount of time before continuing to the next step.
# Delay node
Pause a user's progress through a Journey until the right moment — for a fixed amount of time, until a date or time stored on the user or event, or until a specific time of day in the customer's own timezone.
A Delay node holds users at a point in the Journey before they move on to the next node. Use delays to control the timing of your messages — for example, waiting 3 days after a welcome email before sending a follow-up, holding a reminder until the day of an appointment, or sending a "good morning" message at 8am in each customer's local time.
## Adding a Delay node
1. Open your Journey and click **Edit Journey** to access the canvas.
2. Click the **+** button at the point in your Journey where you want to add a pause.
3. Select **Delay** from the node menu.
4. Click the Delay node on the canvas to open the side panel.
## Configuring the delay
Open the Delay node's side panel and click **Edit** to choose how the wait is calculated. There are three options:
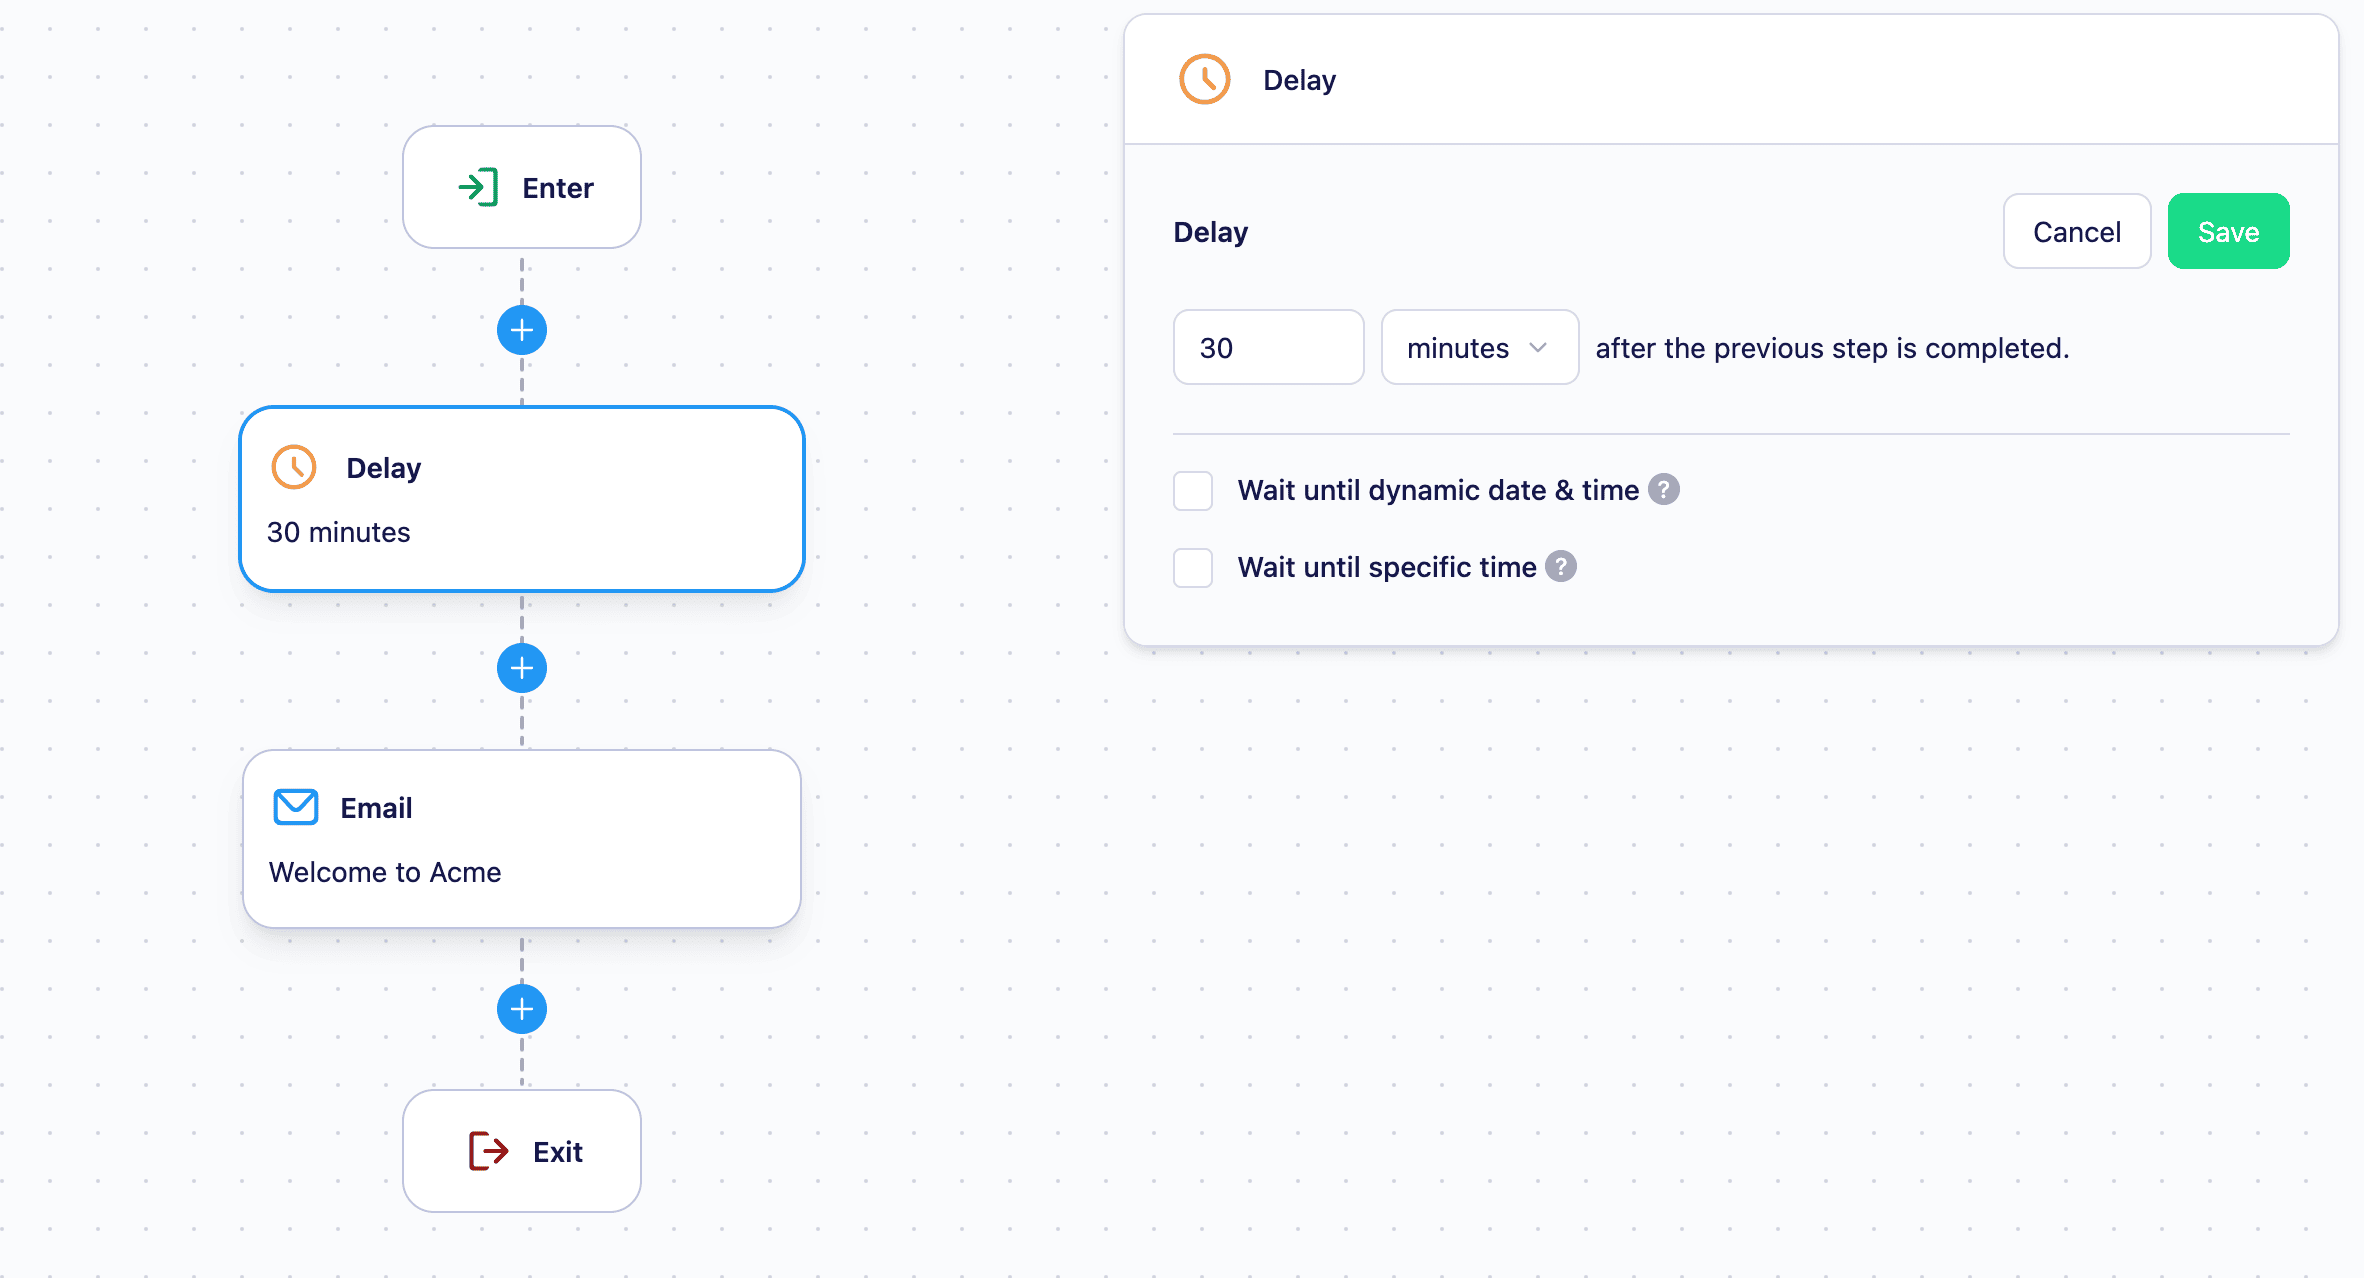 ### Wait for a fixed duration
Hold the user for a set amount of time, measured from the moment they reach the node. Specify the duration in:
* **Hours** — e.g. wait 6 hours
* **Days** — e.g. wait 3 days
The delay begins as soon as a user reaches the node.
### Wait until a specific time of day
### Wait for a fixed duration
Hold the user for a set amount of time, measured from the moment they reach the node. Specify the duration in:
* **Hours** — e.g. wait 6 hours
* **Days** — e.g. wait 3 days
The delay begins as soon as a user reaches the node.
### Wait until a specific time of day
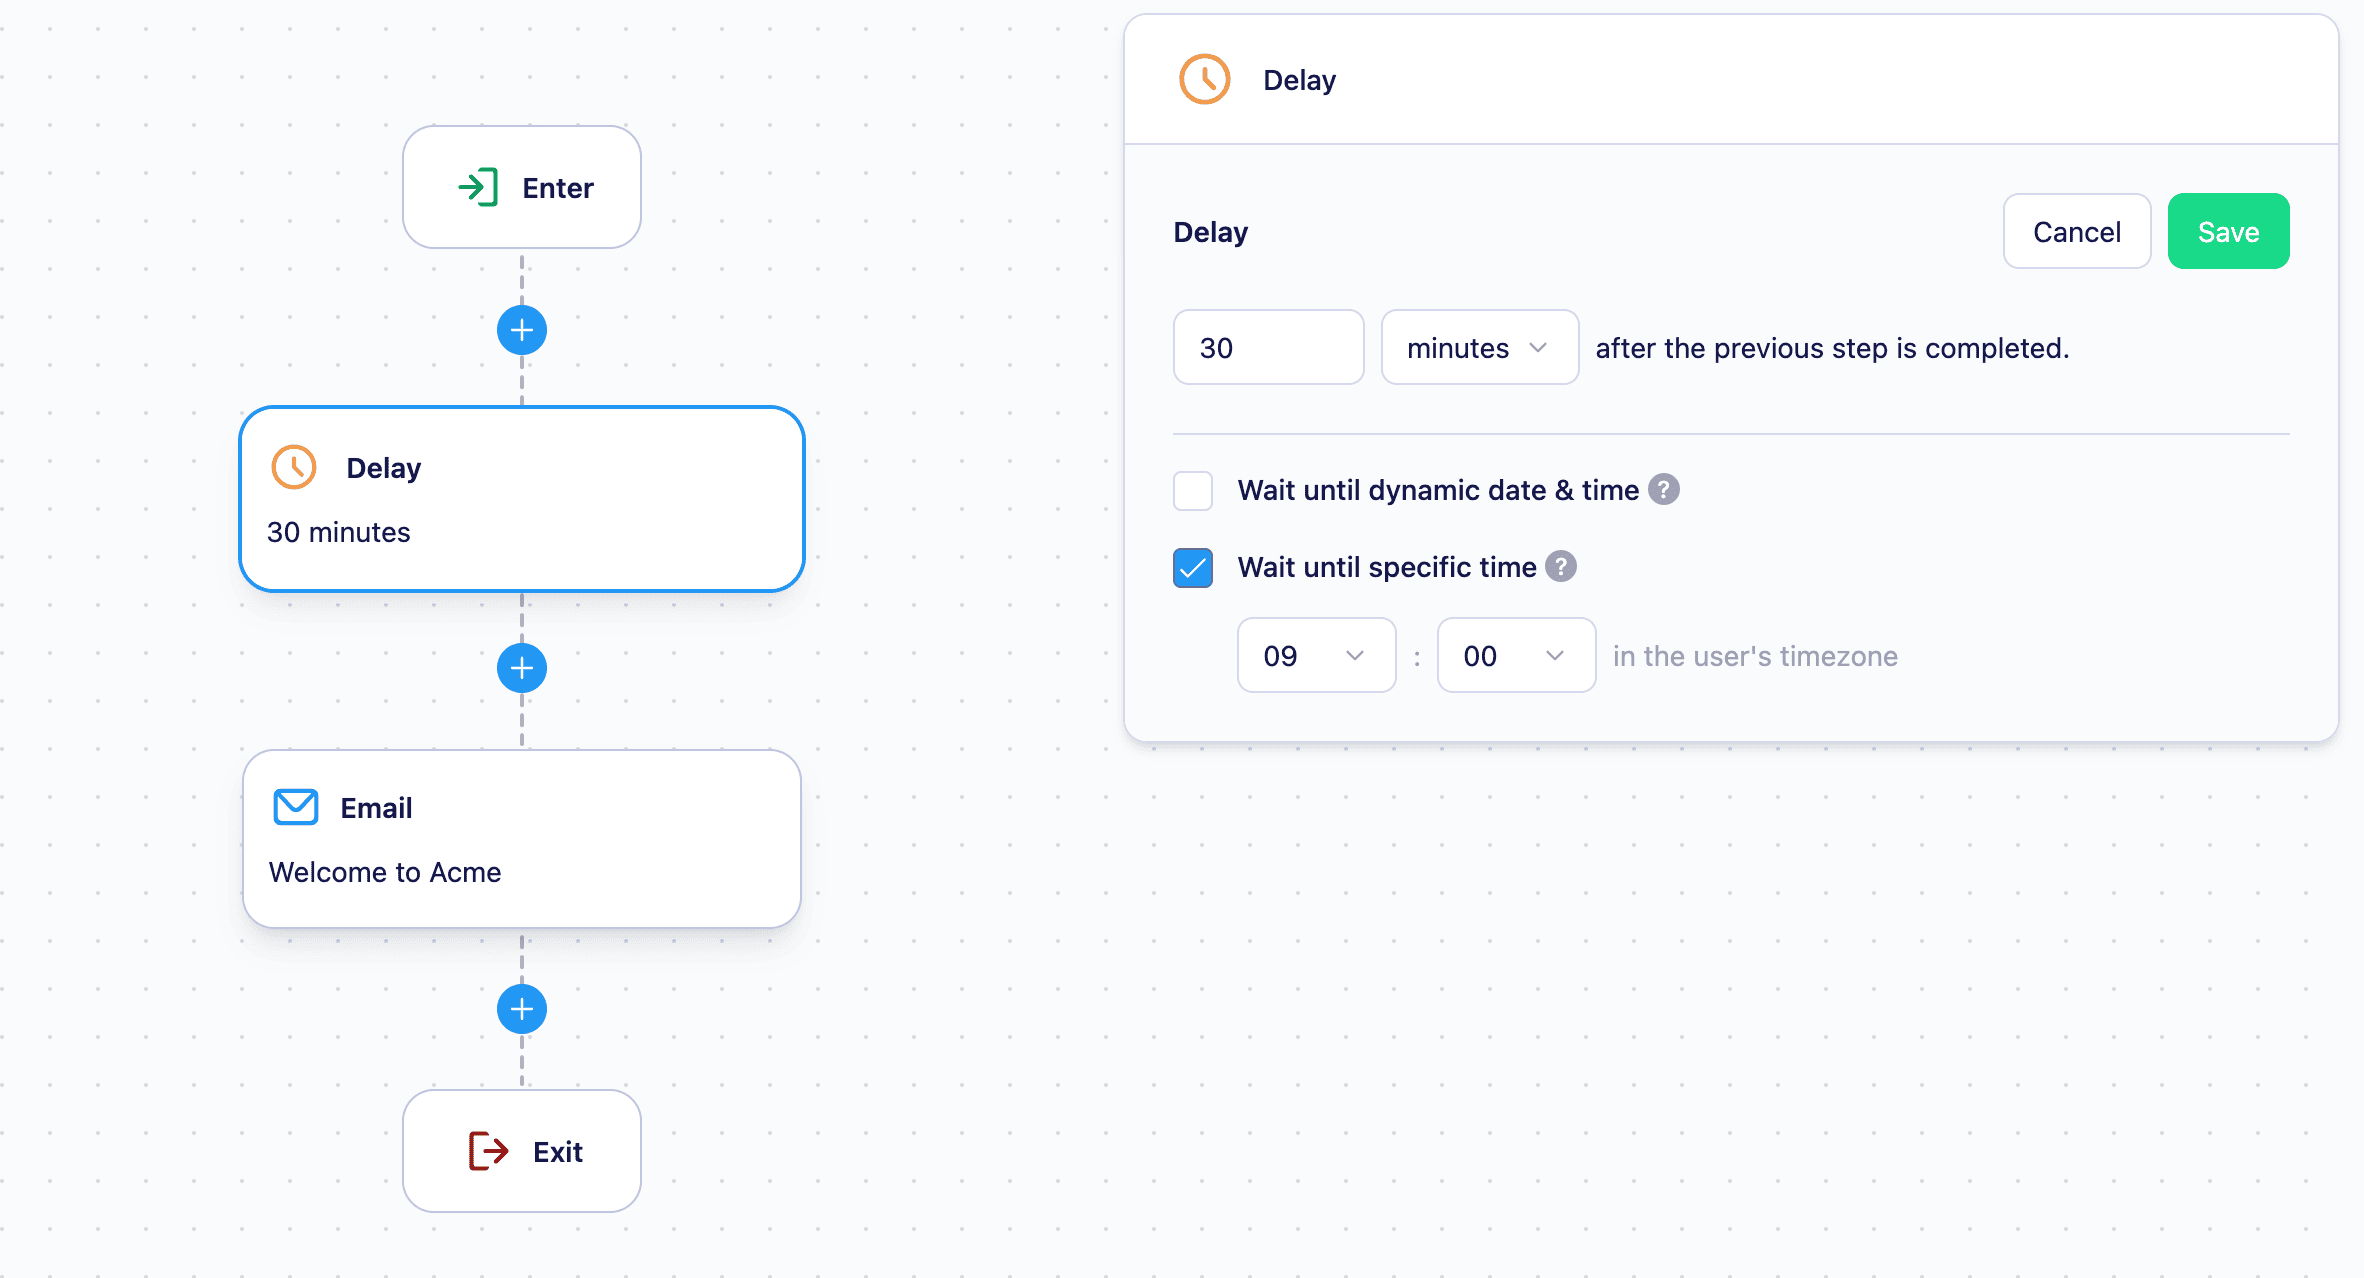 Once the delay period ends, hold each user until a chosen time of day in their own timezone — so a message scheduled for the morning actually lands in the morning, wherever your customer is. For example, combine a 3-day delay with a "good morning" time of 8am, and each user advances at 8am their local time on the third day.
This option requires a timezone property on the user's profile. If a user has no timezone property, the time-of-day hold is skipped and they advance as soon as the selected delay ends.
### Wait until a dynamic date or time
Once the delay period ends, hold each user until a chosen time of day in their own timezone — so a message scheduled for the morning actually lands in the morning, wherever your customer is. For example, combine a 3-day delay with a "good morning" time of 8am, and each user advances at 8am their local time on the third day.
This option requires a timezone property on the user's profile. If a user has no timezone property, the time-of-day hold is skipped and they advance as soon as the selected delay ends.
### Wait until a dynamic date or time
 Hold the user until a specific date or time read from one of their properties — for example, a subscription renewal date, an appointment time, or a flight departure. Reference the property that holds the target timestamp, and Vero releases each user when that moment arrives.
The timestamp can come from either:
* A **user property** — data stored on the user's profile. See [Add or update user profiles](/vero-2/user-profiles/how-to-add-or-update-user-profiles) for how to send this data to Vero.
* A **trigger event property** — data sent with the event the user triggered to enter the Journey. See [Setting up event tracking](/vero-2/events/setting-up-event-tracking) for how to send event data to Vero.
Because the target is read from the user's own data, every user can be released at a different time based on the value stored for them.
If the referenced property doesn't exist for a user — or the trigger event didn't include it — that user can't be given a release time and is ejected from the Journey. Make sure the property is reliably set before users reach the Delay node.
## How delays work
Users who are actively waiting at a Delay node are counted in the **Currently in journey** metric on the Journey canvas. Once the wait is complete, Vero automatically moves each user on to the next node — no manual action is required.
If you stop a Journey while users are waiting at a Delay node, those users will remain paused. They will continue when the Journey is restarted, picking up from where they left off.
## Limitations
* The maximum fixed delay duration is **365 days**.
* Journeys must be stopped before you can add or remove Delay nodes.
## Next steps
* [Creating and editing a Journey](https://help.getvero.com/vero-2/campaigns/journeys/creating-and-editing-journeys) — how to build and launch a Journey
* [Email node](https://help.getvero.com/vero-2/campaigns/journeys/email-node) — send an email at a point in the Journey
* [SMS journey node](https://help.getvero.com/vero-2/campaigns/journeys/sms-node) — send an SMS at a point in the Journey
## Need Help?
If you have any questions, reach out to us at [support@getvero.com](mailto:support@getvero.com).
Hold the user until a specific date or time read from one of their properties — for example, a subscription renewal date, an appointment time, or a flight departure. Reference the property that holds the target timestamp, and Vero releases each user when that moment arrives.
The timestamp can come from either:
* A **user property** — data stored on the user's profile. See [Add or update user profiles](/vero-2/user-profiles/how-to-add-or-update-user-profiles) for how to send this data to Vero.
* A **trigger event property** — data sent with the event the user triggered to enter the Journey. See [Setting up event tracking](/vero-2/events/setting-up-event-tracking) for how to send event data to Vero.
Because the target is read from the user's own data, every user can be released at a different time based on the value stored for them.
If the referenced property doesn't exist for a user — or the trigger event didn't include it — that user can't be given a release time and is ejected from the Journey. Make sure the property is reliably set before users reach the Delay node.
## How delays work
Users who are actively waiting at a Delay node are counted in the **Currently in journey** metric on the Journey canvas. Once the wait is complete, Vero automatically moves each user on to the next node — no manual action is required.
If you stop a Journey while users are waiting at a Delay node, those users will remain paused. They will continue when the Journey is restarted, picking up from where they left off.
## Limitations
* The maximum fixed delay duration is **365 days**.
* Journeys must be stopped before you can add or remove Delay nodes.
## Next steps
* [Creating and editing a Journey](https://help.getvero.com/vero-2/campaigns/journeys/creating-and-editing-journeys) — how to build and launch a Journey
* [Email node](https://help.getvero.com/vero-2/campaigns/journeys/email-node) — send an email at a point in the Journey
* [SMS journey node](https://help.getvero.com/vero-2/campaigns/journeys/sms-node) — send an SMS at a point in the Journey
## Need Help?
If you have any questions, reach out to us at [support@getvero.com](mailto:support@getvero.com).