> ## Documentation Index
> Fetch the complete documentation index at: https://help.getvero.com/llms.txt
> Use this file to discover all available pages before exploring further.
# Import user profiles via CSV
> Add or update user profiles in bulk in Vero 2.0 by importing a CSV of identifiers, channel addresses, and properties.
Each row in your CSV creates a new profile or updates an existing one, depending on the identifiers in the file and your account's identity stitching rules. You can import channel addresses such as `email`, identifiers such as `id`, and any number of custom properties such as `first_name` or `location`.
## Required data
Your CSV must contain at least an `id` or an `email` column. You can include any other columns you like as user **properties**, and Vero will store them against each profile.
Here's an example of a CSV that imports cleanly:
```
id,email,first_name,last_name,location
1859,tyrion.lannister@casterlyrock.com,Tyrion,Lannister,Casterly Rock
```
## How profiles are matched
Imports respect the identity stitching rules configured on your account. By default, Vero:
* Matches users on `id` where one is provided.
* Uses `email` as the `id` when no `id` is given, then matches on that value.
You can change how Vero resolves identities — for example, matching directly on `email`. Read more in [Identity stitching and resolution](/vero-2/user-profiles/identity-stitching-and-resolution).
If your identity stitching rules require an `id` and your file doesn't include one, you may create duplicate profiles. Confirm your stitching settings before importing a file without an `id` column.
## Importing your file
1. Select **Imports** in the left sidebar.
2. Select **Import** and choose **Profiles** as the import type.
3. Upload your `.csv` file.
4. Check that Vero has detected each of your columns correctly and **map** them to the matching Vero fields. If you've imported before or sent data via the API, Vero suggests mappings to properties it already knows about.
5. Select **Import** to start the import.
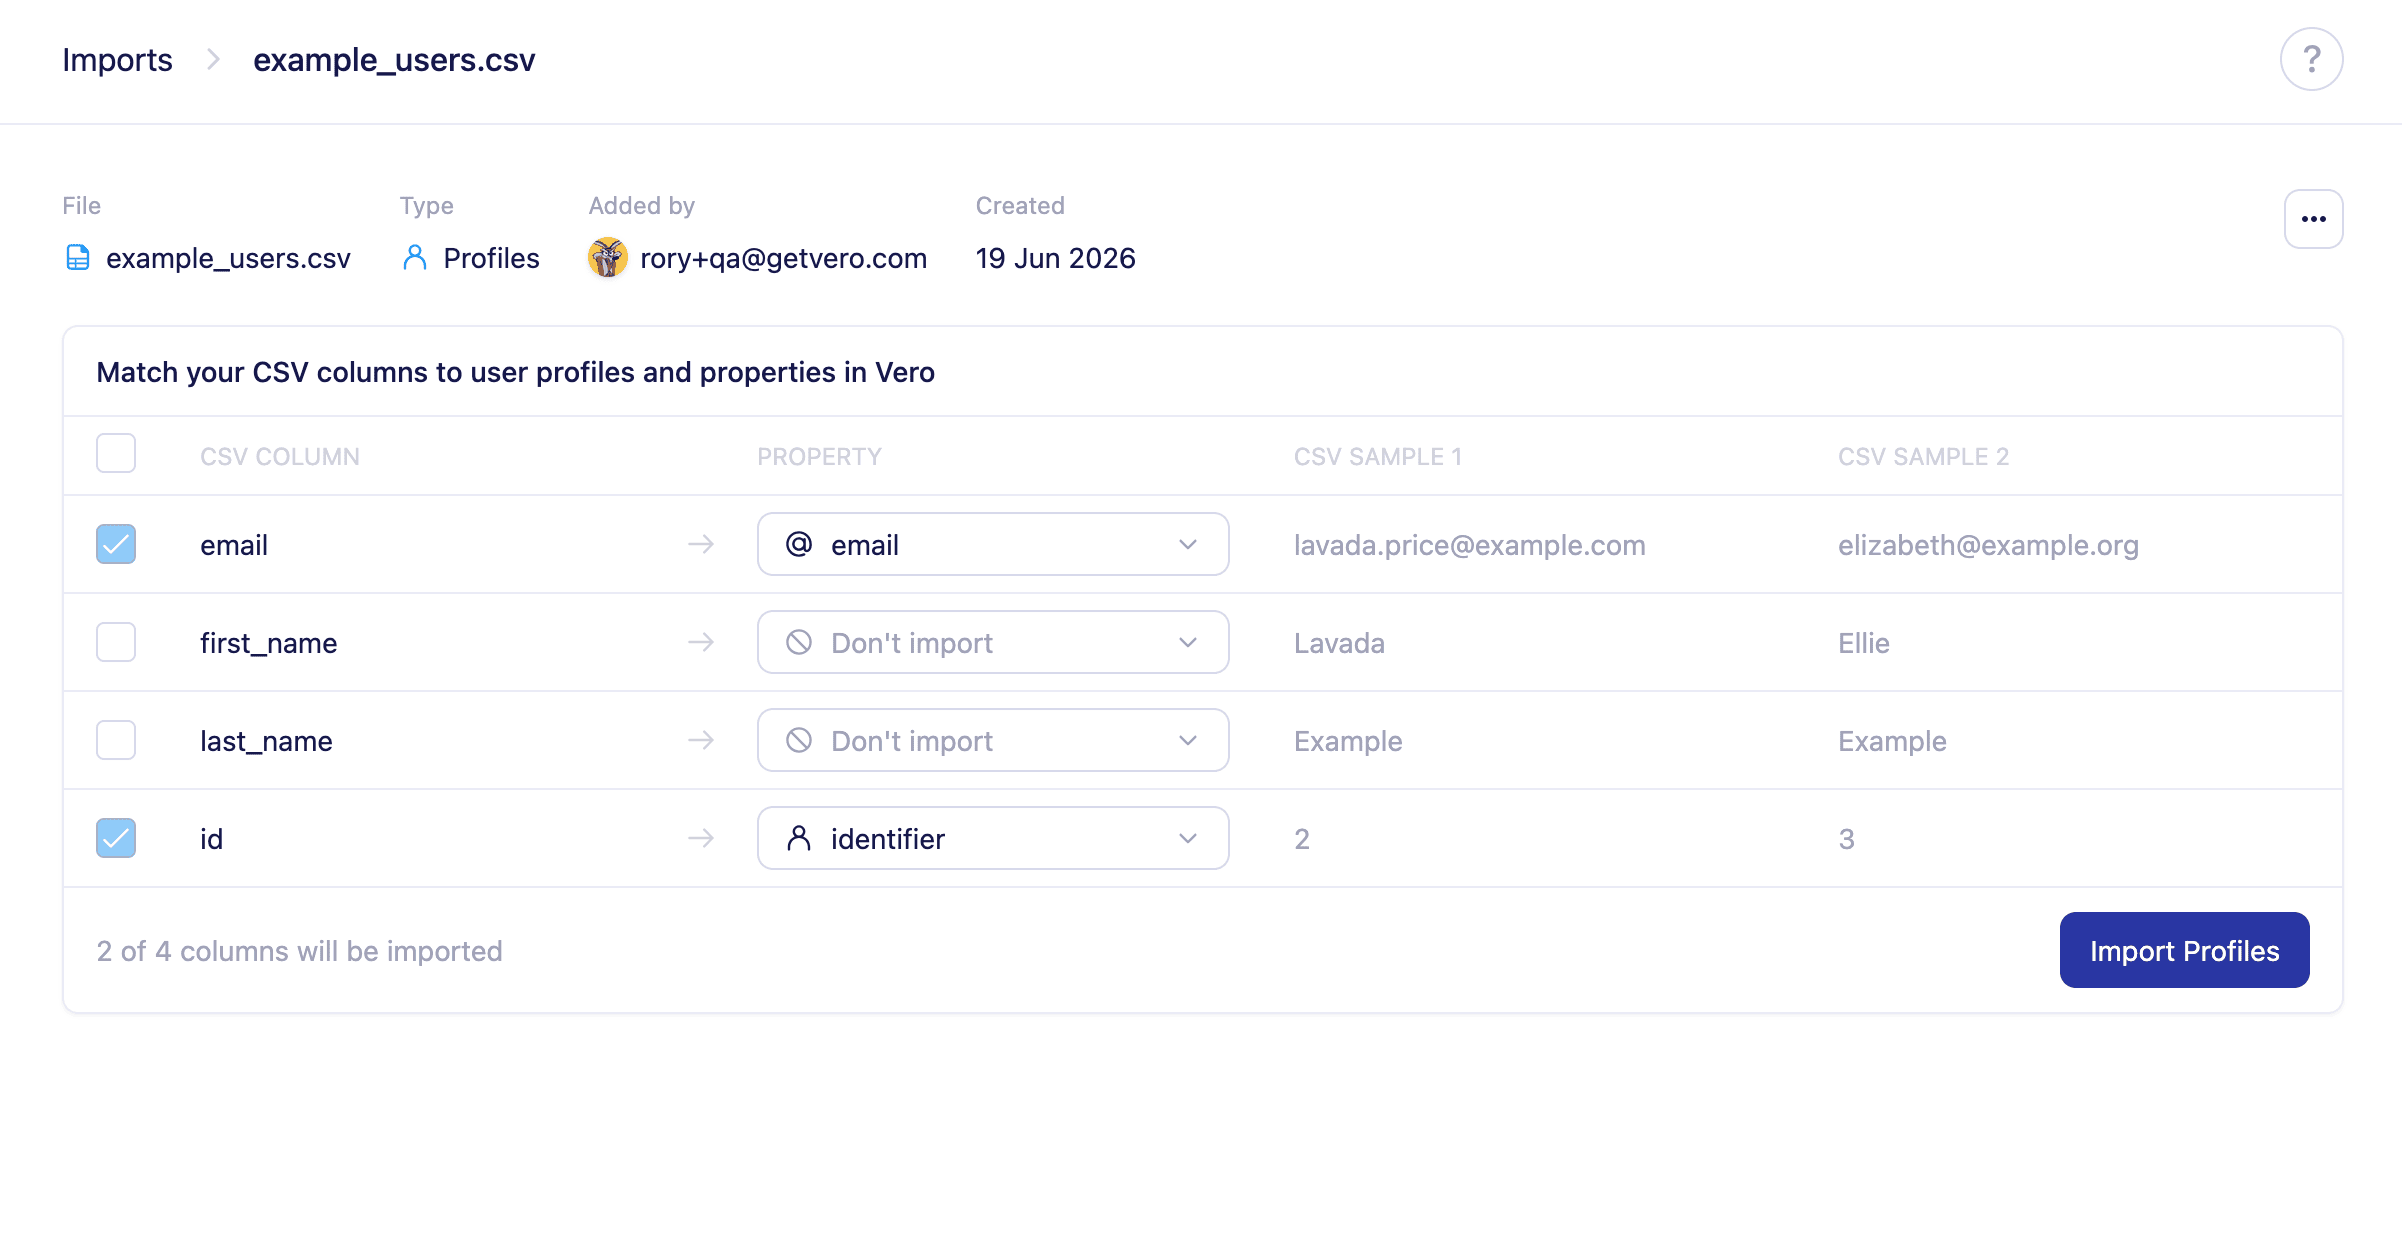 Vero uses the matched identifier to find existing profiles and updates all other properties with the latest values from your file. Once the import completes, a summary page shows how many rows were successfully imported and how many failed.
## After the import
If any rows fail, the summary page lists them so you can correct those rows, export them to a new CSV, and import them again.
## Next steps
* [Unsubscribe users via CSV](/vero-2/importing-exporting/unsubscribe-users-via-csv)
* [Identity stitching and resolution](/vero-2/user-profiles/identity-stitching-and-resolution)
* [User Profiles overview](/vero-2/user-profiles/understanding-user-profiles)
## Need Help?
If you have any questions, reach out to us at [support@getvero.com](mailto:support@getvero.com).
Vero uses the matched identifier to find existing profiles and updates all other properties with the latest values from your file. Once the import completes, a summary page shows how many rows were successfully imported and how many failed.
## After the import
If any rows fail, the summary page lists them so you can correct those rows, export them to a new CSV, and import them again.
## Next steps
* [Unsubscribe users via CSV](/vero-2/importing-exporting/unsubscribe-users-via-csv)
* [Identity stitching and resolution](/vero-2/user-profiles/identity-stitching-and-resolution)
* [User Profiles overview](/vero-2/user-profiles/understanding-user-profiles)
## Need Help?
If you have any questions, reach out to us at [support@getvero.com](mailto:support@getvero.com).