> ## Documentation Index
> Fetch the complete documentation index at: https://help.getvero.com/llms.txt
> Use this file to discover all available pages before exploring further.
# Email attachments
> Attach files to campaign and journey emails, or link to a hosted file when an attachment isn't the right choice.
You can attach files to emails in campaigns and Journey email steps by uploading a file or providing a public URL. Attachments usually aren't a good idea — they make emails larger, more likely to be marked as spam, and more likely to be blocked. They can still make sense for transactional emails where the recipient expects a file, such as a receipt, invoice, or ticket.
## Before you attach a file
Whenever you can, host the file on your website or a file-hosting service and link to it in the email instead. Links keep the message small and let you track clicks.
If you do attach a file:
* Keep it small and use a common format, such as PDF.
* Use a clear, recognizable file name.
* Mention the attachment in the email body so the recipient knows what it is.
## Adding an attachment
**Attachments require an email channel that uses a custom domain or third-party provider.** The default Vero Mailer email channel does not allow attachments.
[Learn how to configure your email channel](../channels/email/how-to-configure-the-email-channel)
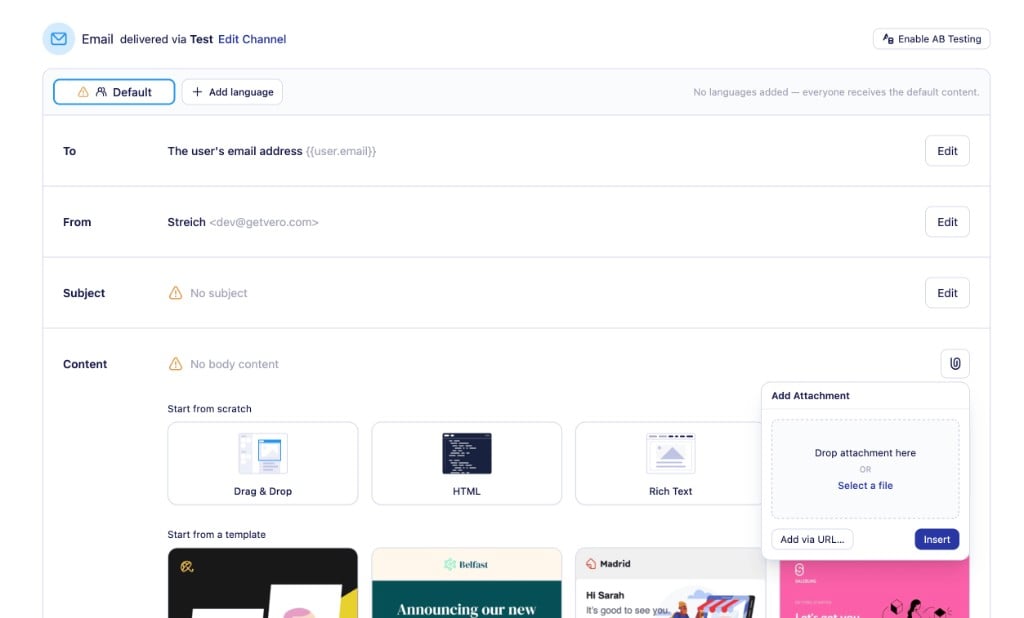
1. Open the email content for your campaign or Journey email step.
2. Click the attachments icon to open the **Add Attachment** panel.
3. Add a file in one of two ways:
* **Upload a file** – drop a file onto the panel, or click **Select a file**.
* **Add via URL** – click **Add via URL...**, enter a **Name** and **URL**, then click **Insert**.
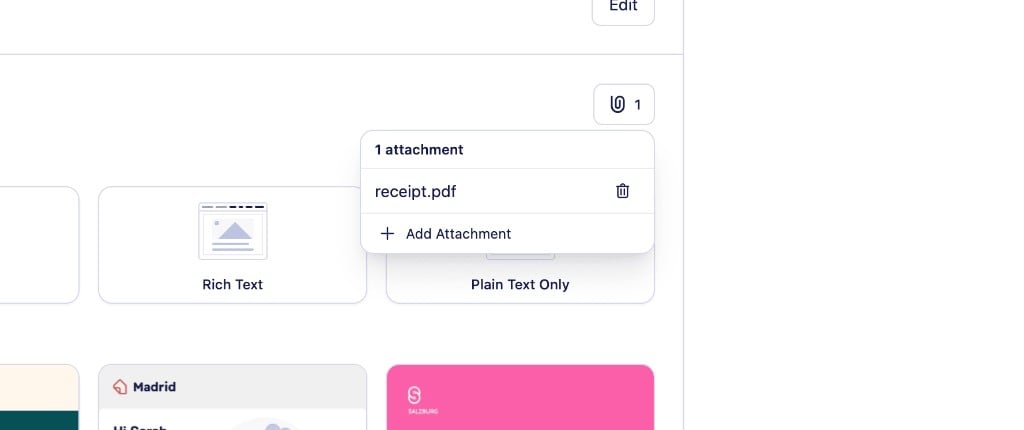
 The attachments icon shows how many files are attached. Click it to see the list, add another file, or remove one.
 ### Personalizing attachments with Liquid
The **Name** and **URL** fields support Liquid, so you can attach a different file for each recipient. For example, to attach each user's invoice:
```liquid theme={null}
https://example.com/invoices/{{event.invoice_id}}.pdf
```
Vero fetches the file from the URL when the email is sent. [Learn more about personalizing messages with Liquid](./how-to-personalise-your-message-using-liquid)
## Removing an attachment
1. Open the attachments panel.
2. Click the trash icon next to the attachment you want to remove.
## Limitations
* Attachments are only available for email. SMS and push messages don't support them.
* The total size of all attachments on an email can't exceed 10MB.
* Uploaded files must be one of these formats: PDF, DOC, DOCX, XLSX, CSV, ICS, VCF, EPUB, PNG, JPG, JPEG, GIF, PSD, MP3, WAV, OGG, AU, MP4, MPG, MPEG, AVI, MKV.
* Attachment URLs must be publicly accessible `http` or `https` URLs.
* If Vero can't fetch an attachment URL, or the attachments exceed the size limit, the email isn't sent to that user.
## Need Help?
If you have any questions, reach out to us at [support@getvero.com](mailto:support@getvero.com).
This documentation is built and hosted on [Mintlify](https://mintlify.com), a developer documentation platform.
### Personalizing attachments with Liquid
The **Name** and **URL** fields support Liquid, so you can attach a different file for each recipient. For example, to attach each user's invoice:
```liquid theme={null}
https://example.com/invoices/{{event.invoice_id}}.pdf
```
Vero fetches the file from the URL when the email is sent. [Learn more about personalizing messages with Liquid](./how-to-personalise-your-message-using-liquid)
## Removing an attachment
1. Open the attachments panel.
2. Click the trash icon next to the attachment you want to remove.
## Limitations
* Attachments are only available for email. SMS and push messages don't support them.
* The total size of all attachments on an email can't exceed 10MB.
* Uploaded files must be one of these formats: PDF, DOC, DOCX, XLSX, CSV, ICS, VCF, EPUB, PNG, JPG, JPEG, GIF, PSD, MP3, WAV, OGG, AU, MP4, MPG, MPEG, AVI, MKV.
* Attachment URLs must be publicly accessible `http` or `https` URLs.
* If Vero can't fetch an attachment URL, or the attachments exceed the size limit, the email isn't sent to that user.
## Need Help?
If you have any questions, reach out to us at [support@getvero.com](mailto:support@getvero.com).
This documentation is built and hosted on [Mintlify](https://mintlify.com), a developer documentation platform.