Creating a workflow
Workflows provide you with the visibility and tools to design and manage your customer messaging experience. With a clear view of all the logic, action steps and message content, you and your team can feel confident in designing your customer journey and ensuring the right message is delivered at the right time.
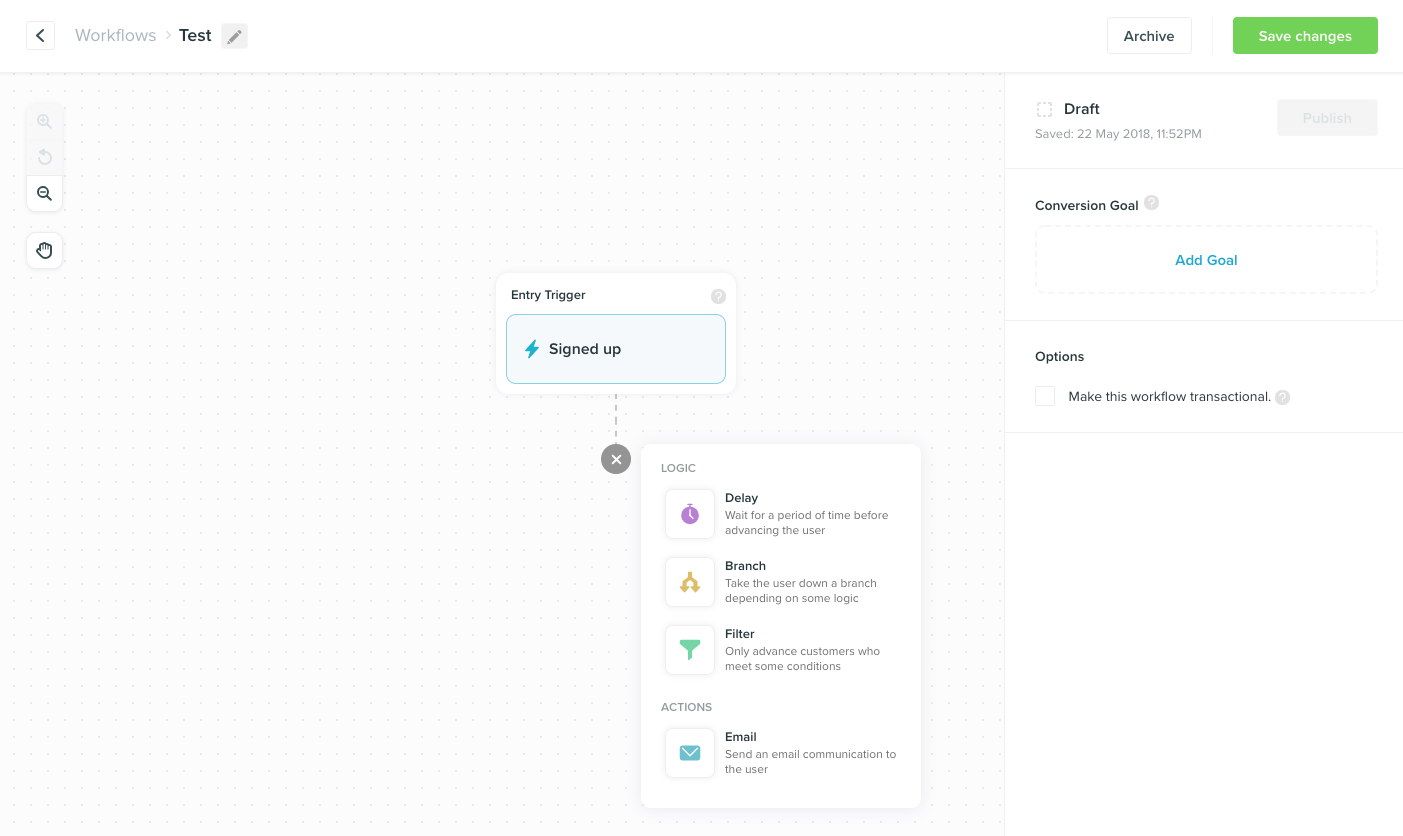
Each new workflow starts with an Entry Trigger, and you can choose from different logic and actions to build your customer messaging journey. You can send both email messages and mobile push notifications within one workflow.
The basic configuration of each workflow step is visible on the canvas, and the sidebar gives you access to the full configuration options.
To create a new workflow:
- Select an entry trigger
- Add logic and action steps
- Add a conversion goal
- Save and publish your workflow
1. Select an entry trigger
In order for a customer to enter a Workflow, they must trigger an event. Vero defines events as all the actions a customer takes on your site. It could be everything from signing up for an account, purchasing an item or viewing a page.
You can track your customer event data in Vero so that when your customer triggers the specified event they will be entered into the workflow.
2. Add logic and action steps
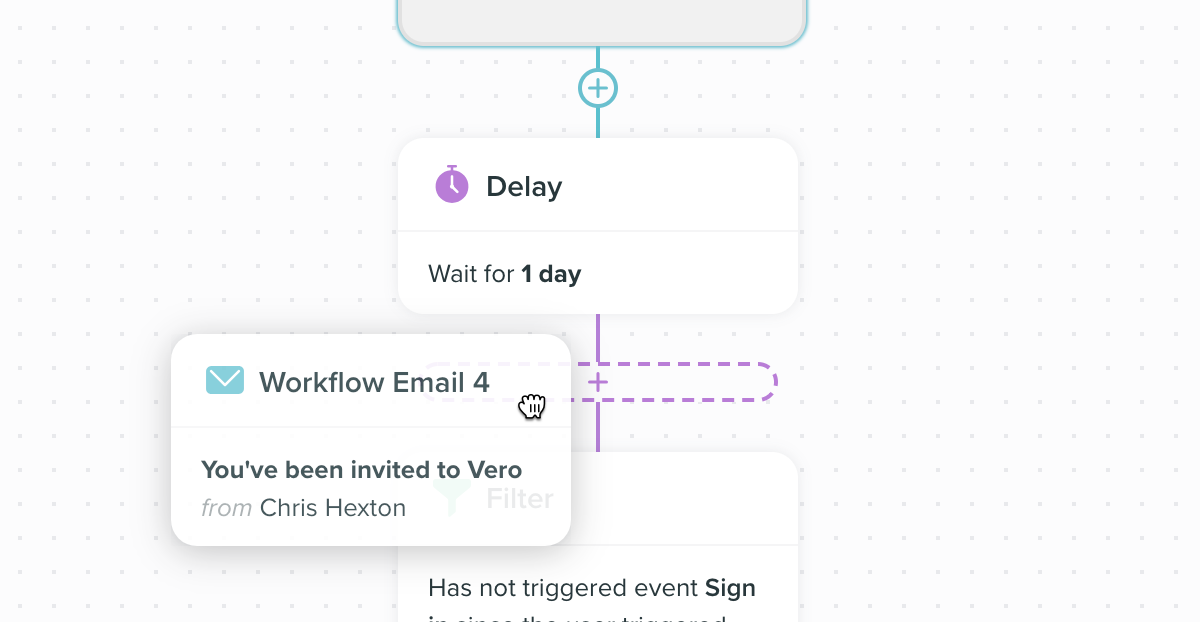
All workflow steps can be easily added and moved around using drag and drop, giving you full control over the order of filters, branches, delays, emails and push notifications. This allows you and your team to quickly create and update your customer journeys.
Logic steps:
-
Delay
Designed to hold users at any stage in a workflow for a period of time, before allowing them to move on to the next step. This is particularly useful if a user must be given time to complete actions before receiving an email or push notification. Vero offers three types of delays.
-
Branch
Allows you to create several paths in the journey for your users. By adding logic that results in the user moving down either a true or false path means you can tailor your customer journeys even further. This also means you can combine multiple campaigns into a single workflow and view more complex journeys on one visual canvas.
-
Filter
Progress users to the next step of the workflow if all the specified conditions are met. Customers who do not meet the conditions of the filter will exit the workflow at this point.
Action steps:
-
Email
You can add emails to your workflow and create/edit the email content from the workflow screen. Workflows allow you to engage with your customers at the right time in their journey.
-
Mobile push notifications
You can also add mobile push notifications to your workflow. Vero supports both iOS and Android push notifications.
You can access the editor for push notifications directly from the workflow. The basic and advanced editors work seamlessly across both iOS and Android platforms, making it easy for you to create, edit and preview each message in your workflow.
3. Add a Conversion Goal
You can measure the overall success of a workflow by adding a conversion goal. A conversion goal is reached when a customer triggers the specified event. By default the goal is tracked for up to 30 days after the contact exits the workflow.
If a customer triggers the conversion goal they will continue to progress normally through the workflow. They will not exit the workflow.
You can change the goal conversion period via Settings > Advanced.
4. Creating a transactional workflow
All workflows are behavioral by default. If you'd like to create a workflow for transactional messages (for example password reset information, invoices or receipts) you can select 'transactional workflow' by ticking the box in the side bar.
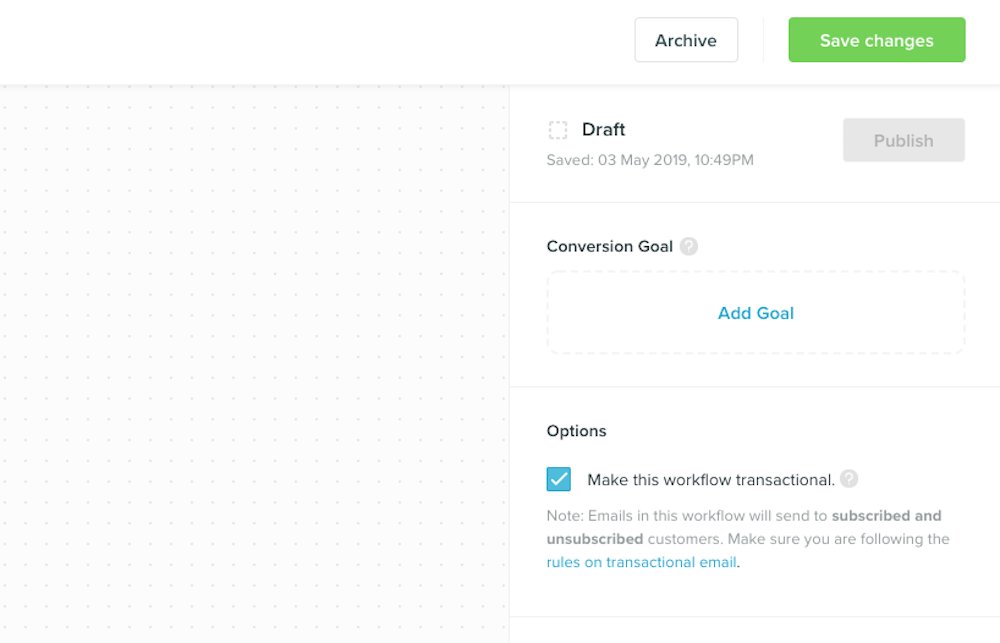
Please note: By ticking the box and making your workflow transactional, all emails and push notification messages in that workflow will be sent to subscribed AND unsubscribed customers. These types of workflows should only be used in scenarios where an email is required to complete a transaction with a customer. For example: Receipts, invoices or forgotten passwords. Read more about the rules on transactional emails.
5. Save and publish your workflow
Once you've reviewed the configuration steps, simply save and publish your workflow to start your customers on their journey!
Next up: Making changes to a live campaign