Drag and Drop email content
Our drag and drop content editor is a simple and accessible tool that your whole team can use to design and build responsive and compatible email templates.
If you are in need of a custom template for one of your campaigns and you don’t already have HTML template code that you can use, Drag and drop is the answer. Simply drag and drop content blocks into the canvas, edit your content in place or start from one of our example templates.
Our drag and drop editor lets you focus on the visual design and content of your email and let Vero do all the hard work to make sure your email is compatible with all the major email clients and devices.
Drag and drop is one of four types of email content in Vero, read more about the types of content in Vero
How to add drag and drop content to a campaign
There are two areas in Vero where you can use the drag and drop content editor.
1. Creating content on a newsletter or workflow email from scratch
To add drag and drop content to a campaign, you can select to start from a blank drag and drop template, use a basic layout, or select one of our example templates as a starting point after choosing to add content on a newsletter or workflow campaign.

2. Create a drag and drop template and select this template when defining your newsletter or workflow content
Create a drag and drop template by selecting the Drag and Drop option after hitting the New template option on Templates page. You can select a saved drag and drop template from the your templates section after selecting to add content to any campaign.
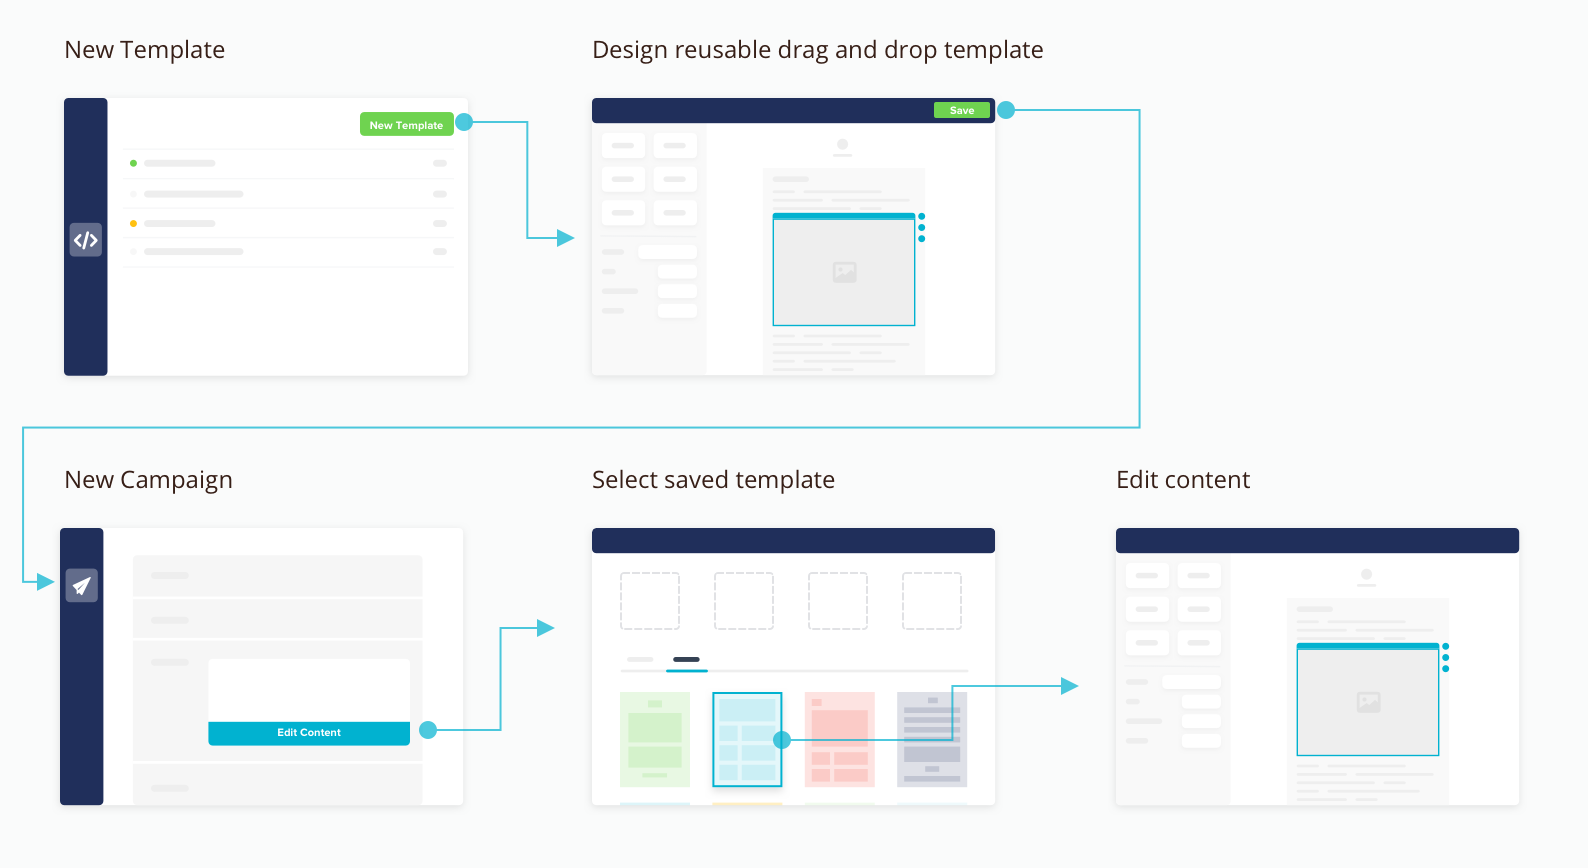
In both of these options, how you create the drag and drop template is exactly the same, however in the second scenario, you can save the drag and drop template to use as a starting point for any of your campaigns. Templates created on the fly during campaign creation will not be saved by default.
How the editor works
Every template you build with the drag and drop editor is based on the popular MJML framework and outputs email specific HTML that has been thoroughly tested on all the major email clients and a huge variety of devices. This means that almost everything you create in the drag and drop editor will be seen by your customers in exactly the same way.
When you create and edit your templates using the drag and drop editor you won’t need to edit a single line of code, every aspect of your template is handled visually using a combination of inline editing mode and contextual options.
Read more about the types of components and options you have control over below.
Body settings
Each template has a set of parent attributes that control both the mail body of the email and the default styles for some of the other components.
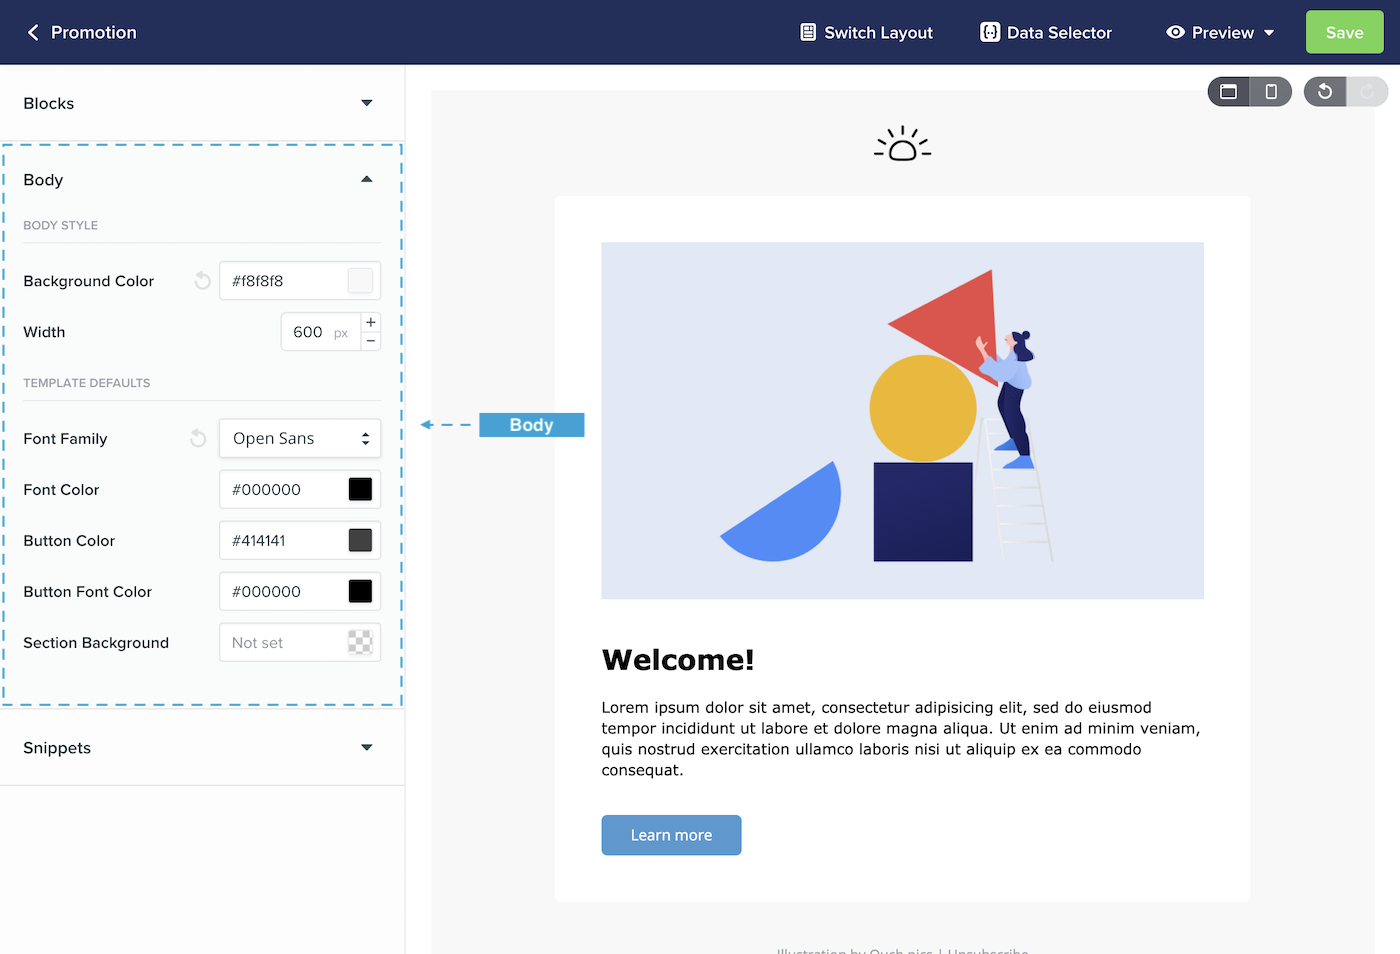
The Body Styles section is where you can change the maximum width of your template and set the background color.
In the Template Defaults section you can set a number of base properties that will change the styles used across all of the components in your template, such as:
- The base font used for all text in your template
- The base color of text and buttons used in your template
- The base background color of any section components used in your template When you change these properties, they will update all components in your template that don’t have a specific overriding style. Think of these as your parent styles that can be overridden in specific parts of your template using the component’s own properties.
Blocks
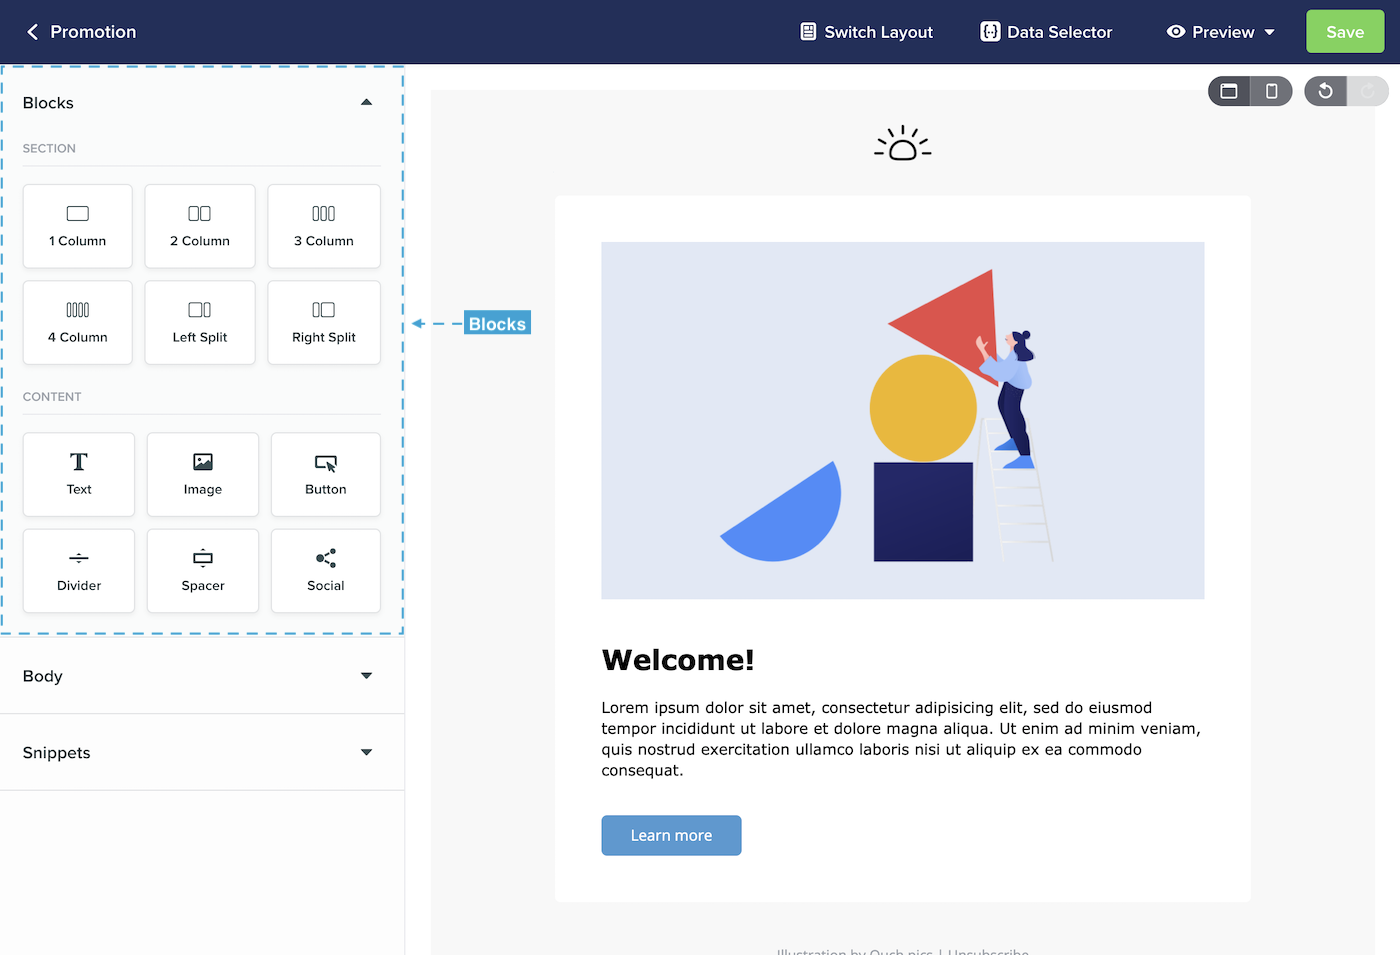
Every template is built using a combination of two types of blocks. Section blocks help you define the layout of your template, whereas content blocks define the individual content.
Think of sections as the containers for your content blocks. Every content block must be contained by a section.
To add a section or a content block to the template, simple click and drag one of the blocks over the canvas area. When you are hovered over an area marked with a green ‘Drop here’, you can simply let go of the mouse and drop the block into place.
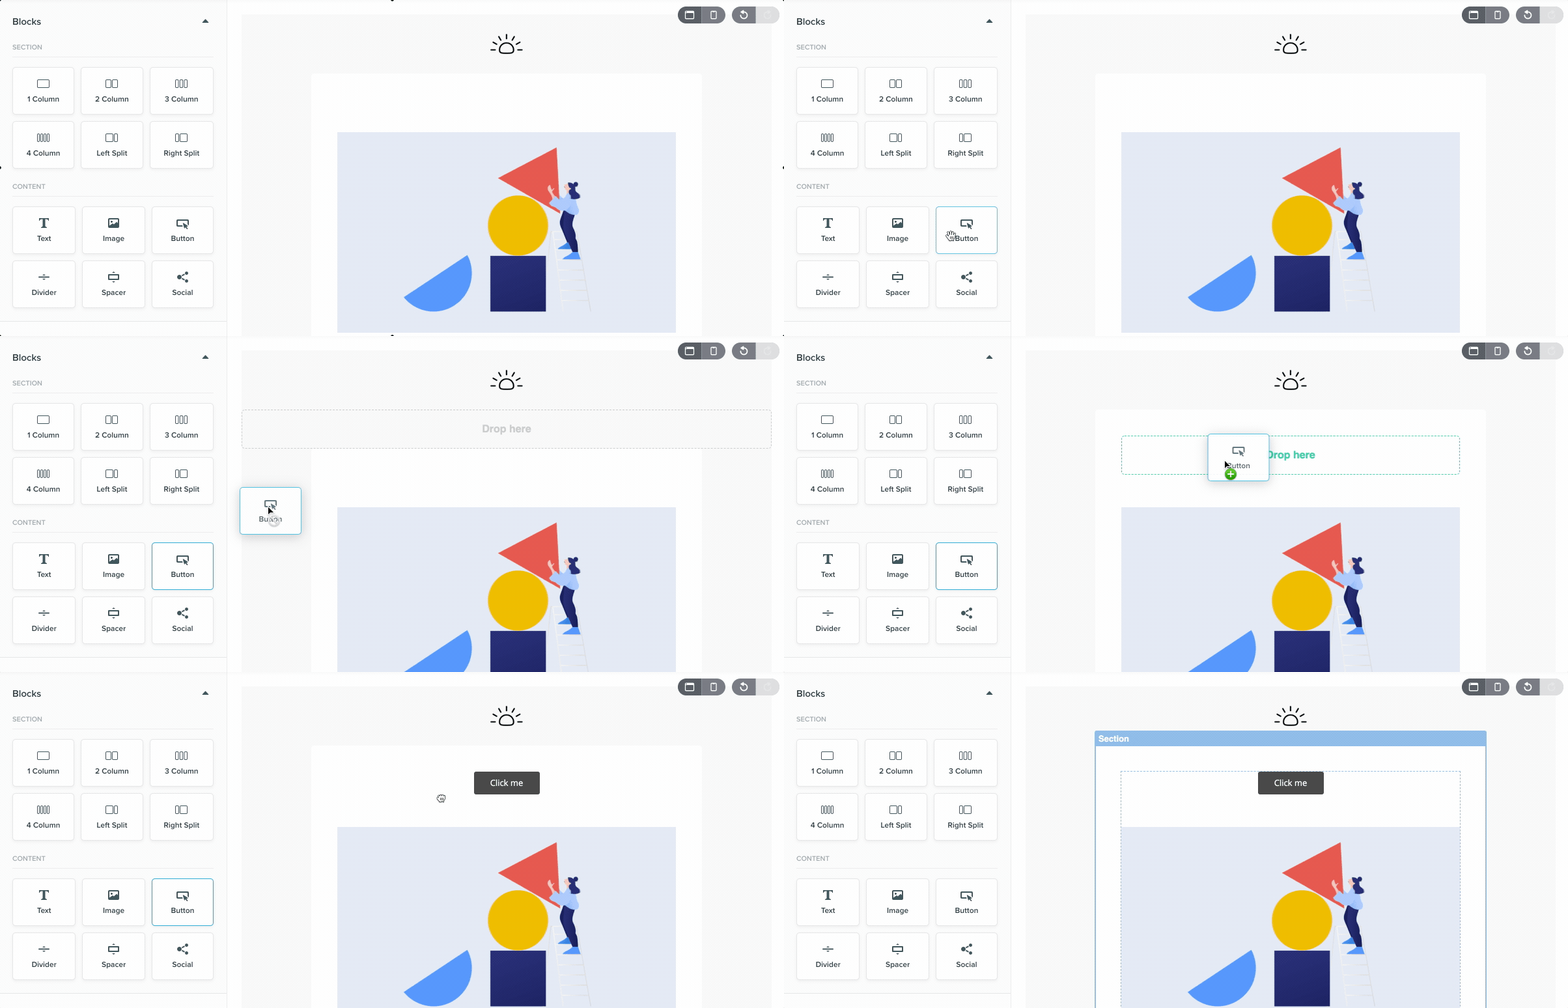
Read more about the each of the content blocks and their properties below:
Section Blocks
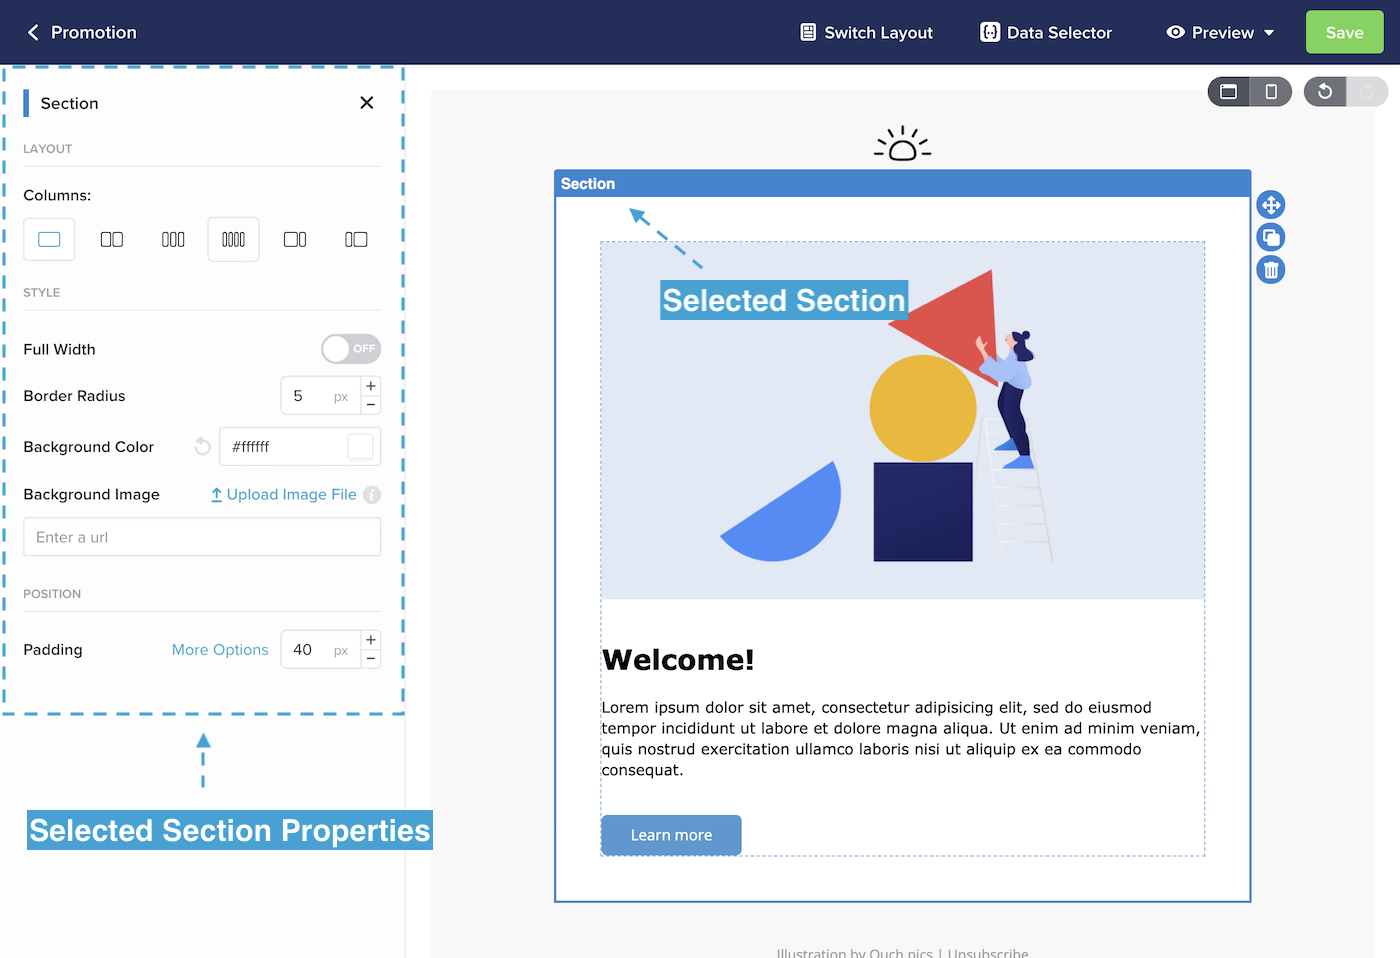
Sections are the core building block of a template. Sections enable you to define how email elements are displayed relative to each other.
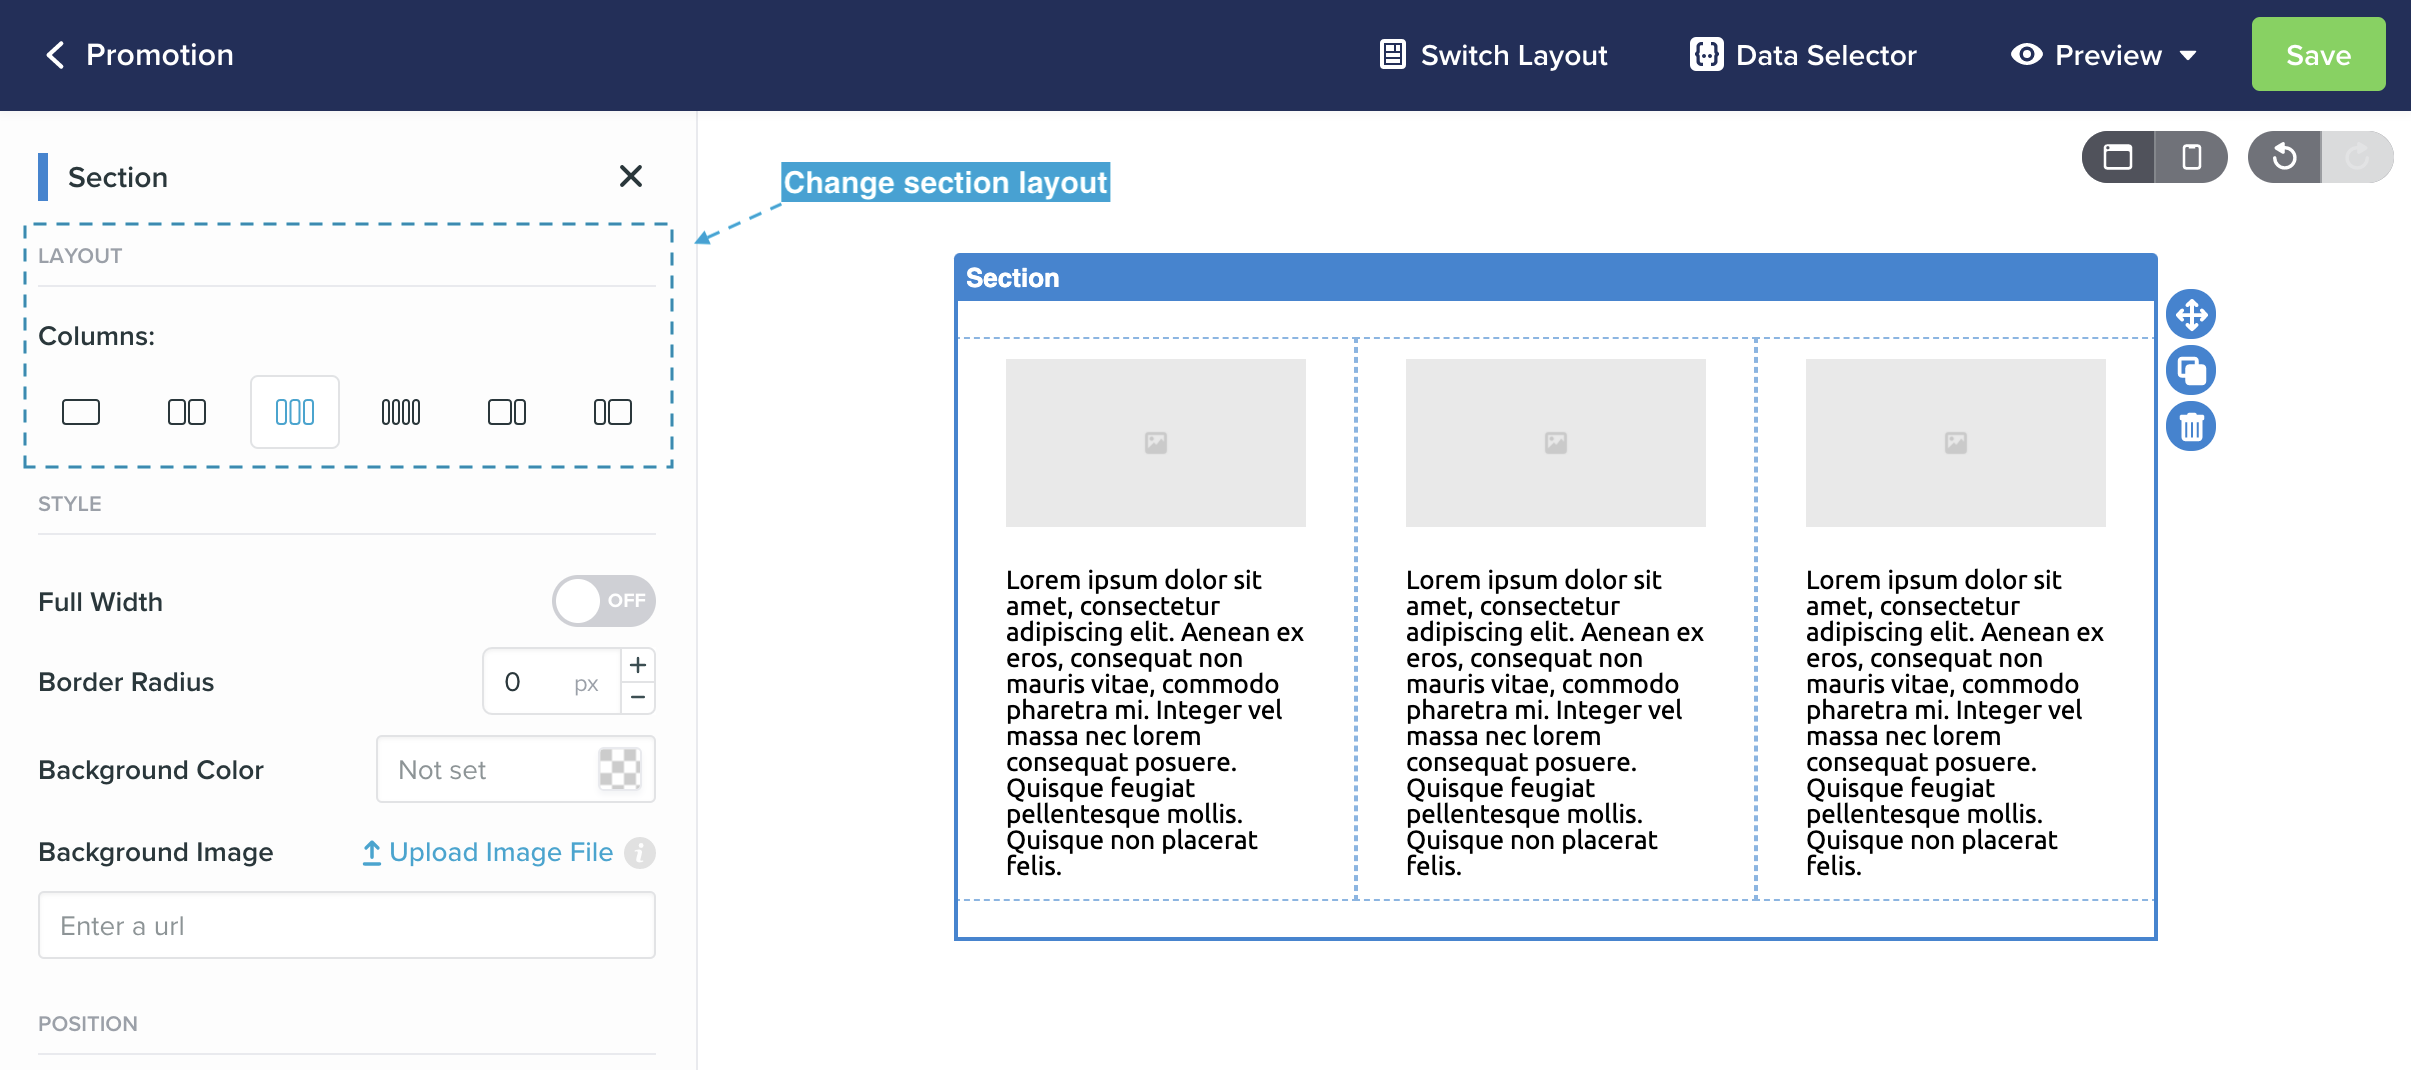
You can choose from six different section layouts, each with a different combination of columns to help align your content blocks in the most common ways. Most emails consist of several sections, such as a header, a couple of body sections and a footer, with the column options available you will be able to easily create each of these types of section.
Each section can be customized using the available properties; choose a background colour or image, add a border radius and set the spacing using padding. Sections also support full-width email background images, enabling you to style your email at the click of a button:
Quick note: If you drag and drop a content block into an area that doesn’t already have a section defined, a new section will be created around the content block you dropped in. When dragging a section into the canvas, you can only drop it adjacent to another section. Sections cannot be added within other sections.
Content Blocks
Content blocks are the elements that make up your email, such as text, images and buttons. You can only drag content blocks into a section. Vero offers several content blocks ready-to-go, and we’ll discuss each below.
Text
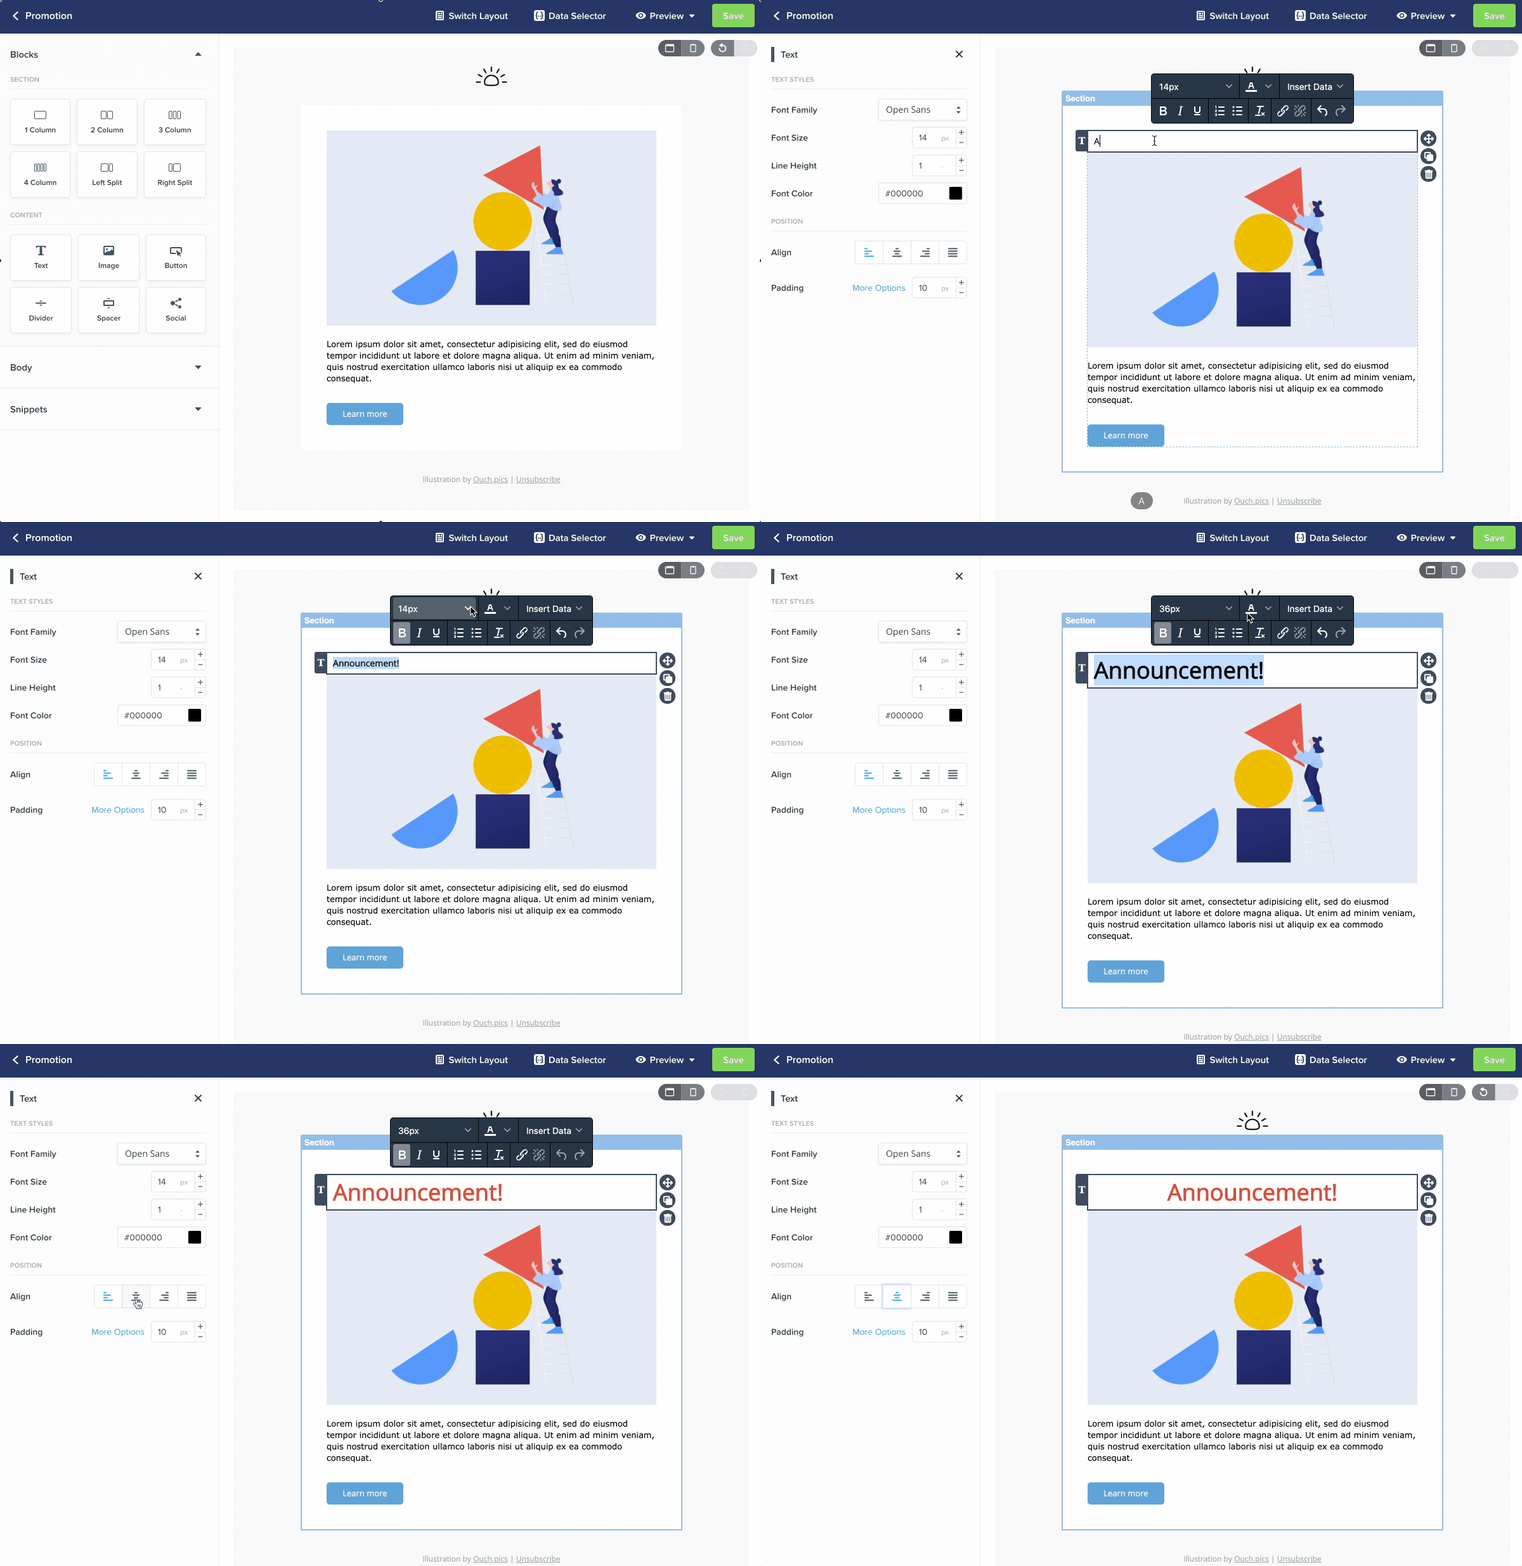
Text blocks are a core element of every email design. Simply drag a text area where you want it, click the default text and start typing!
Properties that affect the style and position of the text in the overall layout are controlled at the block level, on the left hand side. These include alignment and padding. You can also define the default font size and color for the block, along with the font family and line height.
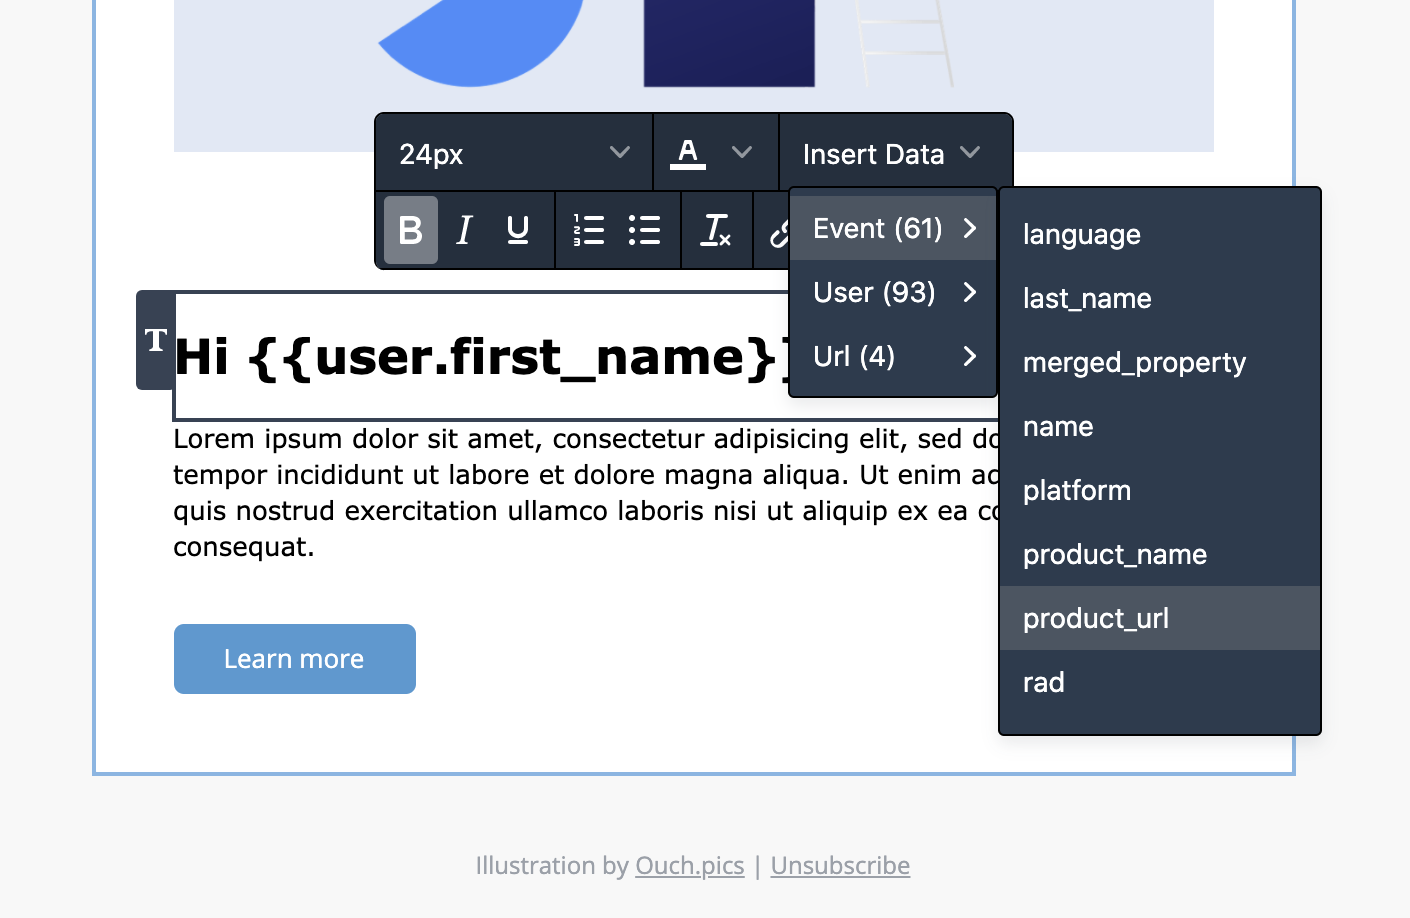
Several style elements apply to specific words or characters, and these are accessible when typing in the block itself, as below. These styles apply to the selected text and can vary within the text block itself.
The text block also provides easy access to insert user and event data, to make it easier to personalize your emails. Read more about personalizing message content using liquid.
Image
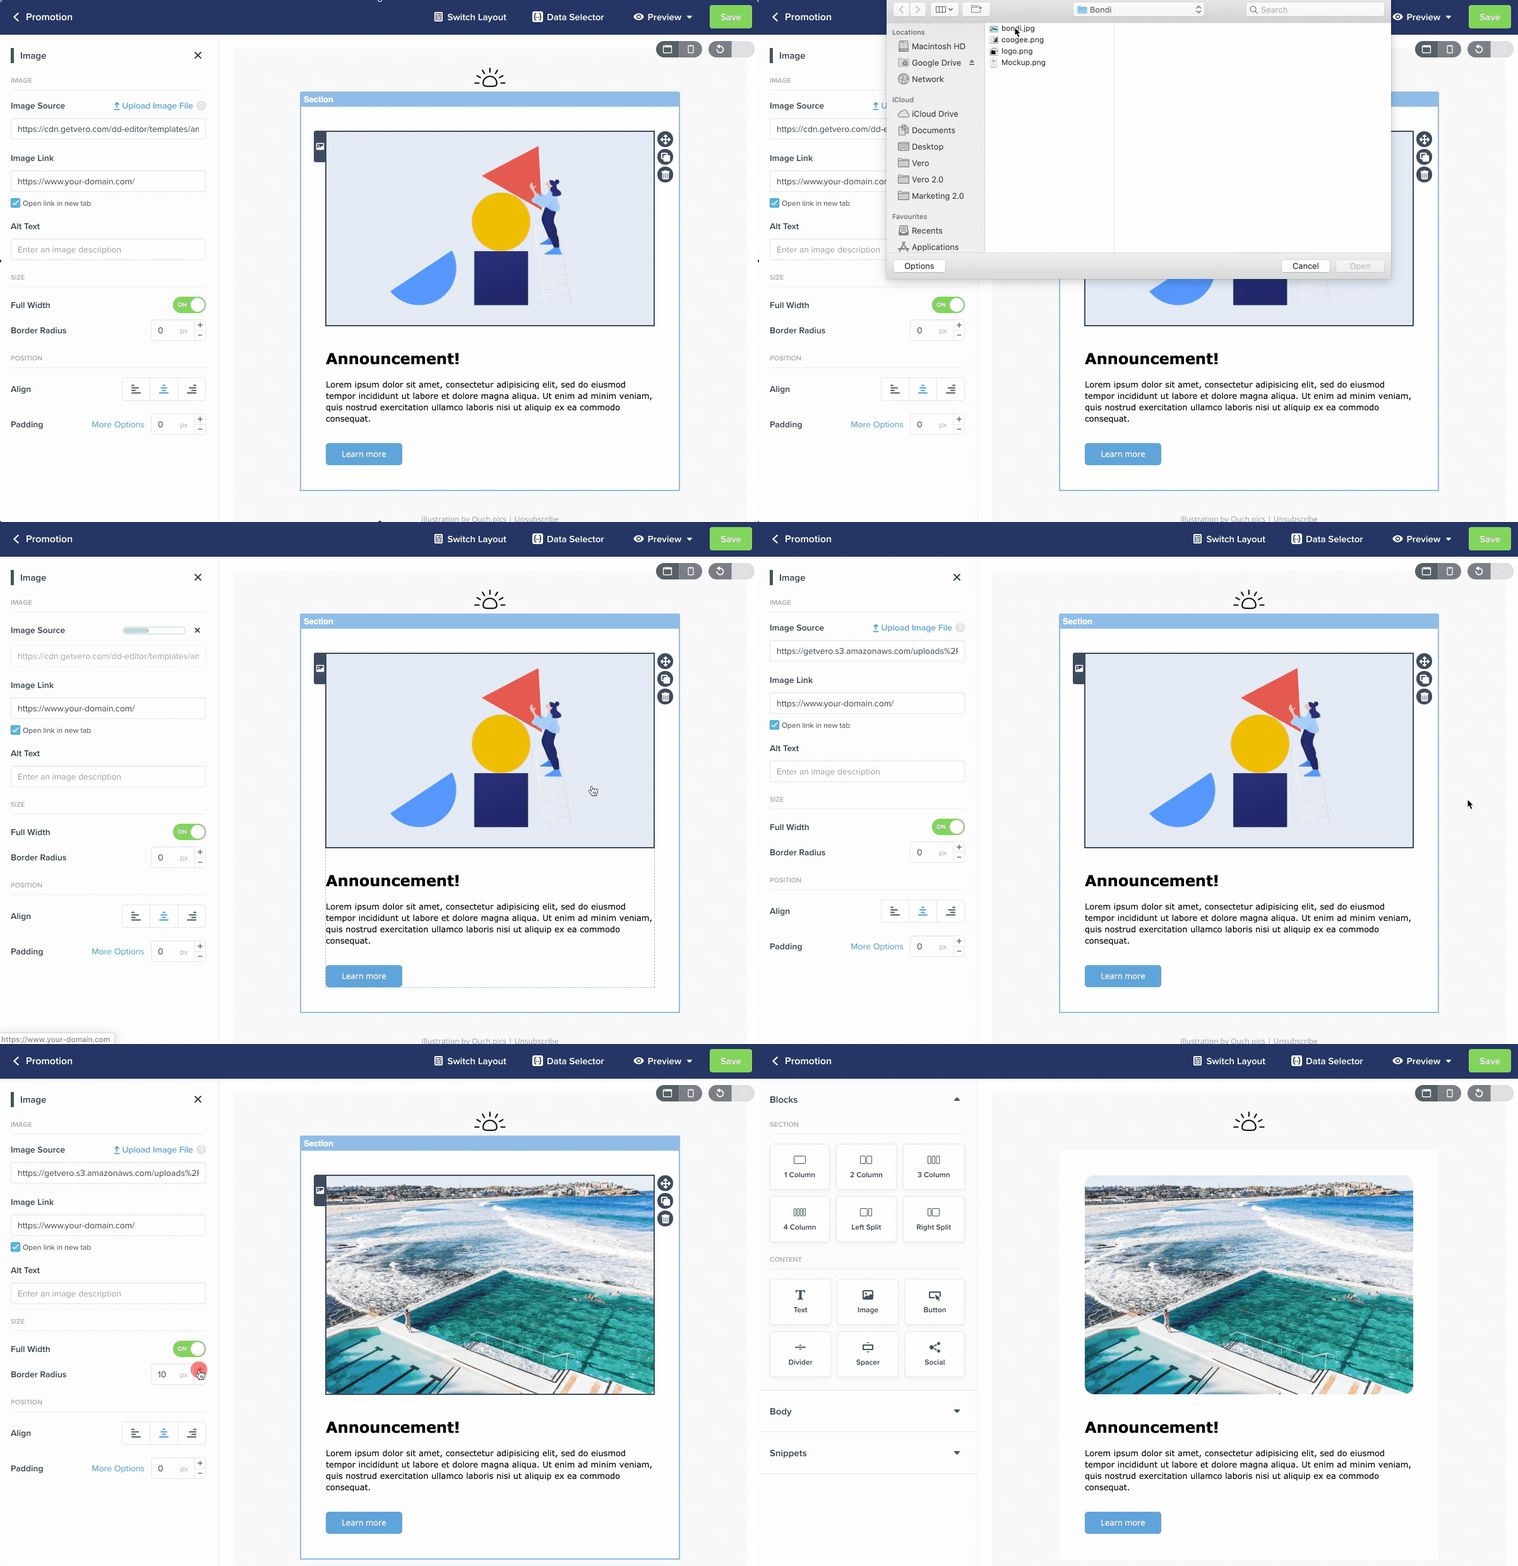
Image blocks take out the hassle of uploading and managing your images. Easily add an image by dropping in a URL or uploading a file and you’re all set.
The image block lets you add an “alt” tag for accessibility and a link on your image to drive action. You can easily adjust the size of your image as well as the alignment, spacing and border radius.
Button
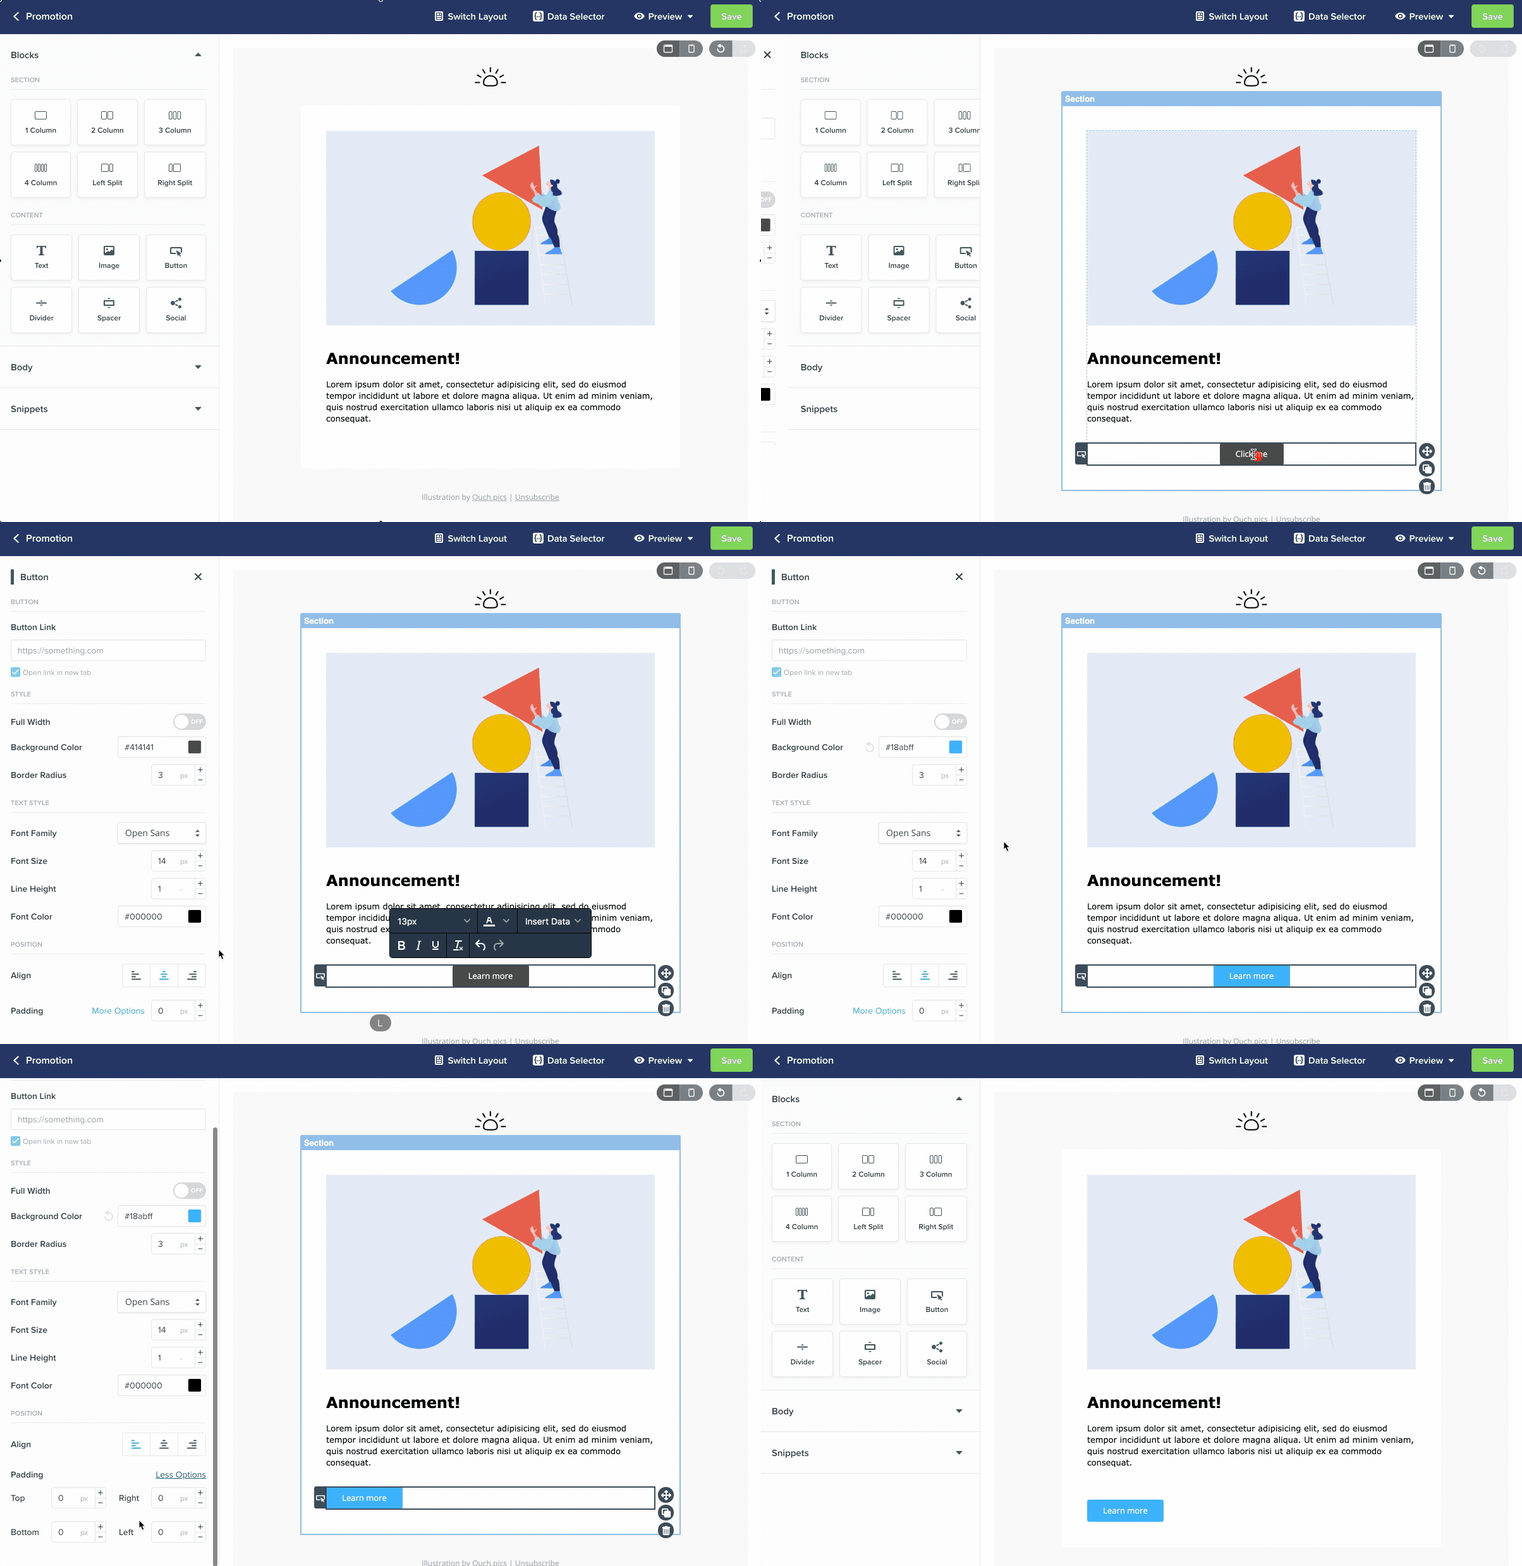
Easily add a call to action to your template using the Button component. Buttons are a common element in all email templates. Simply drag the button where you need it.
You can customize the color, size and link of your button as well as all of the standard text styles you’d expect for the text within the button itself, such as the font size, family and color.
Divider
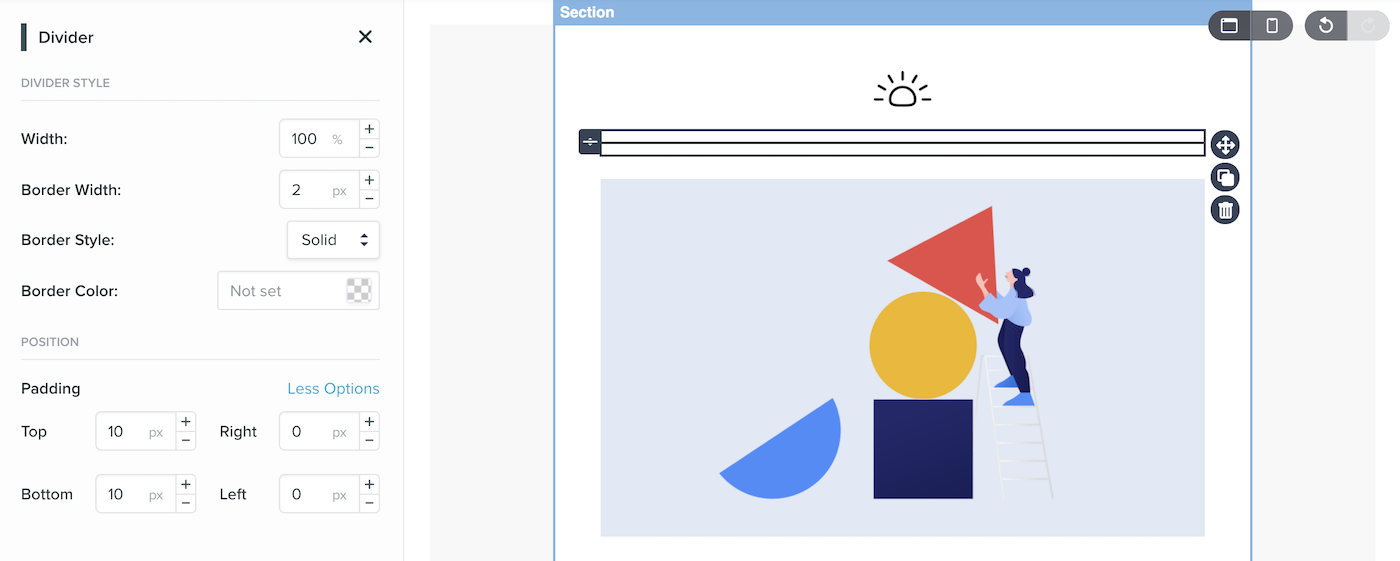
Dividers can be a useful way to visually break up your email into readable chunks. You can control the color, width and weight of your divider, as well as the padding surrounding it to get it in just the right place.
Spacer
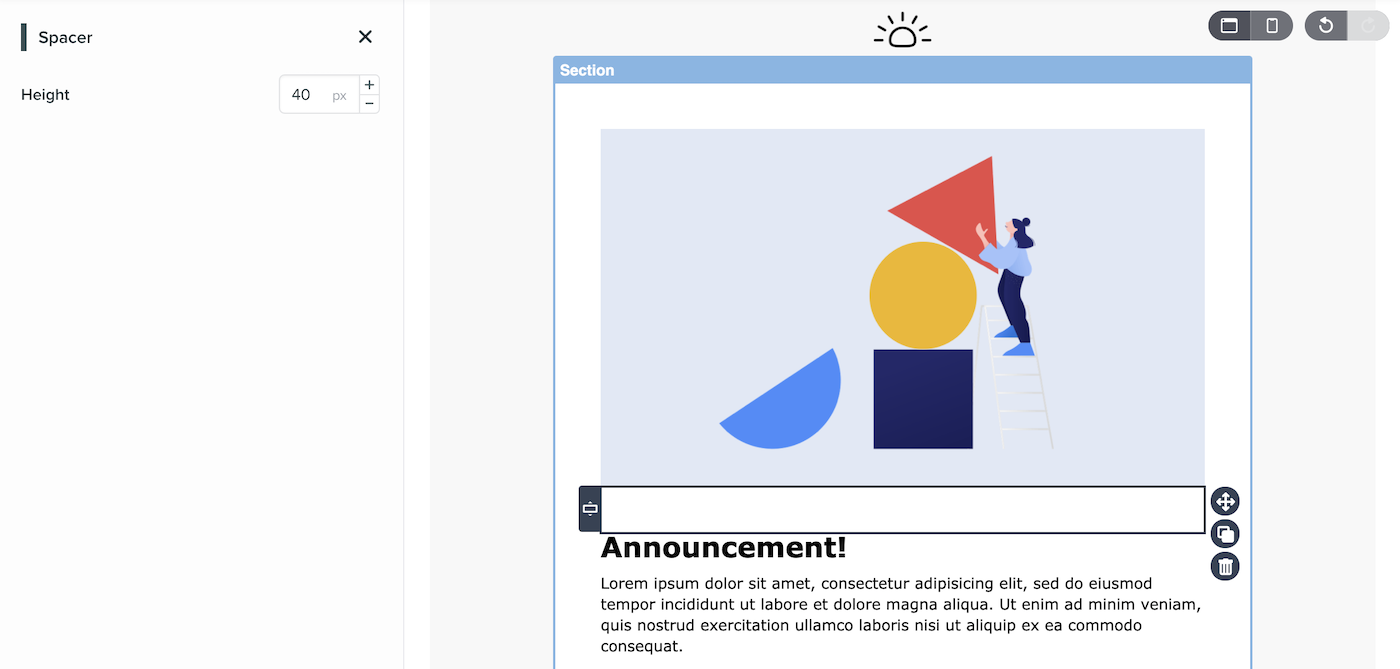
Spacers enable you to place a gap between content blocks in a way that is HTML email client-friendly. Spacers are rendered in a way that is guaranteed to offer the most support across email clients, rather than attempting to rely on padding or linebreaks. Spacers are a simple block with only a height property to adjust.
Social
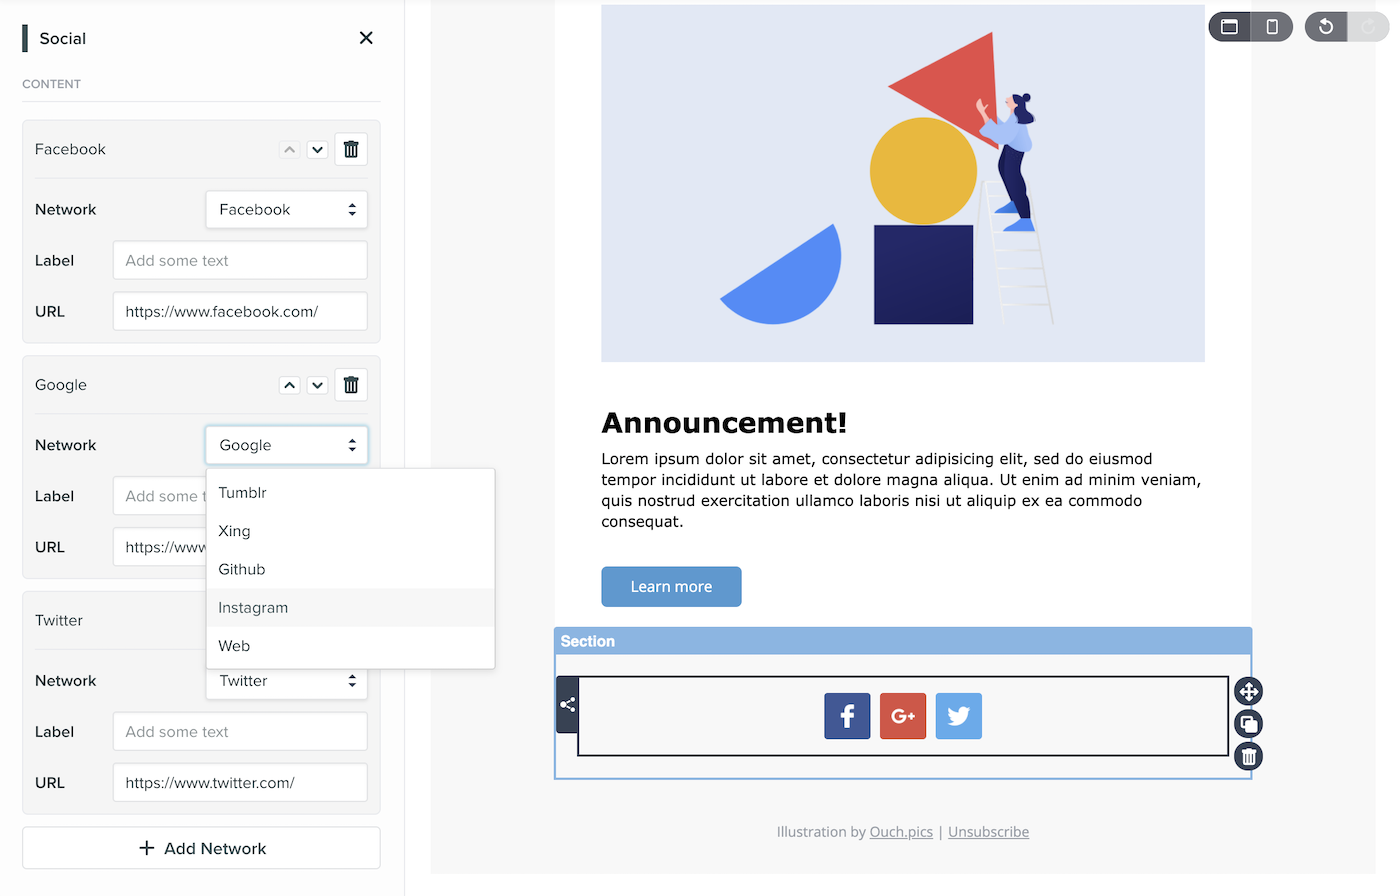
To cater for a common element of an email template, the social block enables you to easily add icons and links for each of your social media profiles. With just a few clicks you can insert the icons for 15+ different social networks including Facebook, Linkedin, Instagram, Twitter and YouTube. You can also add a custom network with your own icon and coloring.
This block provides style controls to easily align, size and space your social networks, as well as choosing whether you want to stack the icons horizontally or vertically.
Block Actions
Each block added to your template has a few actions to help you control its placement.

- Move - Click and drag this icon to move your block to a different spot in the template. Areas you can drop the block will be shown with a gray ‘Drop Here’ marker, which will turn green to confirm your selection.
- Duplicate - Click this icon to create an exact copy of the selected block. The duplicate block will be placed directly below the current block, ready to be dragged wherever you need it.
- Delete - Click this icon to remove the selected block entirely.
Desktop and mobile rendering
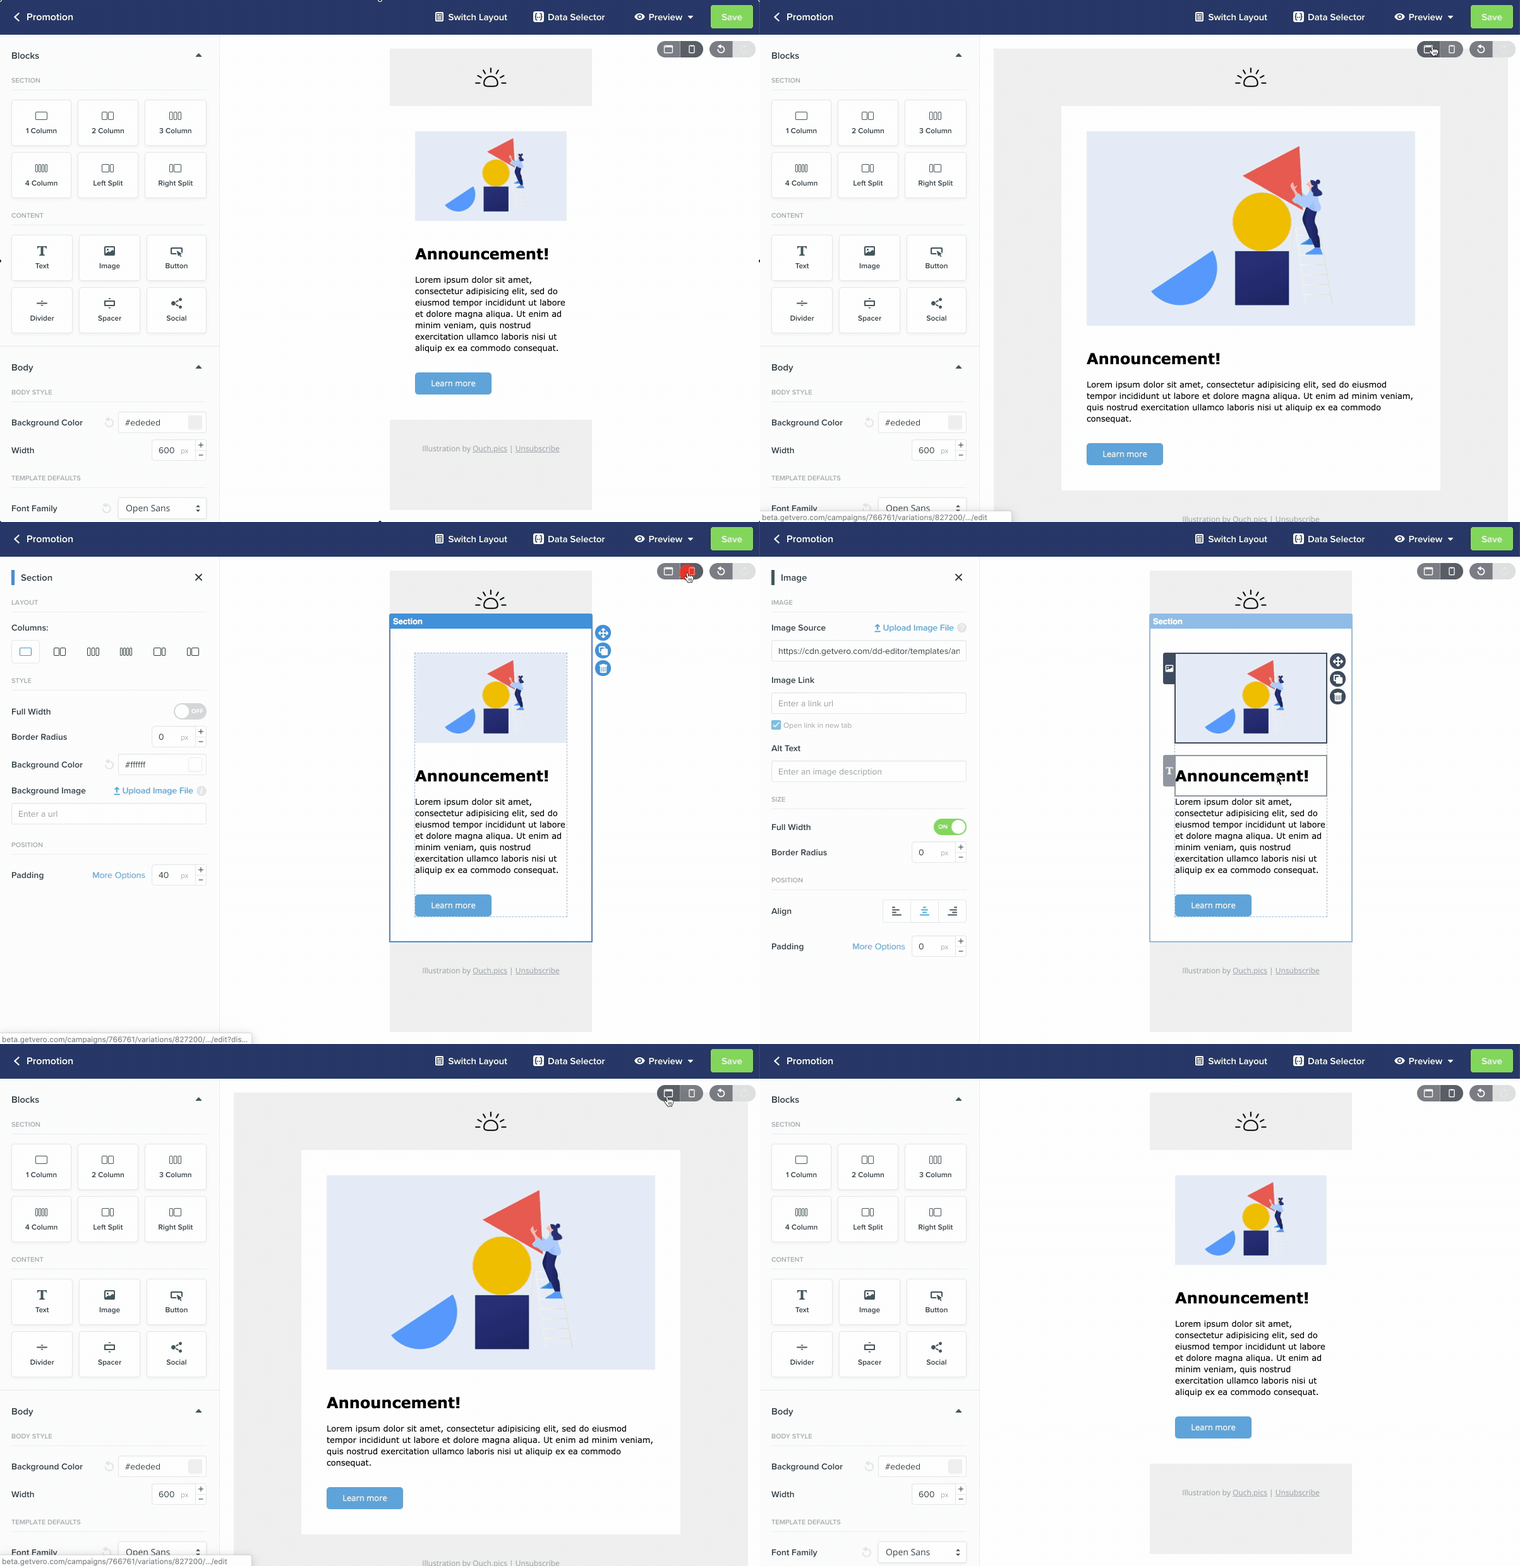
By default, every template you build using the drag and drop template is responsive, meaning anything you create for desktop devices will also adjust itself to display on mobile devices. To see exactly how your template will look on both mobile and desktop, you can click on the mobile and desktop icons located at the top right of your template canvas. You can even make edits to the mobile design in the mobile preview mode.
It’s important to remember that every change you make will have an effect on mobile, so you should always check your mobile version before launching your campaign.
How do I add personalized data to my Drag and Drop emails?
Personalization is one of the easiest ways to make your email messages more engaging and impactful. To provide you with powerful personalisation options, Vero uses Liquid, an open-source templating language created by Shopify. You can use Liquid in any Drag and Drop text block to load dynamic content in your emails based on the data you have stored in Vero. When editing a text block, select the "Insert Data" menu to see a list of all the user and event data you can insert into your email via liquid.
