Using vero-editable tags in HTML templates
Note: This feature is no longer the preferred way to work in Vero and will be deprecated in a future update.
Vero has a unique feature that allows you to define specific elements of your HTML templates to be easily editable without the rest of the template. This is useful if you want to lock the layout and styles of your template but still allow your team members to edit certain parts of content when creating a new campaign. To enable this feature, you need to add a css class of vero-editable to any images, heading, paragraph blocks and other components that you want your team to be able to edit.
Adding editable sections
To make a section of a HTML template editable, simply add the CSS class vero-editable to the HTML element you want to make user editable.
Elements that support vero-editable tags are listed below. We’ve included an example of how you add the class correctly:
- div and td tags:
<div class="vero-editable"> - a (anchor) tags:
<a href="http://casterlyrock.com" class="vero-editable"> - img tags:
<img src="http://casterlyrock.com/tywin-lannister.png" class="vero-editable"> - img tags with surrounding a (anchor) tags. I.e. images that are links:
<a src="http://casterlyrock.com" class="vero-editable"> <img src="http://casterlyrock.com/tywin-lannister.png"> </a>
When you create or edit a campaign and define the content for a HTML template you are essentially taking a copy of the master HTML template and customising it for the campaign in question. Vero takes note of every change you make to a vero-editable tag. It stores these along with your new campaign so that they can be used for future reference.
NOTE: Elements with the vero-editable class are also required to have some default content.
Using vero-editable templates in a campaign
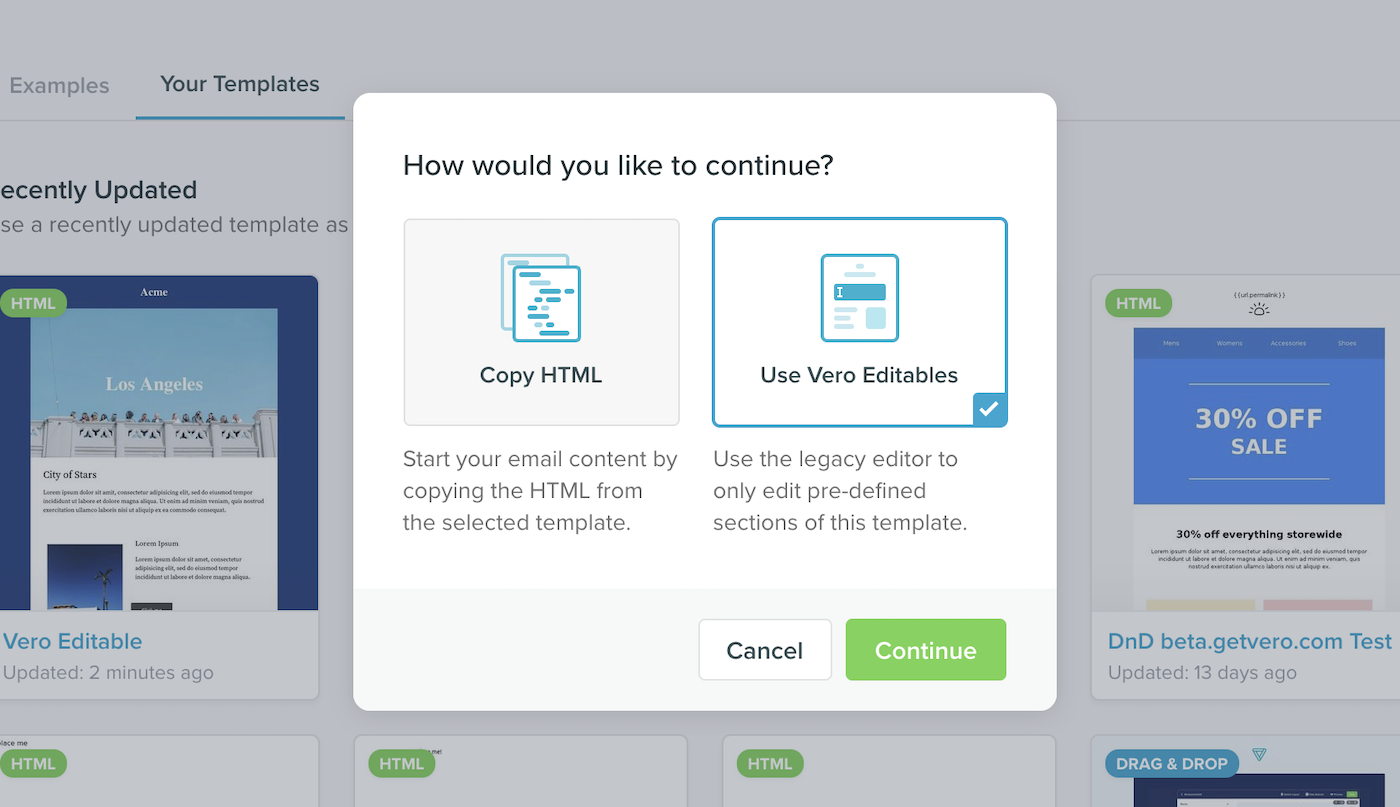
When you select a starting point for a campaign's content, any vero-editable classes present in the selected template will be detected and you will be asked if you wish to use the template as a copy of the HTML or as a Vero Editable template.

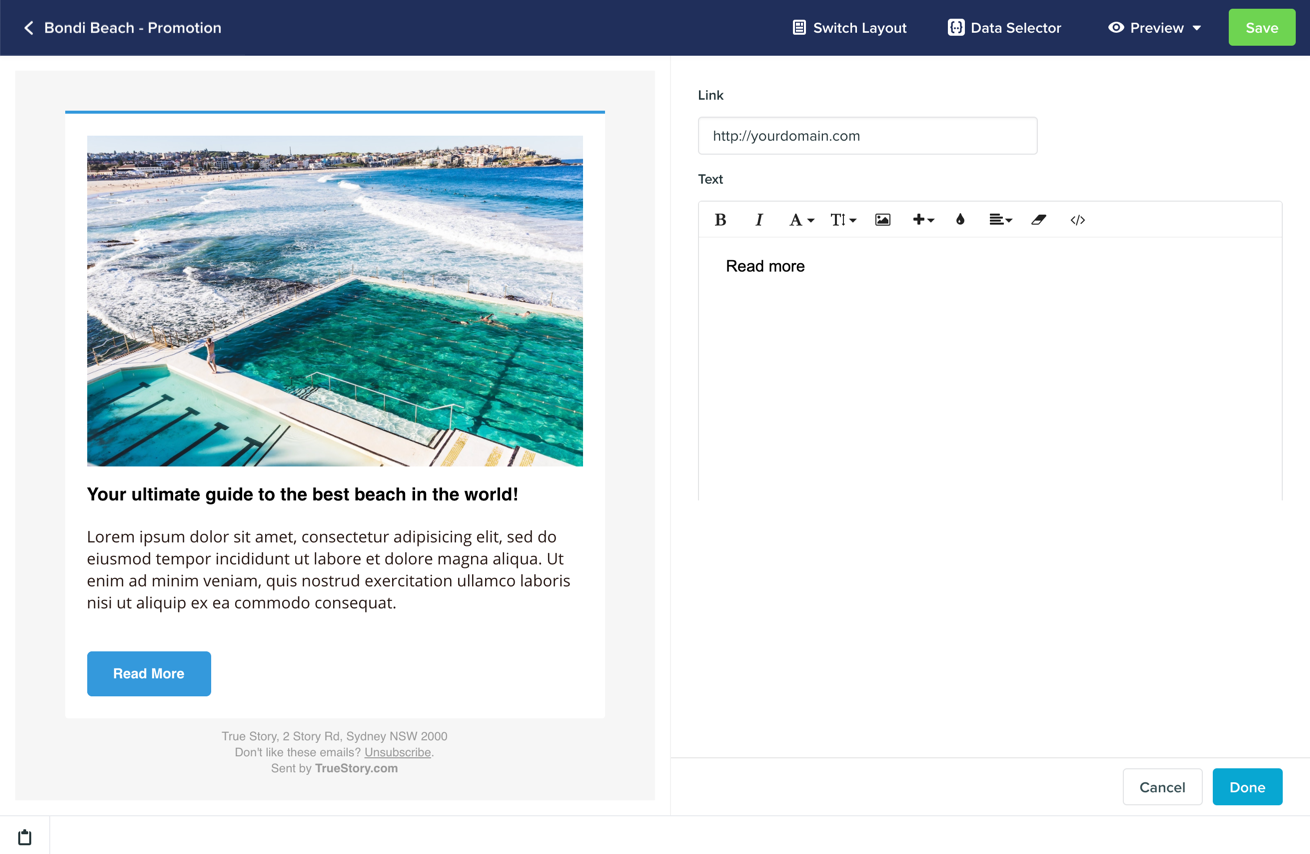
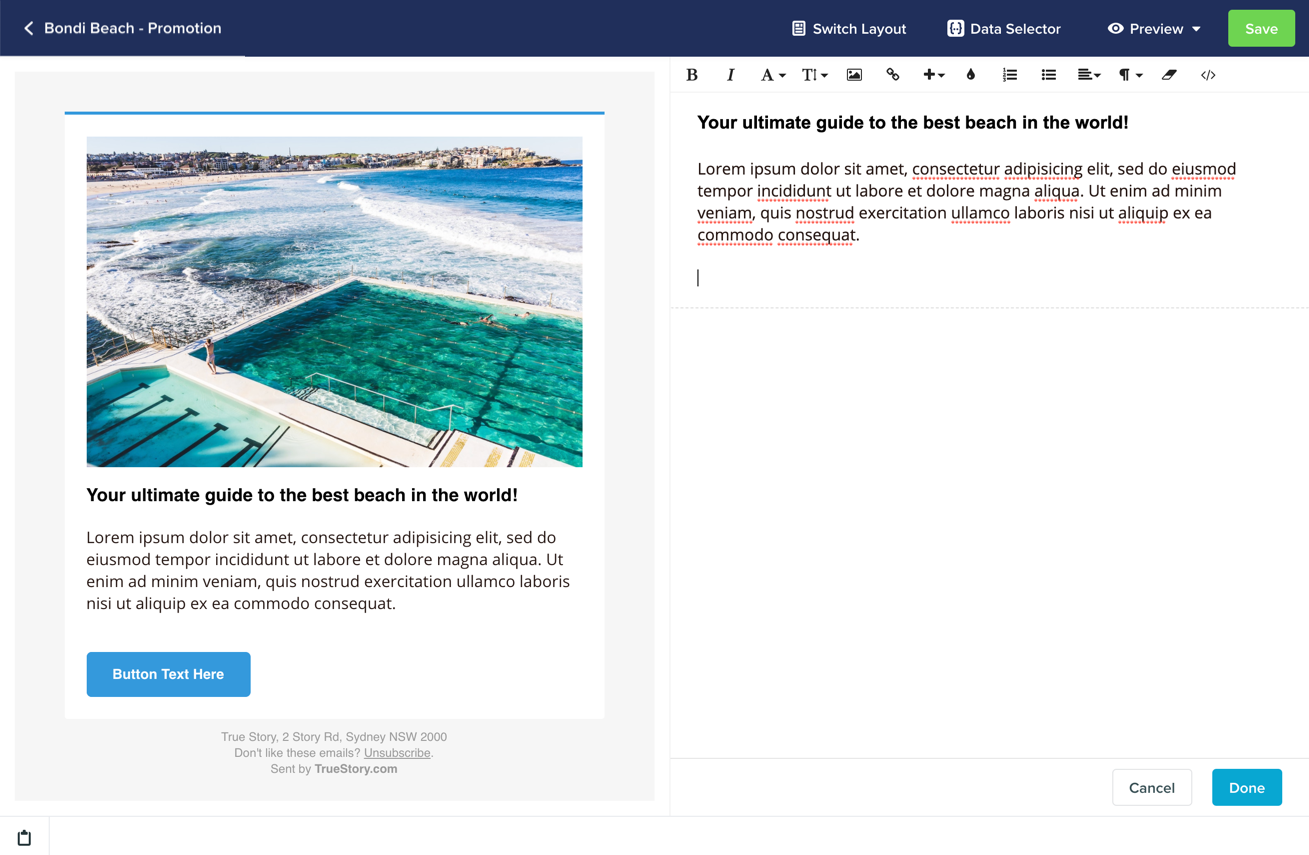
In this mode, when you edit the content of the selected template, each section with a vero-editable will be available for point-and-click editing. Simply hover over the template to see which elements are editable and click to show the editing panel.
Here’s an example of a link tag being edited:

Here’s an example of a div section:

If you need to drop down to edit the underlying HTML of the editable section/tag (for instance, adding an attribute like data-vero="ignore" to a link), that's possible too. Simply select the </> icon and an HTML editor will show up.
Tips to make life easier
There are two rules of thumb when marking editable zones.
- Firstly, we don't recommend putting one vero-editable tag inside another (nesting).
- Secondly, it is better to put
vero-editabletags directly on the desired editable object (e.g. an image), rather than a containing element. This is better than putting lots of different elements inside one bigvero-editableblock (such as a<div>tag).
Note: Unlike the default behaviour of copying a template's content to the campaign content, choosing the Vero Editable option will treat your campaign content as an instance of the base template, meaning any changes that you make to the underlying base template will also change the instance of the template you have selected in the campaign.
What happens to my campaigns when I make a change?
When you update a template, Vero will try to automatically apply those changes to any campaigns that inherit from that template.
For example, if you have a template with a header and a footer and a single vero-editable block in the middle, Vero will store any changes you make to this vero-editable section, per campaign. If you update the header, Vero will automatically update all of the child campaigns, merging in the updates along side your own changes to the vero-editable section.
What if there is a conflict?
Conflicts arise when you edit a master template and add or remove vero-editable regions. When this happens Vero won't be able to correctly merge your previous campaign updates onto the new template, as it will recognize you've changed the structure of the underlying campaign.
In this scenario, where a clean merge cannot be guaranteed, Vero will mark those templates as having a content conflict, signifying that the changes may have caused a conflict, and have not been applied until you review (and save) the campaign using that template.
Read more about content conflicts
Further questions
Templates can be tricky and every email vendor has its own little quirks. If you have questions about how a template will appear, or how to import a template from another email vendor, just drop us a line via support@getvero.com and we'll help you out!


