Creating mobile push messages
Creating a push message
To send your customers mobile push notifications you will need to configure push notifications in your Vero account.
Mobile push notifications can be sent as a newsletter campaign or added as an action step in a workflow.
Setting up a push notification as a newsletter campaign allows you to send one push message to a segment(s), at a specified time. Whereas, adding a push notification to an automated workflow sends a push message based on an action or event, as part of a customer journey.
To create a push newsletter campaign: navigate to Campaigns > Newsletters > New Campaign and select ‘Push’ as the channel.
To add a push notification to a workflow: navigate to Campaigns > Workflows > New Workflow and select ‘Push’ as an action step. Read more about setting up a Workflow for email and push messages.
Whether you're creating a newsletter campaign or a workflow, for both campaign types you will be given the option to select a Provider and Platform(s).
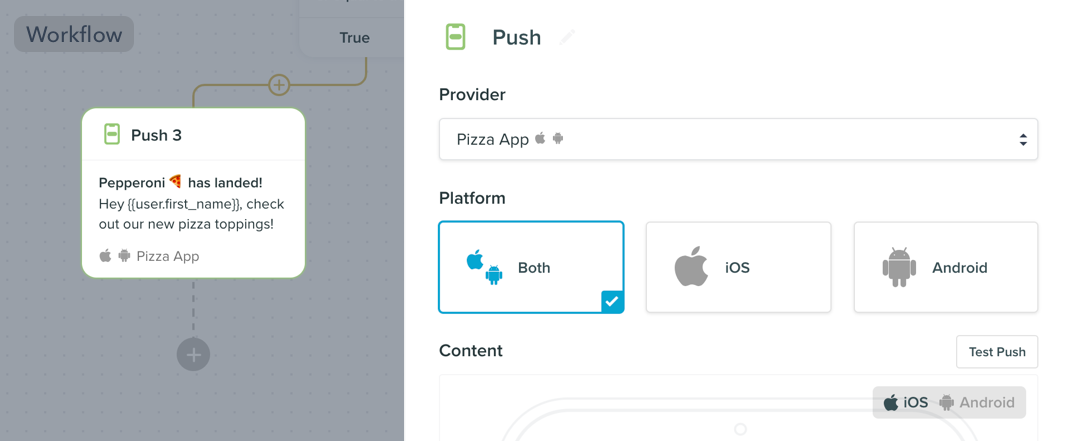

Provider
Vero supports push notification delivery providers Amazon SNS and Twilio Notify. If you haven’t already set up a Provider in your Vero account, please read our Mobile Push Notifications - Integration guide.
Platform
You will have the option to select which Platforms your push messages will be delivered to. You can choose to send to iOS, Android or both.
Adding content
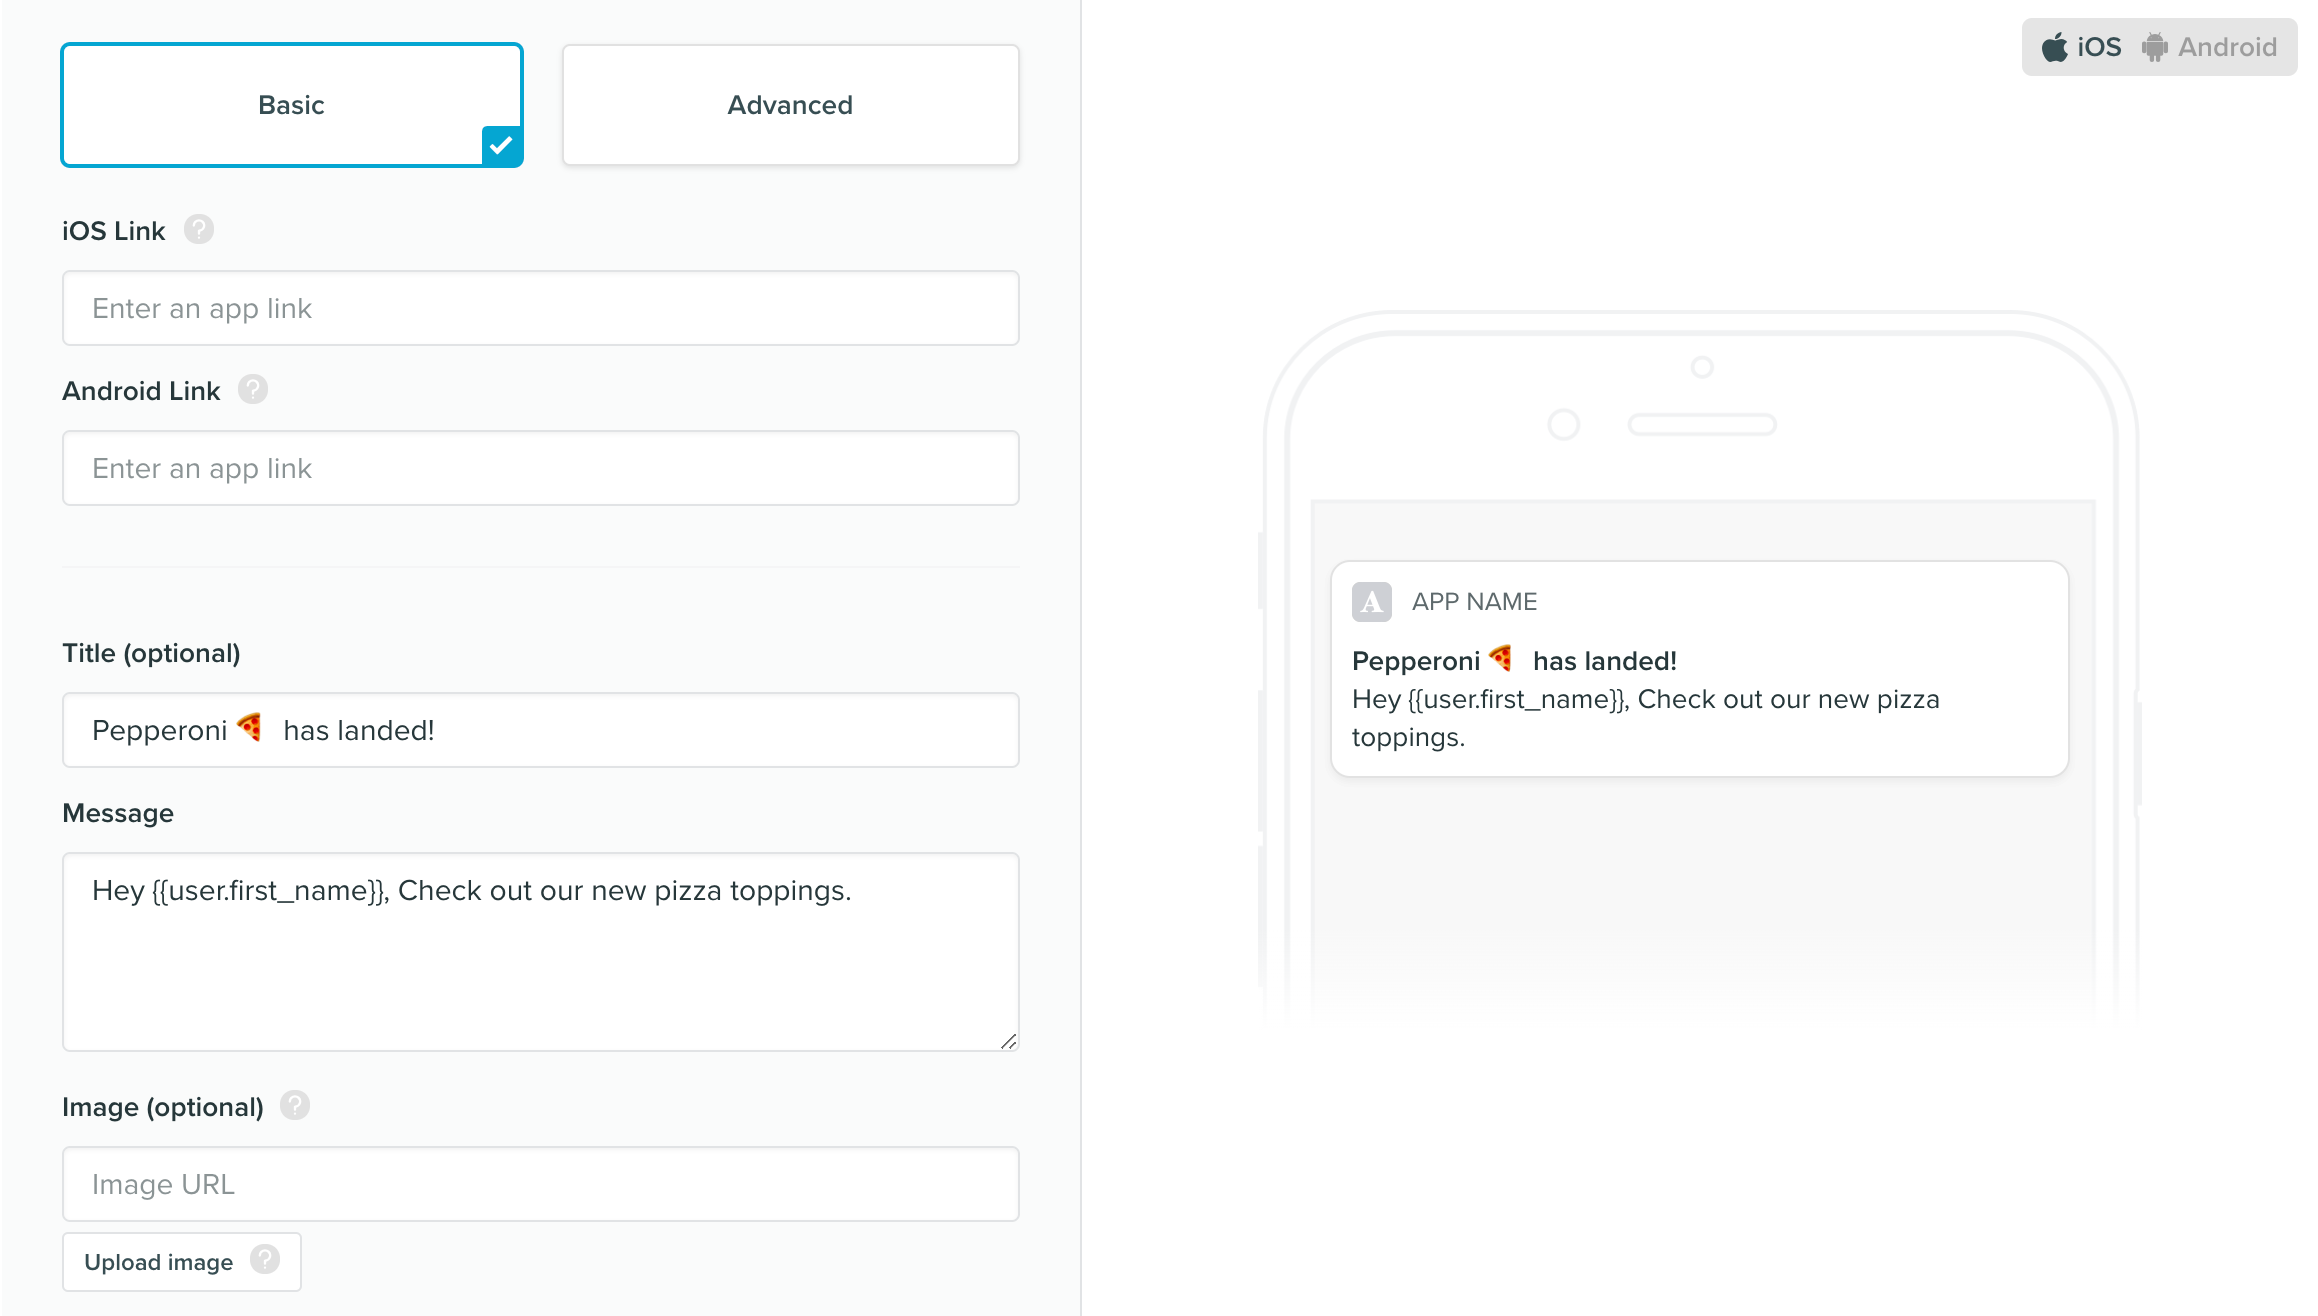
The Content Editor for push notifications is the same for both Newsletter and Workflow campaign types. The basic editor enables you to easily add text, a link and an image (maximum file size 10mb) to your message. The advanced editor is available for those who wish to edit the full JSON payloads. Using the toggle in the top-right you can preview your message on both iOS and Android devices.
Inserting dynamic user and event properties/attributes
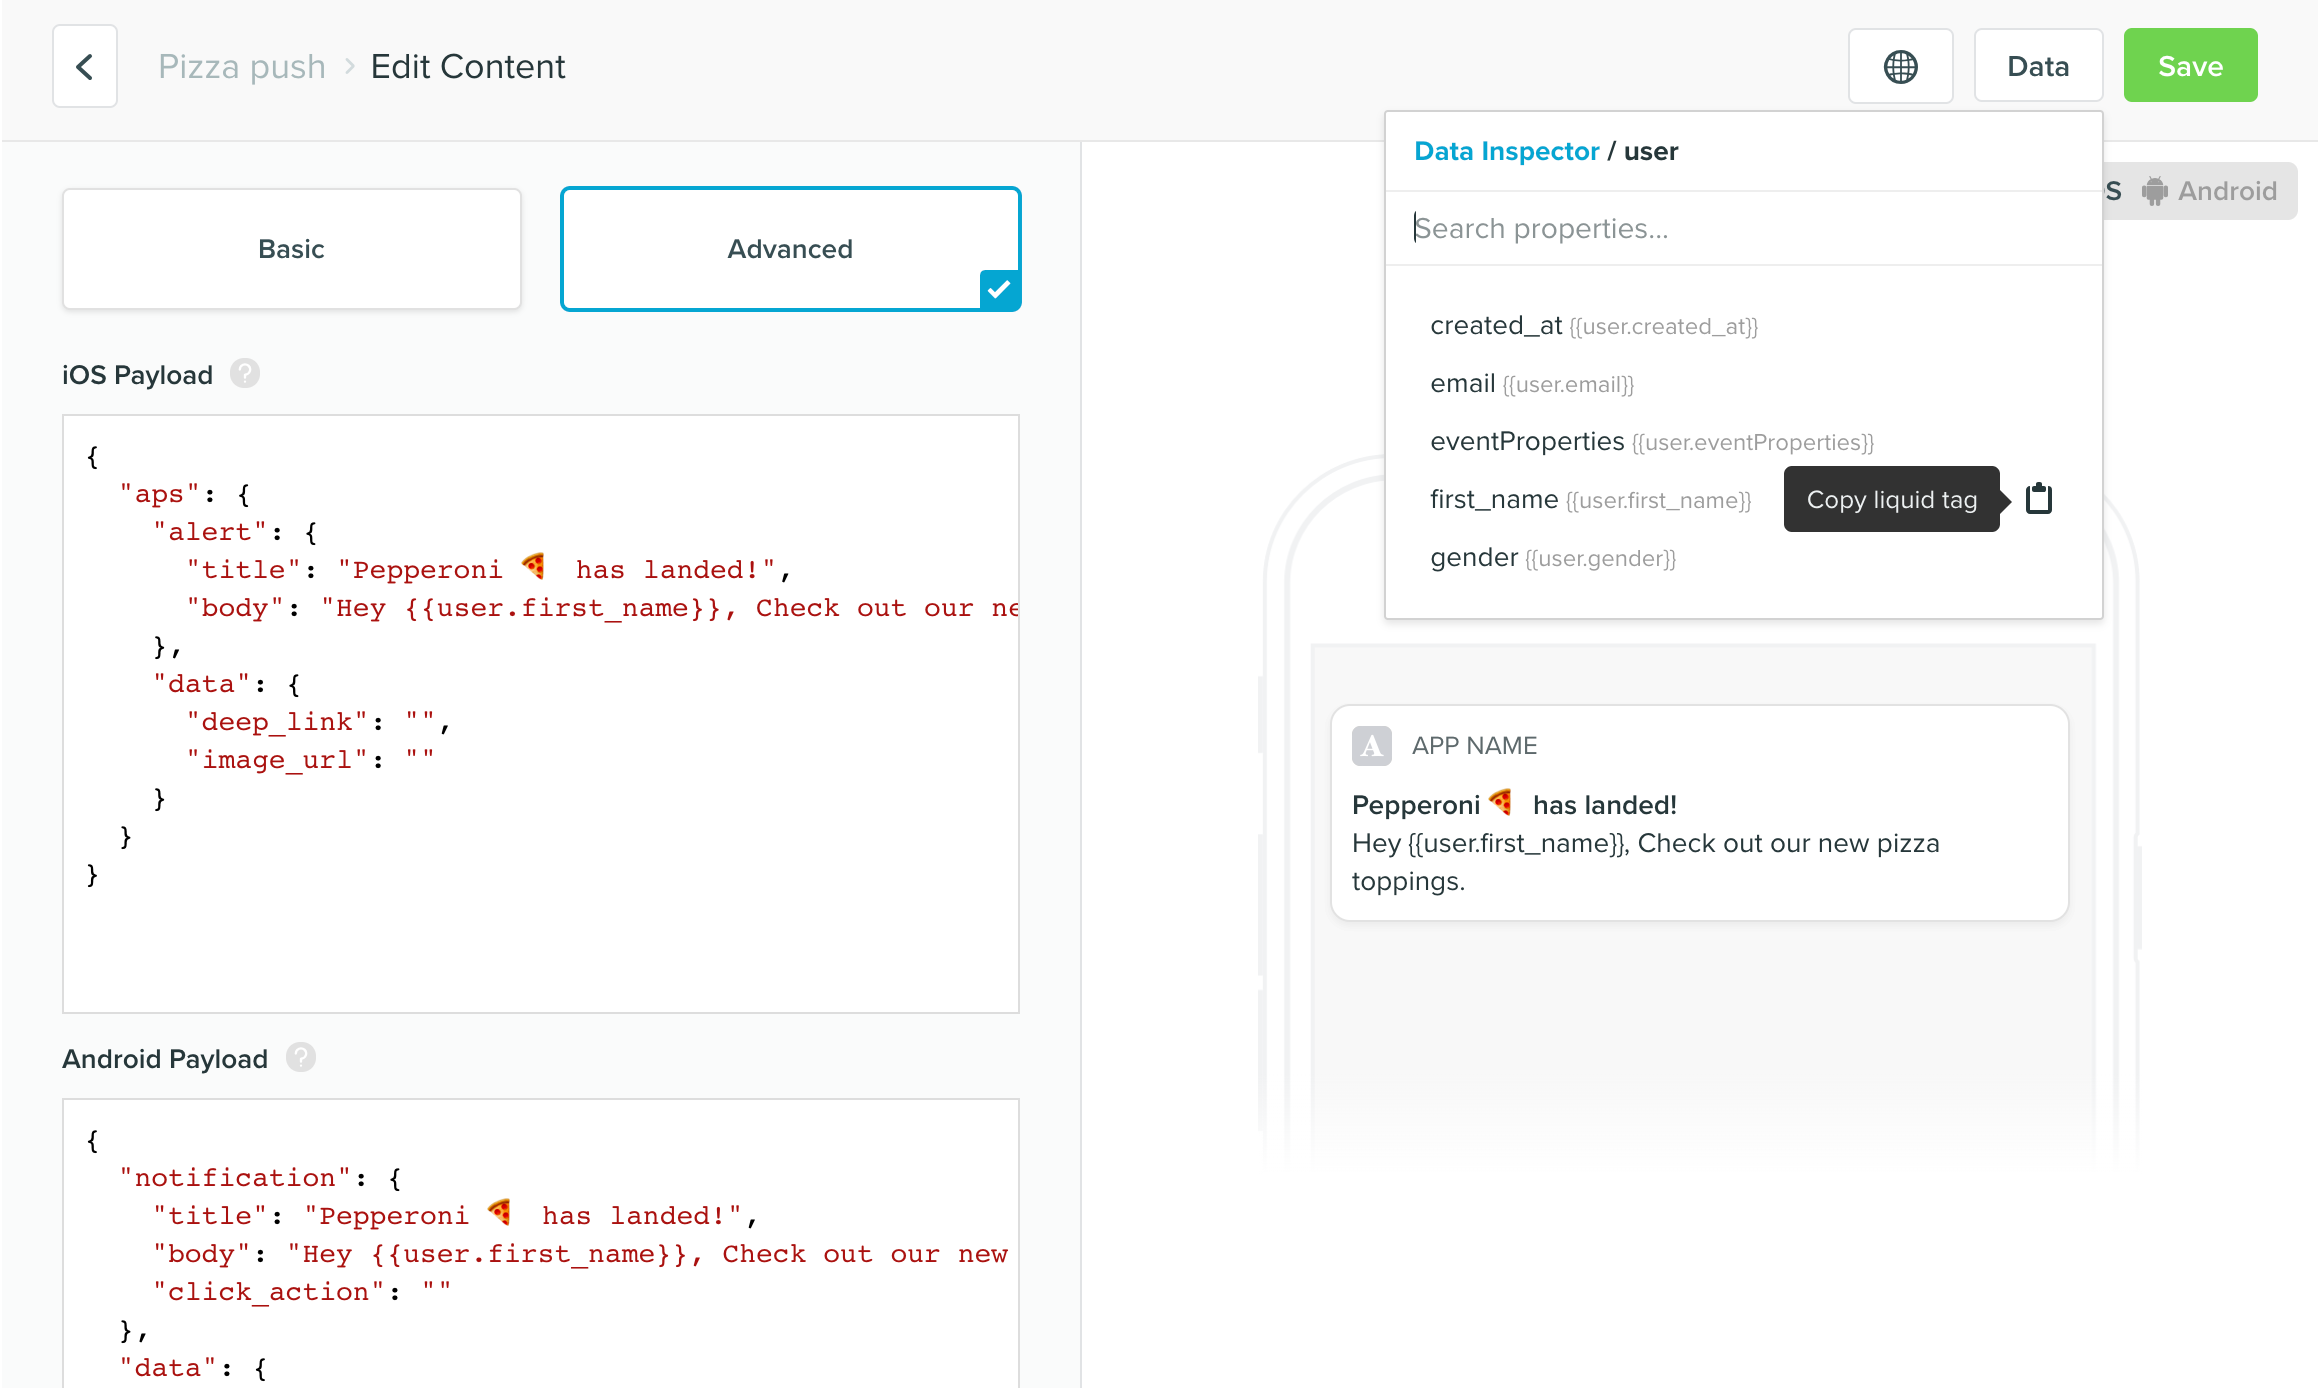
Using the Advanced editor, you can add Liquid syntax to the Payloads to create personalized messages for your customers. Similar to the email content editor, select Data to open the Data Inspector and copy and paste user and event properties into the iOS and Android Payloads.
Maximum payload size for push notifications
4KB (4096 bytes) is the maximum payload size for both Apple Push Notification service (APNs) and Android’s Firebase Cloud Messaging (FCM). This is for the entire payload- the text message and any other custom data that is sent with the notification.
Testing push notifications
a. Create a test profile
Sending iOS and Android push messages requires a "device token". This device token is generated programmatically by Apple and Google when requested by your mobile application.
Device tokens are specific to the combination of your device and the current installation of your mobile application. As such, there isn’t an easy way to find this device token using your mobile – it needs to be generated programmatically.
As part of Configuring Mobile Push Notifications in Vero, device tokens will be sent across to customer profiles in Vero. Assuming that you can install and use your mobile app on your own phone, if the integration is successful, then registering your own test customer profile by using your application should add your profile to Vero.
You can confirm this by searching for your profile in Vero and checking if you have a device token present on your profile.
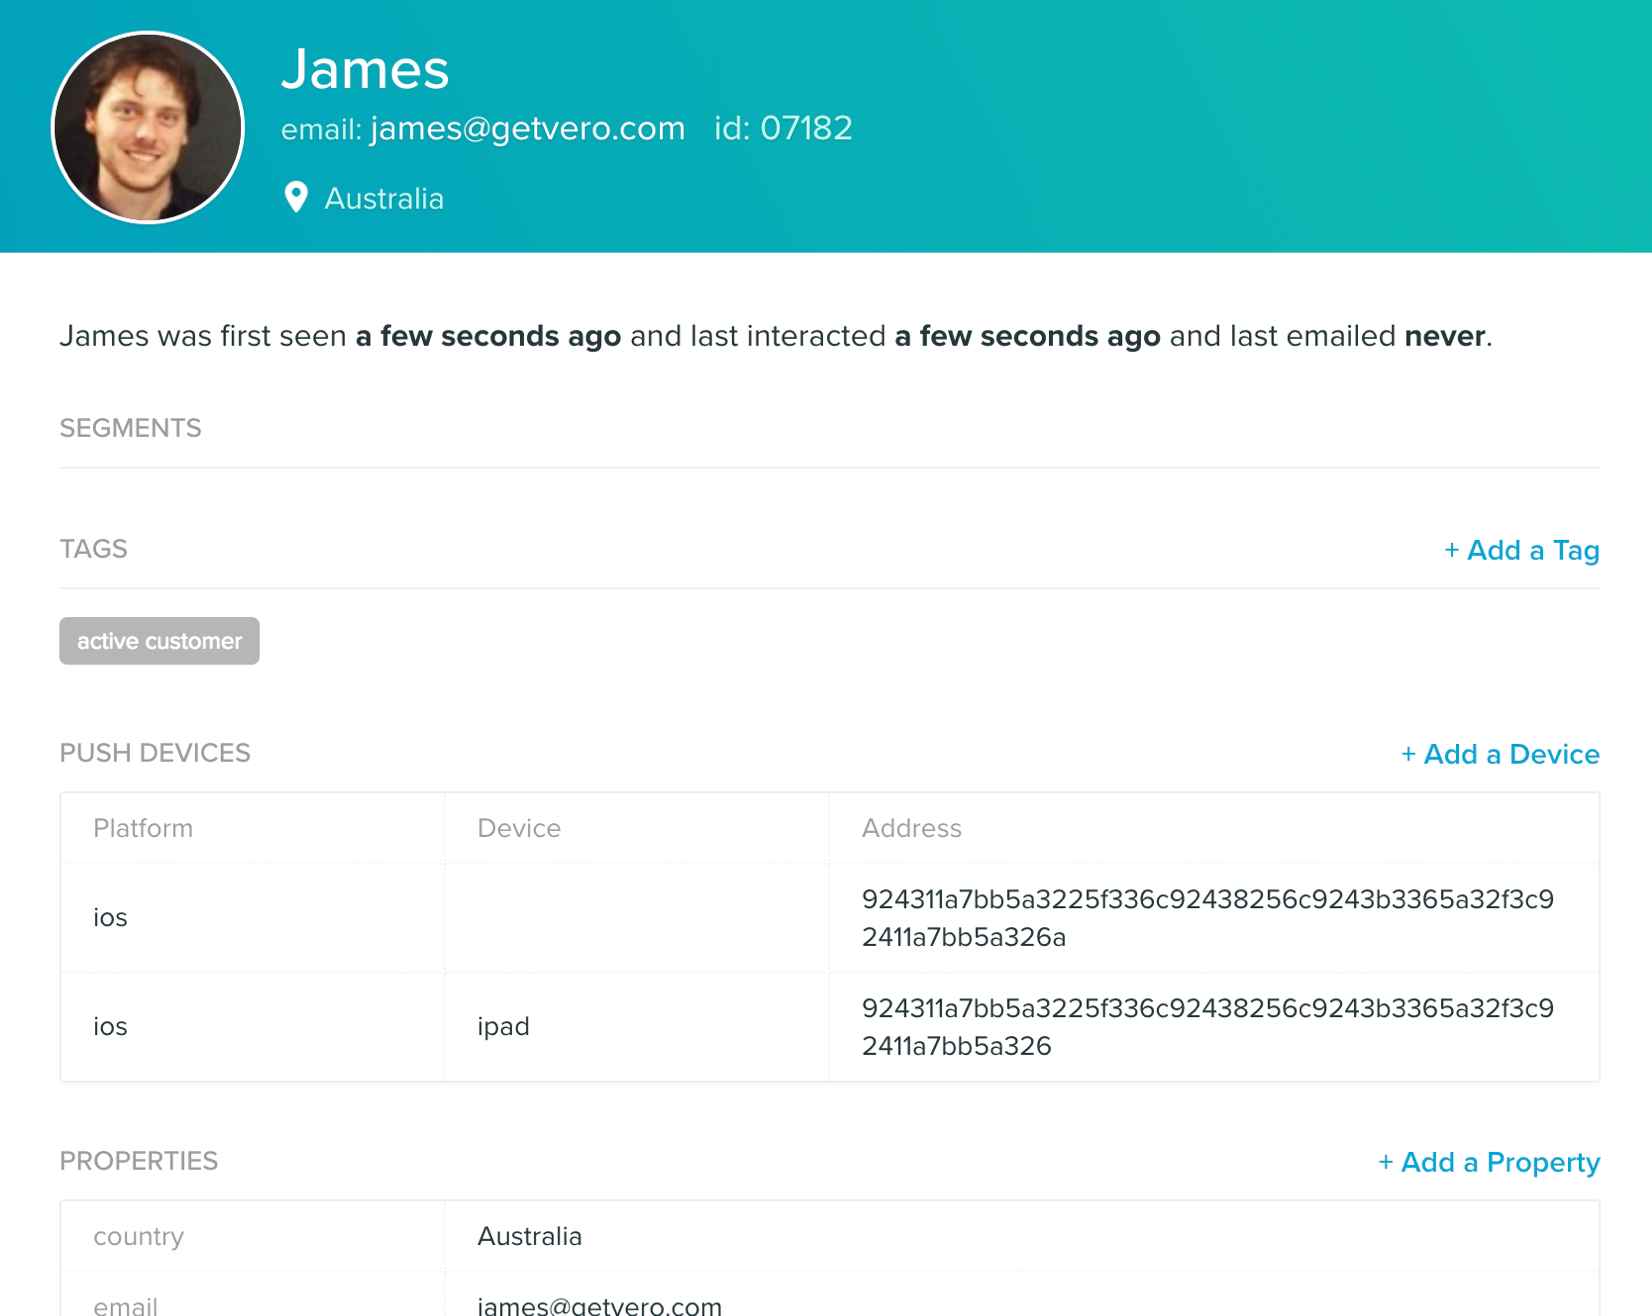
If so, you can use this profile to send and receive test messages on your own device.
b. Send a test push notification
Navigate to the push notification campaign that you want to test and select 'Test Push'.
Using the preview modal, search for and select your test profile. Note that Vero will search for device_tokens that match the platform(s) selected for a given campaign. For example, if you create a new push campaign and select iOS as the platform to target, we will search for users that have an iOS device_token set.
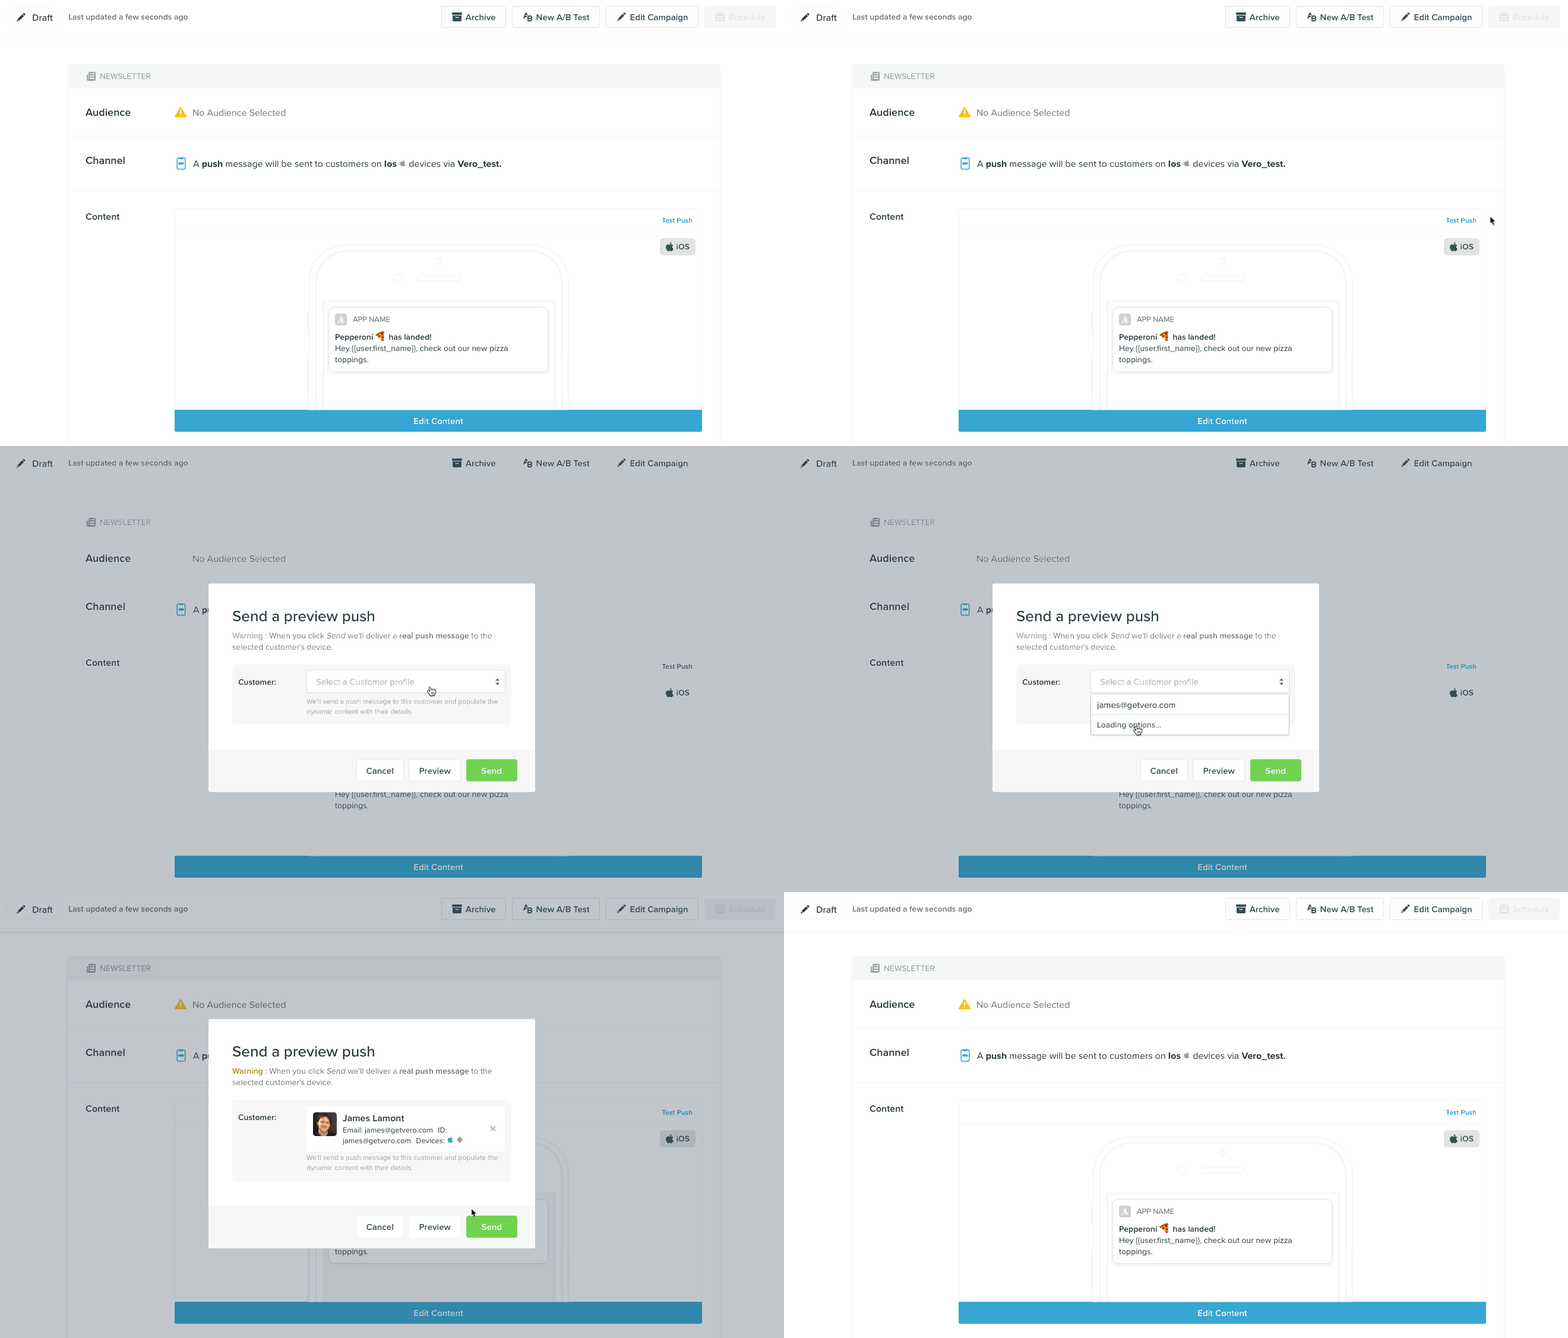
Once you've selected your test profile, hit Send and Vero will then deliver a test version of the push message to your device.


