Previously known as Fusion (or External Attributes) in Vero 1.0. In Vero 2.0 we’ve updated both the functionality and name to Data Feeds to align with industry-standard terminology and more accurately describe the feature’s capabilities.
Setting up a Data Feed
To begin using Data Feeds, follow these steps to set up your endpoints at the project level: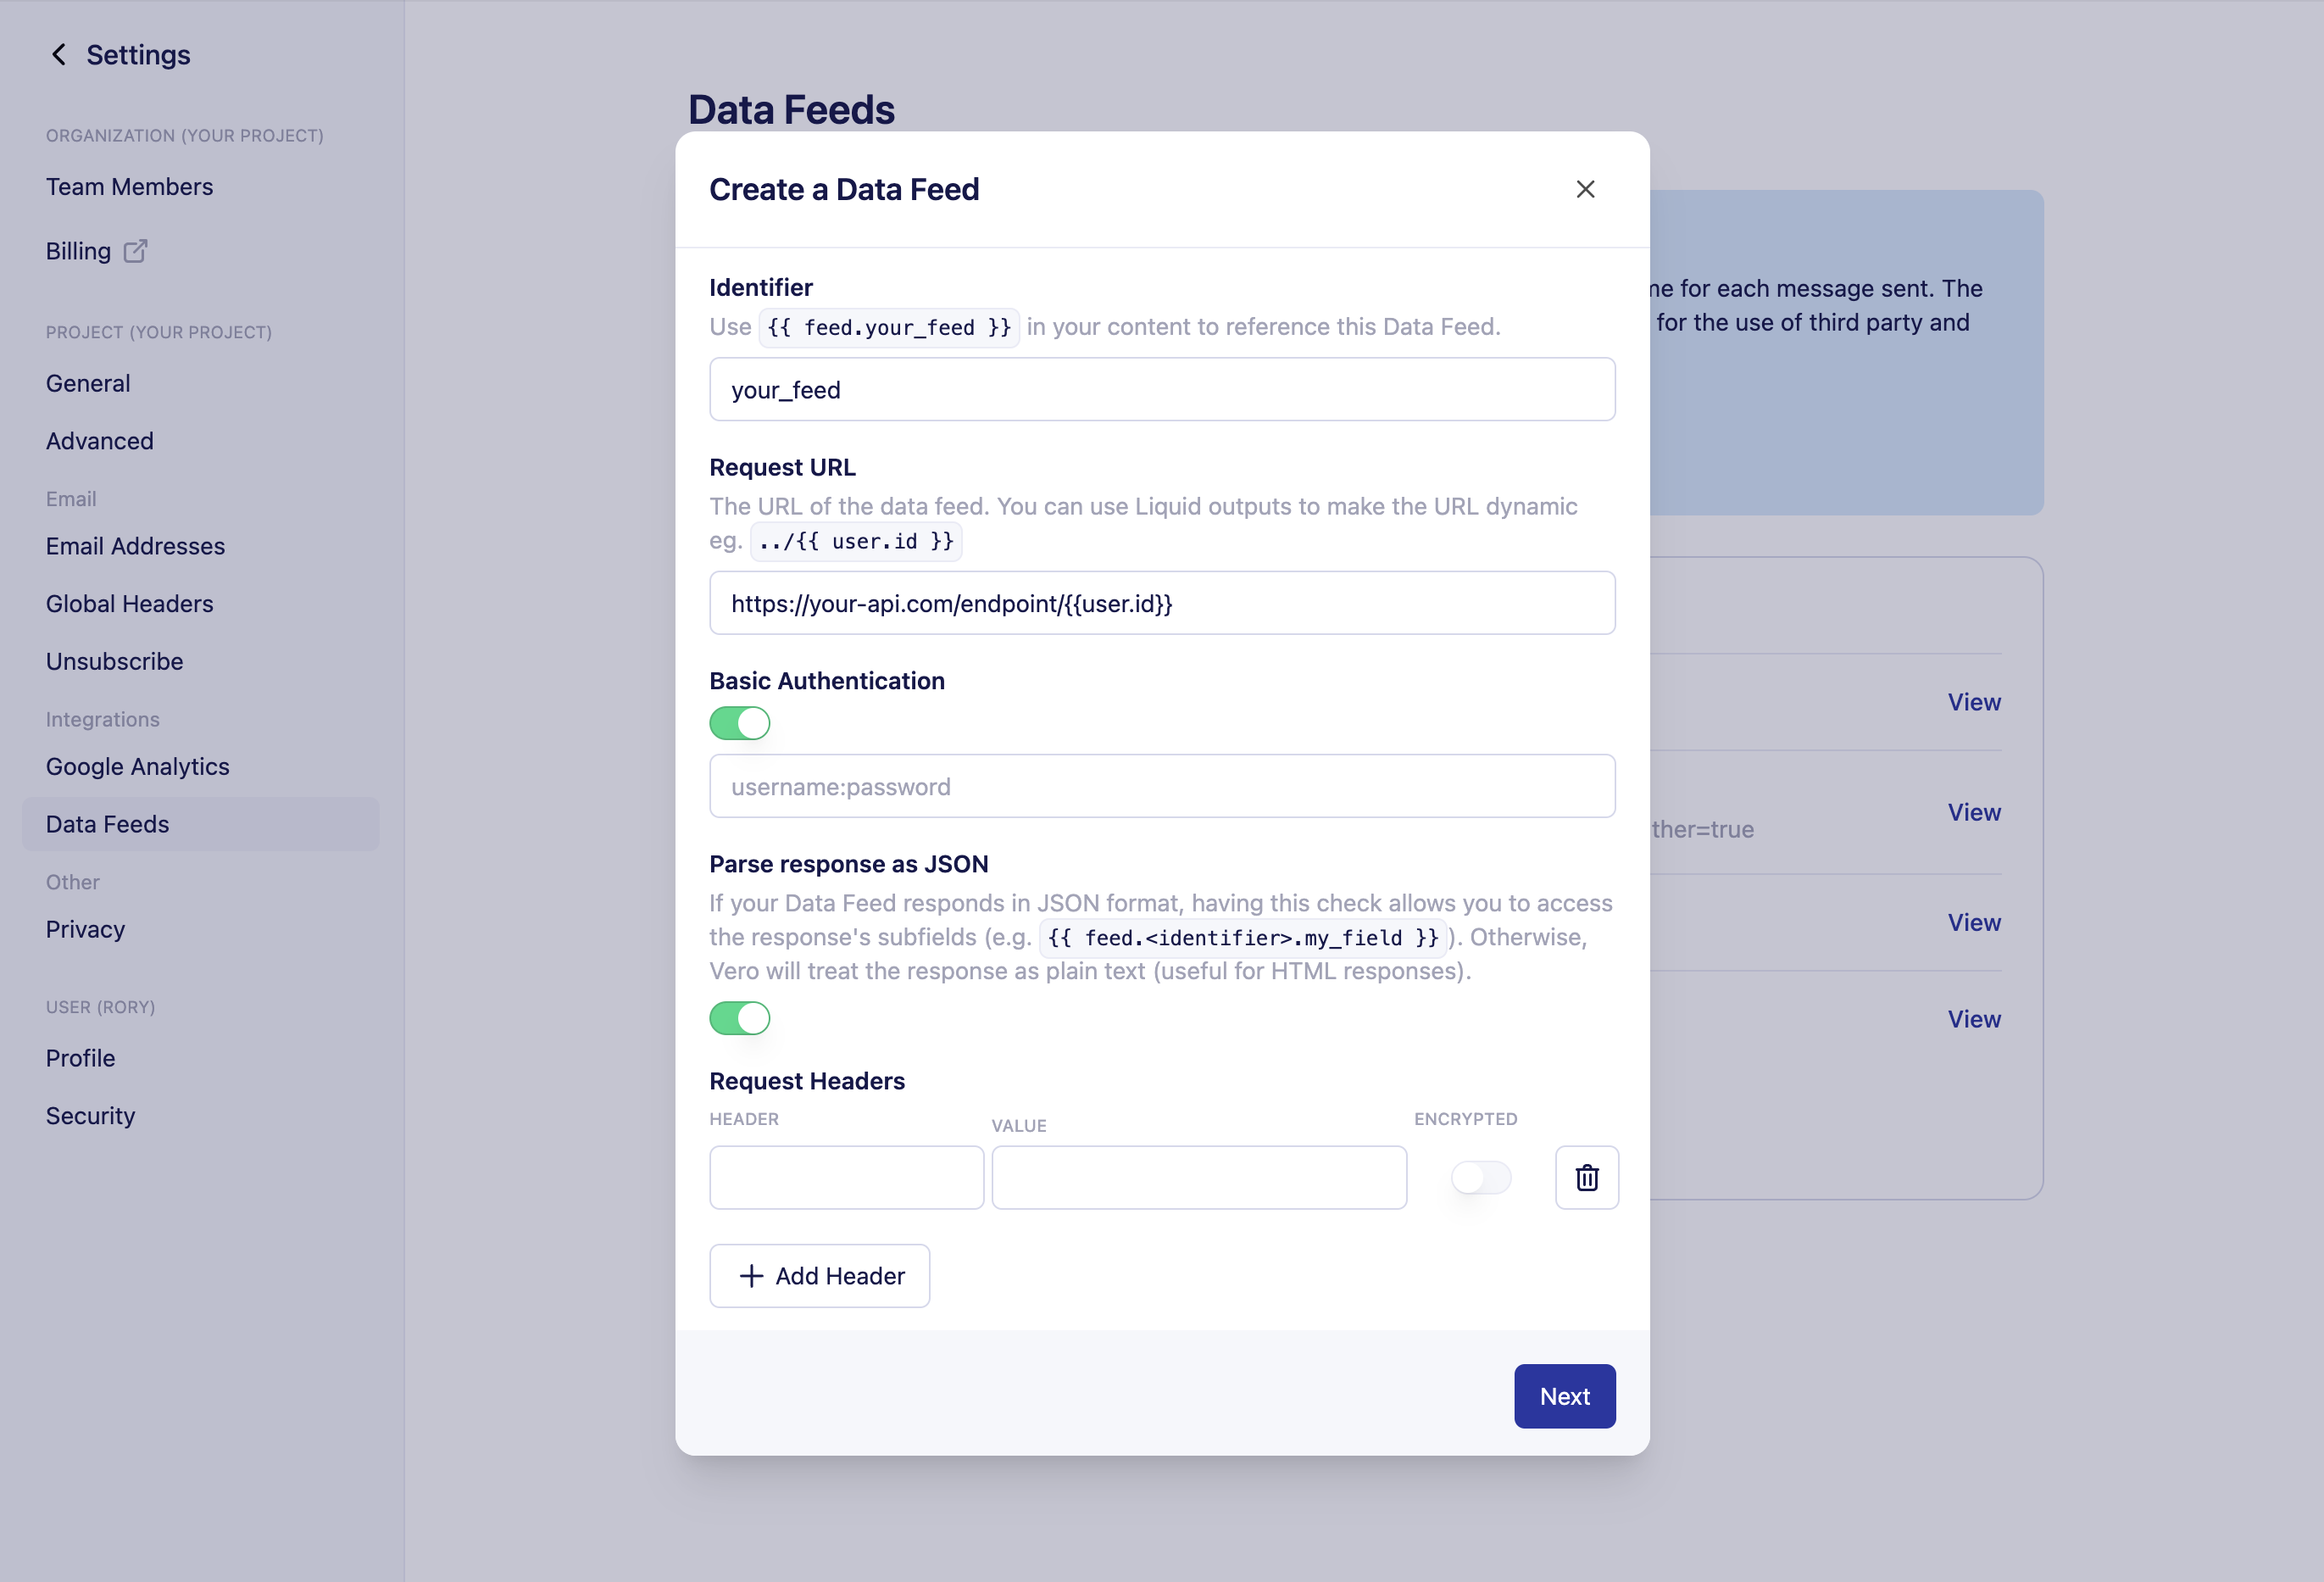
- Navigate to the Data Feeds Section: Open your project settings and locate the new Data Feeds section.
- Add a New Endpoint:
- Identifier Assign a descriptive, unique name (for example,
product_recommendations). This name is what you will use in your Liquid merge tag. Your endpoint name will be converted to snake_case (lowercase + underscores) for use in your campaigns via Liquid ie{{feed.product_recommendations.product_name}} - Endpoint URL: Enter the HTTPS URL of your API endpoint. ie.
https://api.example.com/data- You can add dynamic user or event properties to your endpoint url using Liquid. ie
https://api.example.com/data/{{user.email}}orhttps://api.example.com/data?{{event.property}} - Any user property included in your audience or saved to Vero Cloud can be used in your endpoint.
- Event properties added to the endpoint url will use data from the trigger event from the campaign.
- You can add dynamic user or event properties to your endpoint url using Liquid. ie
- Basic Authentication : If you endpoint uses basic auth, use this setting to add your credentials.
- Parse response as JSON: Use this setting to define if the response of the endpoint is formatted as JSON or not. Once enabled, you can access specific fields in the response of the data feed. If the response payload is not JSON, deselect this option to treat the payload as plan text, useful for HTML outputs.
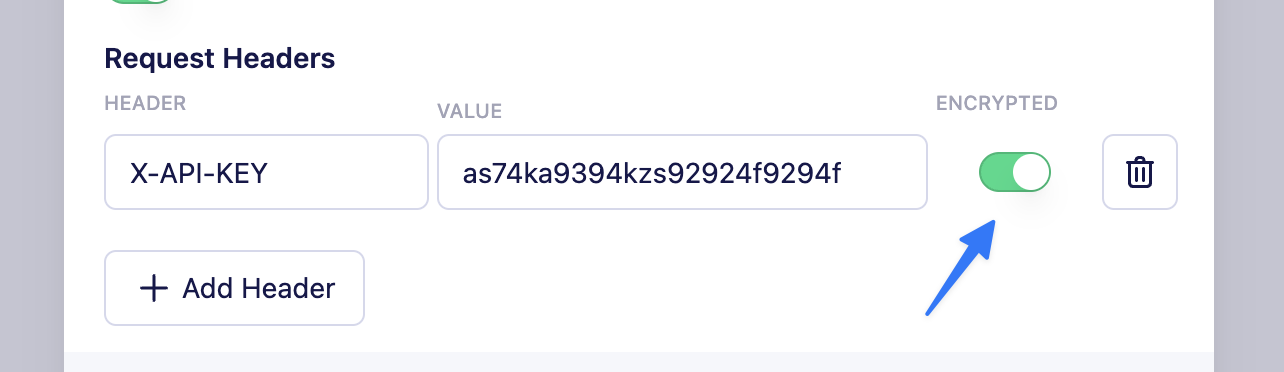
- Custom Request Headers: If your API requires authentication beyond Basic Auth (such as API keys or tokens) or any additional request headers, you can add them here.
- Identifier Assign a descriptive, unique name (for example,
- Save Your Endpoint: Once configured, the endpoint is available to use in any campaign using Liquid syntax.
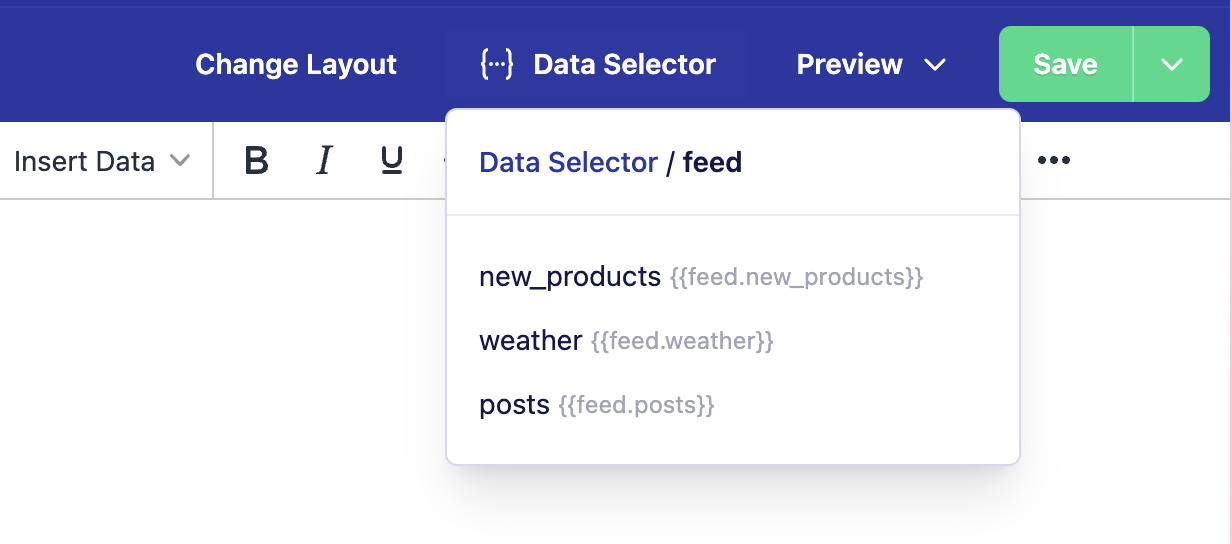
Using Data Feeds in your campaigns
After setting up your Data Feed, you can incorporate external data into any campaign using Liquid tags in the message content.Referencing Global Data Feeds
Once you have configured an endpoint with a friendly name eg.book_recommendation you can reference its data in message content using Liquid like so:
JSON Format:
When using the JSON format, you can access specific fields from the response in your content. If your JSON response looks like this:
Authentication
Data Feeds support multiple authentication methods to ensure secure data retrieval:Basic HTTP authentication
In the Data Feeds settings, you have the option to include basic HTTP authentication directly in the endpoint URL.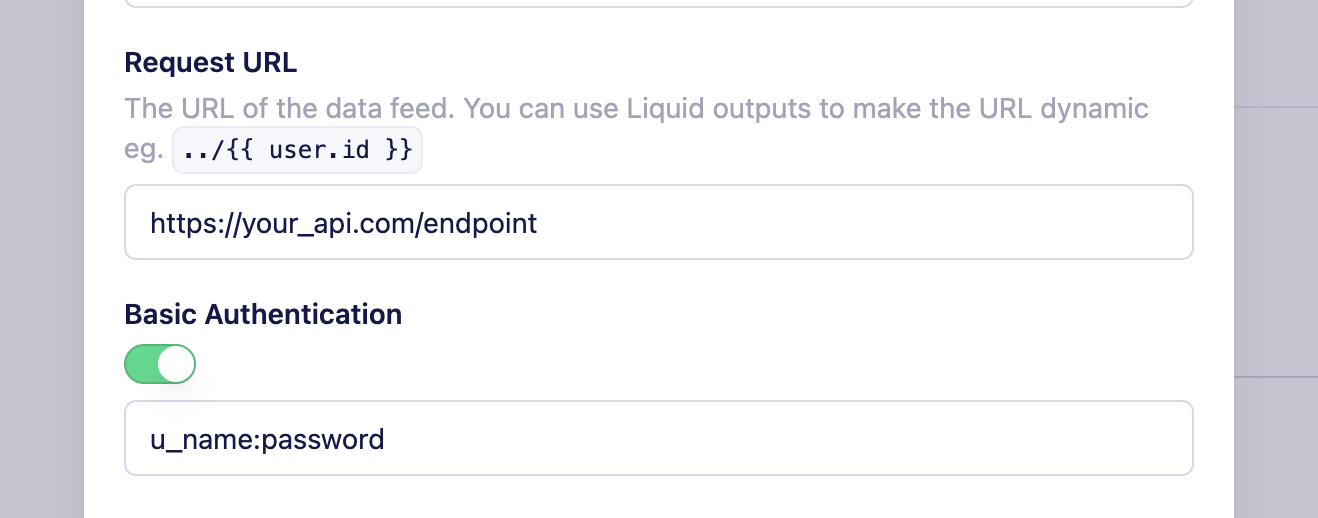
Header-Based authentication and custom headers
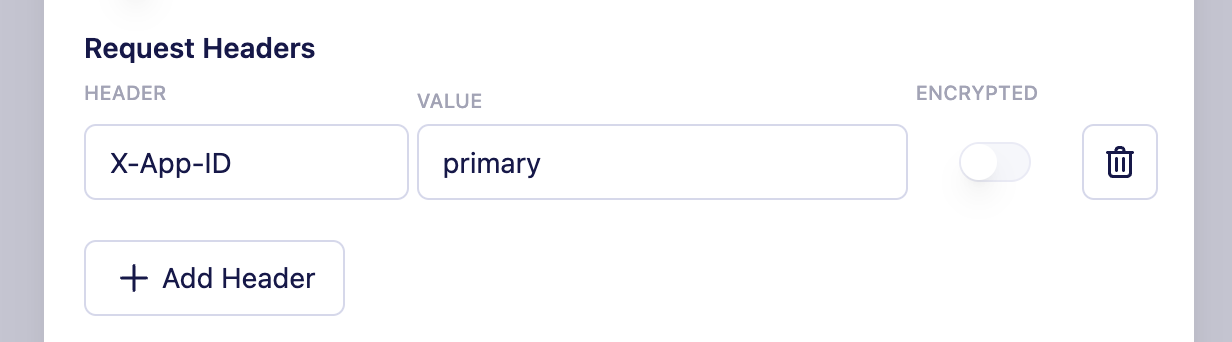
Custom header encryption
Response and error handling
- Successful Responses: A
200HTTP response code indicates success, and your email will include the fetched data. - Empty or No Content Responses: If your endpoint returns a
204status or returns a200status with an empty response body, Vero will discard the email to prevent sending incomplete content. - Error Handling and Retries: For response codes
400-599, Vero automatically retries the request up to five times at increasing intervals. This ensures that emails are sent only when complete data is available.
Testing your Data Feed endpoints
We recommend testing your endpoint to ensure it returns the expected data structure. We also recommend using sample user data in your endpoint URL (for example,https://api.example.com/customer/{{ user.id }}) to verify the returned data before sending your campaigns.