Preparing to use event triggers
Before setting up an event-triggered campaign, you must ensure that your project is already tracking user events in Vero. If you haven’t set this up yet, follow these steps:- Install the Vero Tracking library - Add the Vero Tracking API to your website or app, or set up an integration (e.g., Segment.com).
- Create a Track API key - An admin user must log into your Vero project and generate a Tracking API Key in the settings.
- Track your first event to Vero - Once your tracking setup is complete, send test events to Vero to verify that events are being tracked correctly.
Setting up an event triggered campaign
Once user events are being tracked in Vero, you can create a campaign triggered by any of those events. Here’s how to setup an event triggered campaign:- In the Trigger panel of your campaign, click Edit, then select Event Trigger under the “Automated” section.
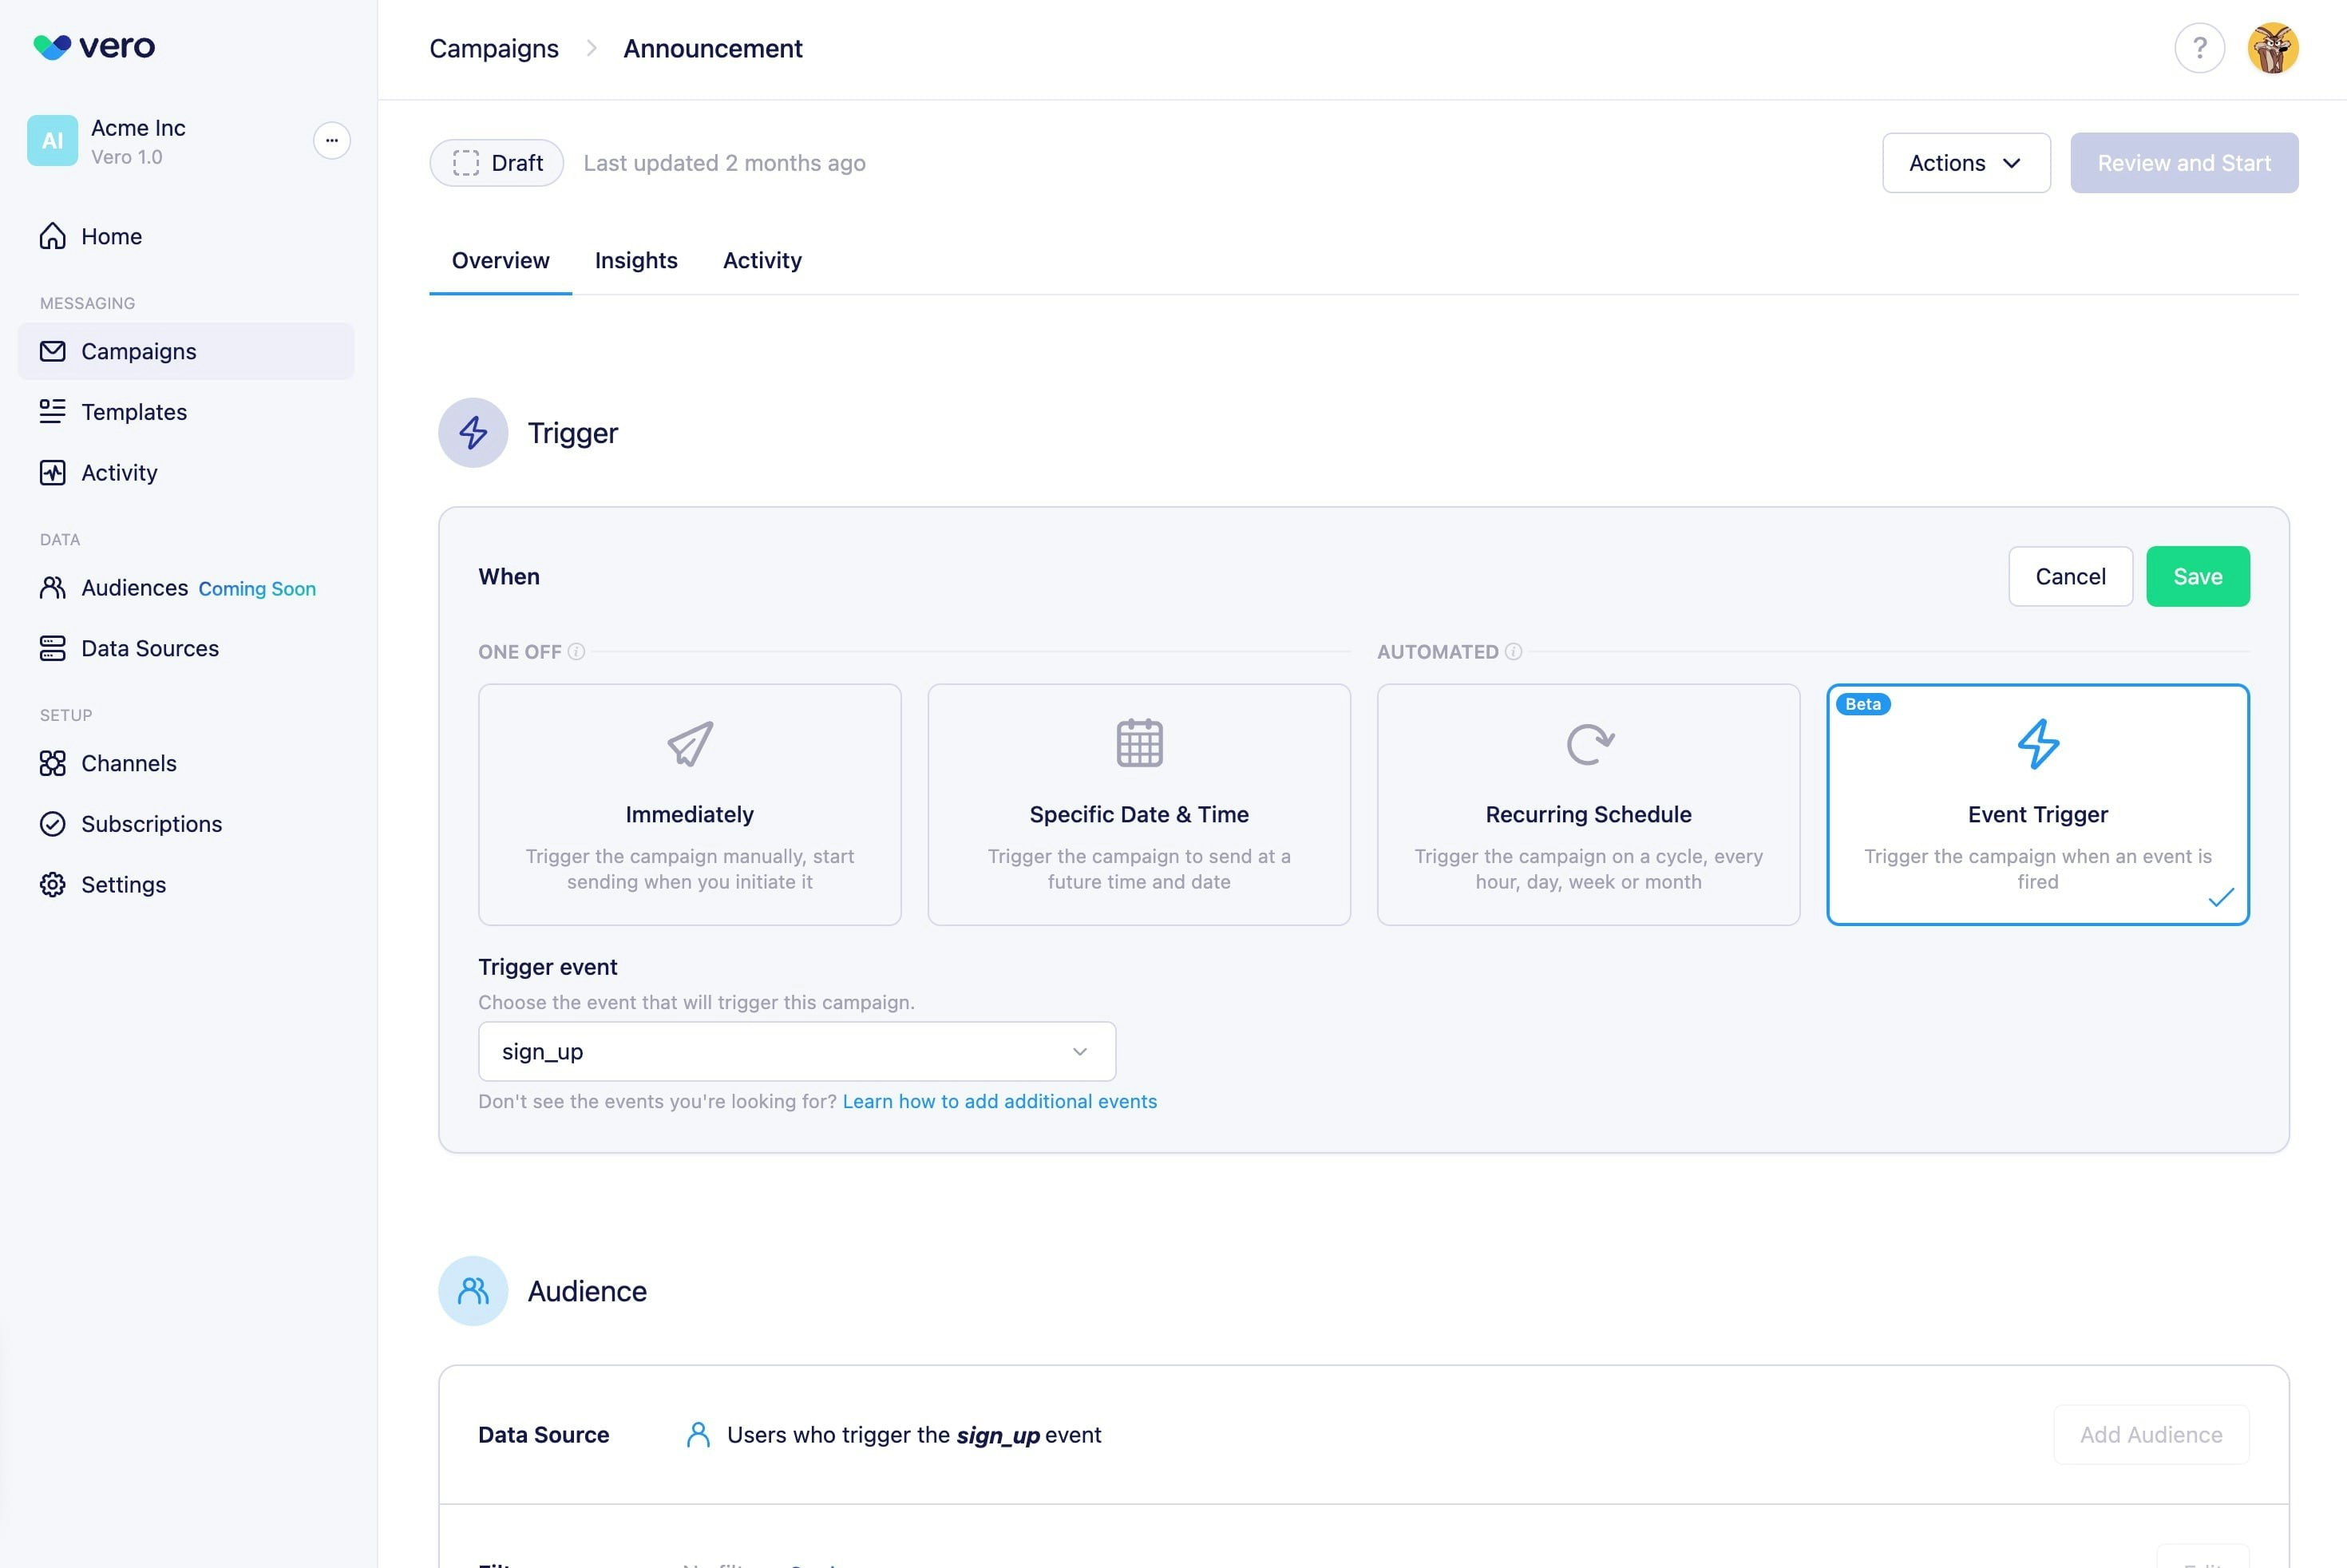
- From the dropdown menu, choose the event that will trigger the campaign.
- Example: If you want to send a welcome email when users sign up, select an event like
sign_up. Users who trigger the selected event will receive the campaign every time they trigger this event.
- Example: If you want to send a welcome email when users sign up, select an event like
- After selecting an event trigger, the Audience panel will automatically update to reflect “Users who trigger
sign_up.” - Add Content to your message:
- Choose a channel (e.g., email, push notification).
- Set the From address and Subject.
- Add body content using one of Vero’s content editors.
- Once all required fields are completed, click Review and Start to launch your campaign.
- Confirm the campaign details and click Start. Your campaign status will then be marked as Live.
Personalizing Event-Triggered Messages with Liquid
You can personalize event-triggered messages using Liquid templating to dynamically insert event data into your content. When an event is tracked, the data sent with it can be referenced in your message using{{ event.property_name }}.
Example: Personalizing a Welcome Email
If a sign_up event is tracked with:
Viewing campaign and event activity
Once your campaign is live, you can track its performance in real time using the Report Summary and Insights page. These reports include key metrics such as:- Number and % of time the campaign has been Triggered
- Number and % of messages Sent, Delivered, Opened, Clicked
- A historical breakdown and chart of each triggered event and message interaction
- A breakdown of how many times each link in the content was clicked
Stopping a Campaign
If you need to stop a campaign, click Stop in the campaign settings. While stopped, no new messages will be sent, even if users trigger the event.Restarting a Campaign
When restarting a campaign:- Only users who trigger the event after the restart will receive messages.
- Events that occurred while the campaign was stopped will not trigger messages retroactively.
Editing a Live Event-Triggered Campaign
You cannot edit an event-triggered campaign while it is live. To make changes:- Stop the campaign.
- Make your changes.
- Restart the campaign to resume sending messages.