Setting up a custom header on your campaign
Adding a custom header to your emails can be a useful tool for helping recipient email clients differentiate between a spam email and a genuine email and is a current requirement for larger email clients like Google and Yahoo.
They are also useful for allowing customers to unsubscribe from your emails rather than marking them as spam with their email client, in turn impacting your deliverability reputation.
Adding a custom header to your campaign
If you'd like to set up a custom header across all campaigns, you can edit this in the Advanced section of Settings. If you use this option, please note the extra instructions below.
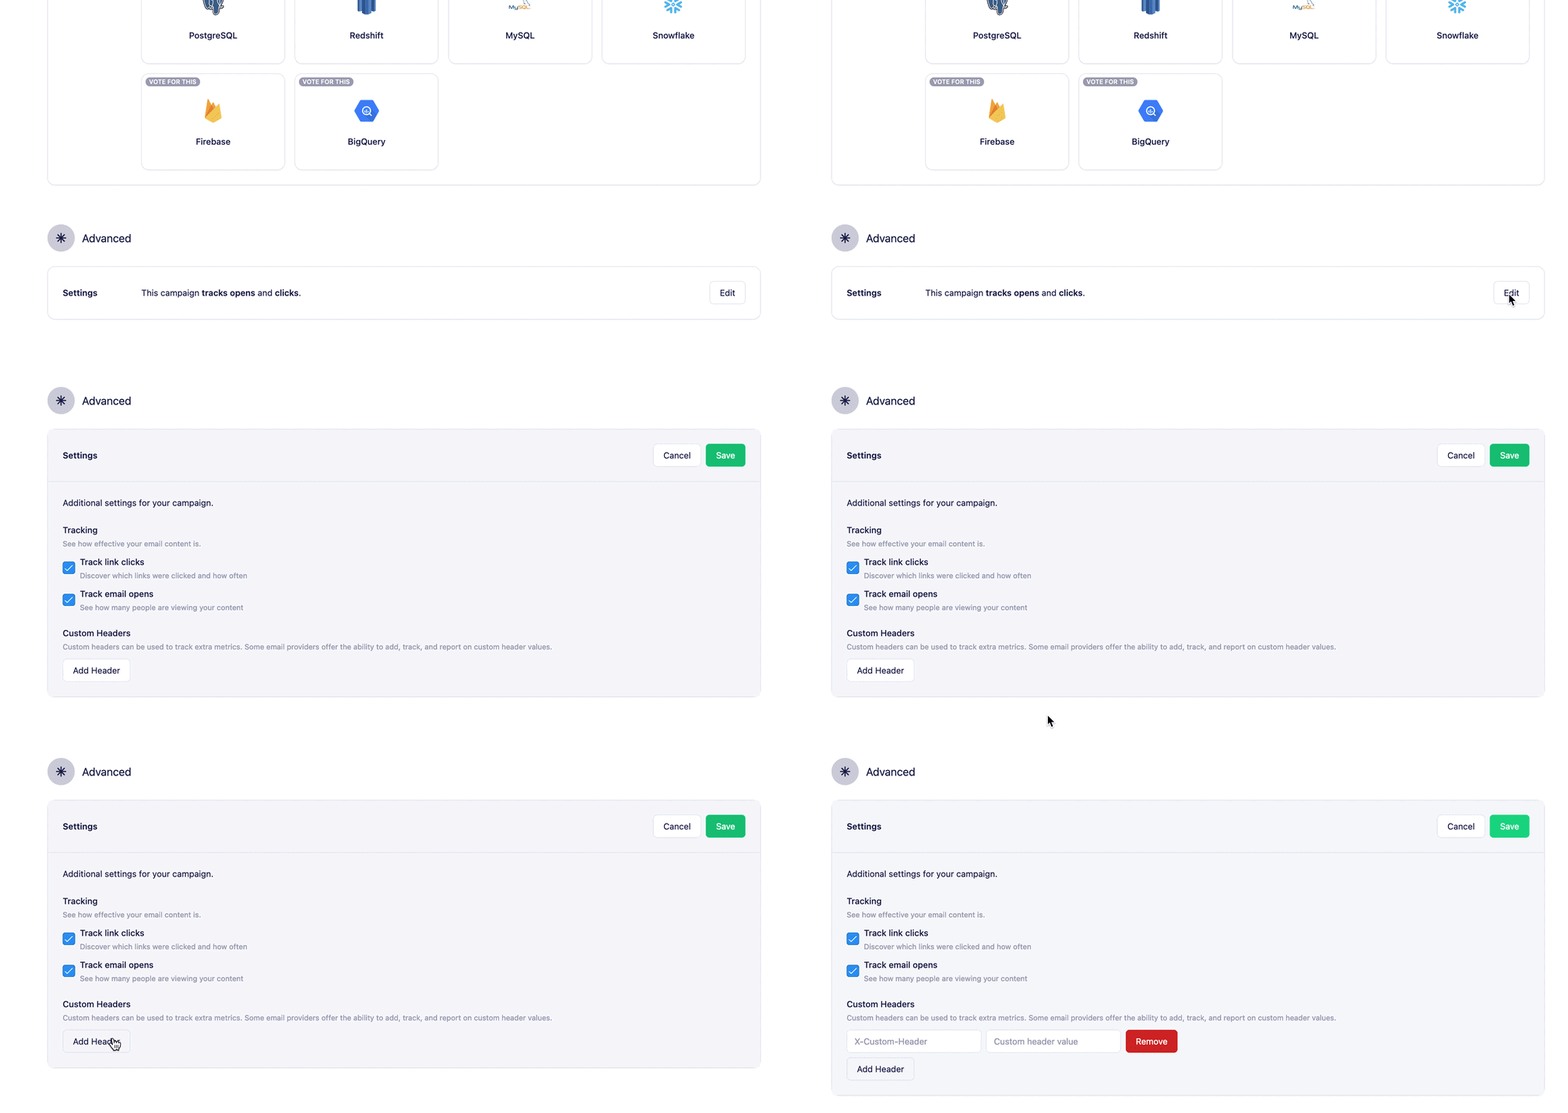
If you'd like to set up a custom header on a per campaign basis you can do this by visiting the Advanced section at the bottom of your campaign and clicking Add header.

Adding a custom list-unsubscribe header
By Default, Vero automatically adds the one-click list-unsubscribe option across all campaigns.

This can be added as a custom header in your Vero campaign by using
list-unsubscribe: <mailto:unsubscribe@domain.com>,<{{url.one_click_unsubscribe_link}}>

The mailto: address (ie. unsubscribe@yourdomain.com) should be a valid email address that you control. It must be monitored, and emails sent to that address will need to be unsubscribed.
Requirements for custom list-unsubscribe headers
The following is for customers that want to add their own custom list-unsubscribe option rather than using the default option provided by Vero.
- Using a One-Click URL: The URL used in the
list-unsubscribeheader must be a one-click unsubscribe endpoint. This endpoint must be capable of accepting a POST request in the following format:
POST /unsubscribe/example HTTP/1.1 Host: solarmora.com Content-Type: application/x-www-form-urlencoded Content-Length: 26
List-Unsubscribe=One-Click
The endpoint should also include parameters that identify the user so they can be unsubscribed (e.g.?user_id={{ user.id }}).
- Adding the list-unsubscribe-post header: If you use a
list-unsubscribeheader with a URL, you also need to include thelist-unsubscribe-postheader:
list-unsubscribe-post: List-Unsubscribe=One-Click
Additional Resources
For more detailed information on setting up one-click unsubscribe headers, refer to the following resources:


