What are segments?
Segments are dynamic customer audiences that update automatically as your data changes. Unlike static lists, segments continuously evaluate your customer profiles against the conditions you define, adding or removing people the moment they match or stop matching your criteria. Segments let you target campaigns precisely, power automated workflows, organize your audience by value or behavior, and maintain fresh audiences that ensure every send reaches the most current, relevant group. Read more about how segments work in VeroBefore you begin
To create and use segments, you’ll need:- Customer data flowing into Vero – Segments require data to compute. Make sure you’ve set up tracking in your app or website, or imported customer profiles.
- The right permissions – You need “View and Edit” access to create segments. If you don’t see the “Add segment” button, contact your account administrator to update your permissions.
- A clear goal – Know what audience you’re trying to target. Start with business requirements (e.g., “customers who haven’t purchased in 60 days”) rather than technical conditions.
Creating a segment
Step 1: Start a new segment
-
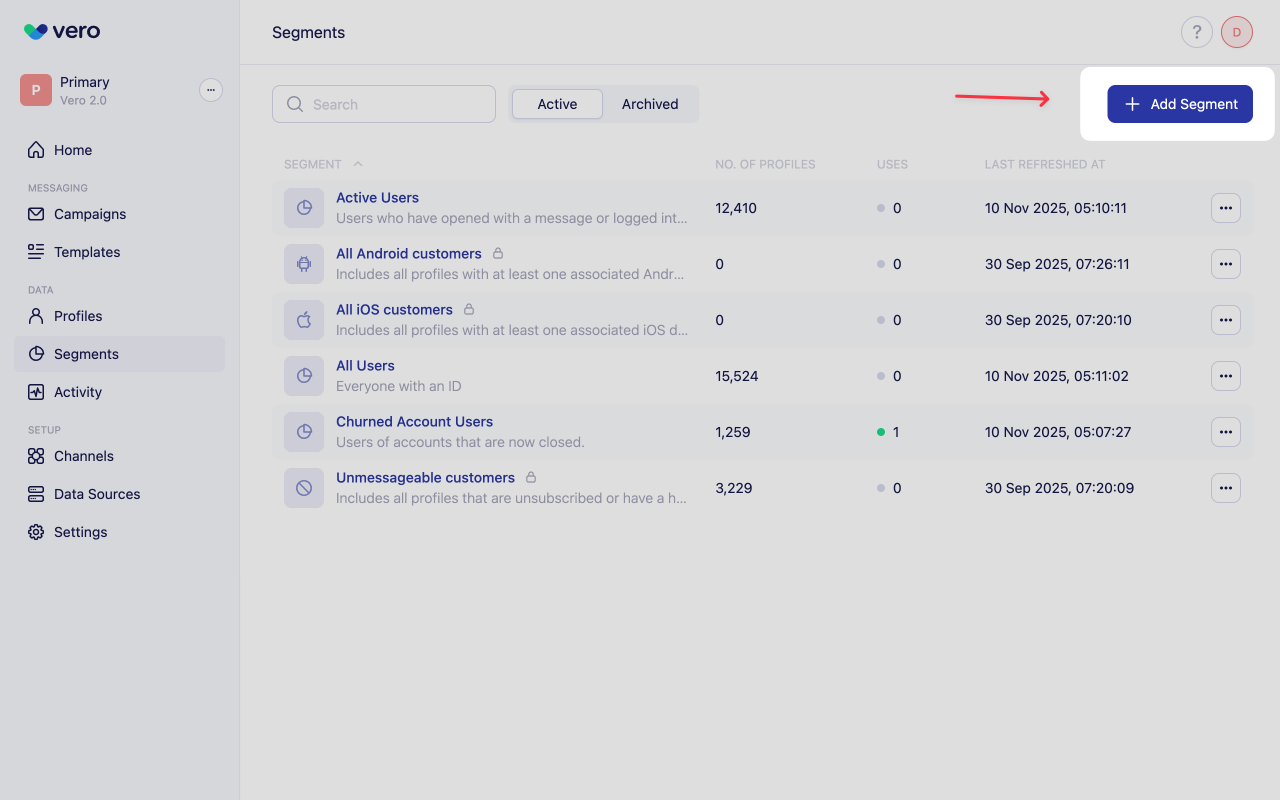
Navigate to Segments from the main menu, or go directly to
connect.getvero.com/segments - Click Add segment
-
In the dialog, configure:
- Name – Use a clear, descriptive name (up to 255 characters). For example: “High-value customers – $500+” or “Inactive users – 60+ days”
- Description (optional) – Document the segment’s purpose, any special logic, and the expected audience size. This helps your team understand and maintain the segment later.
- Type – Select Standard to use the visual condition builder. (SQL segments will be available in the future)
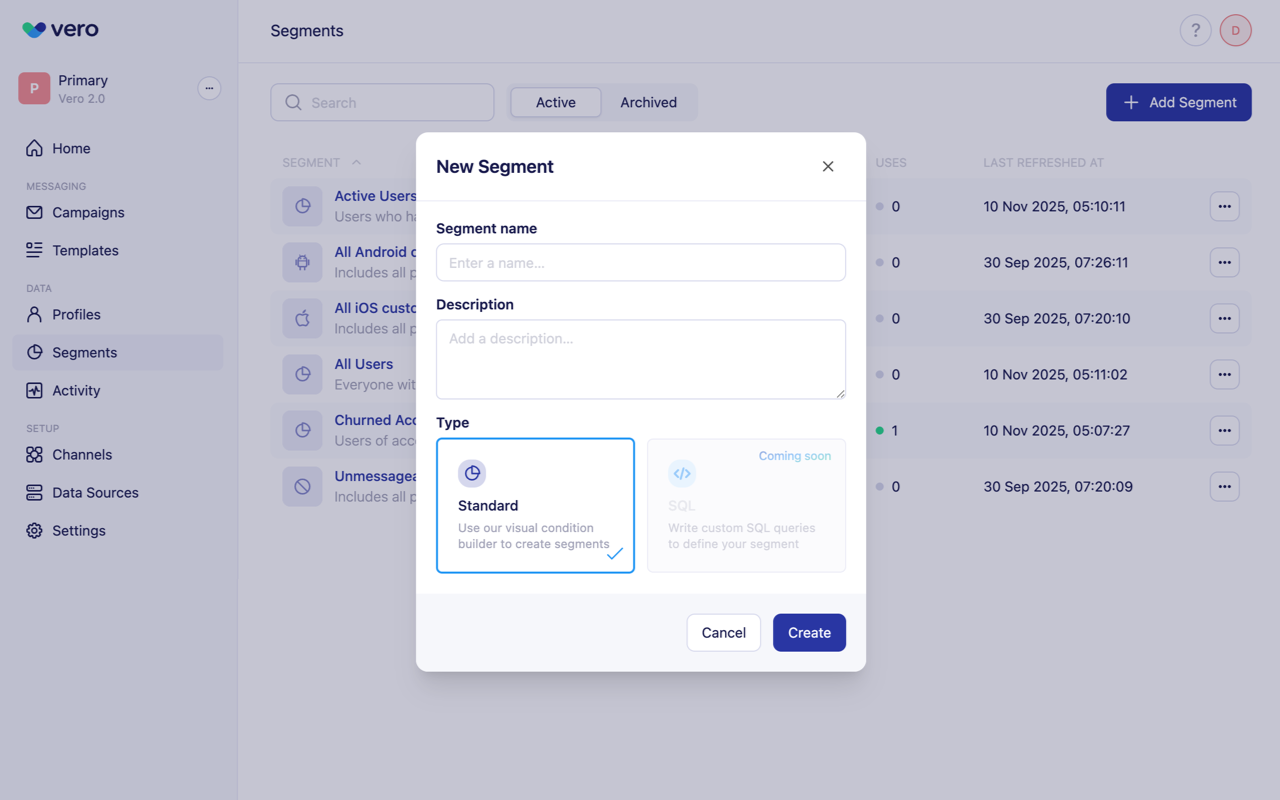
- Click Create segment
Step 2: Define conditions
The segment builder uses condition groups and conditions to define your audience:- Conditions are individual rules that evaluate customer data (e.g.,
email contains "@[company.com](http://company.com)"orlast_purchase_date < 30 days ago) - Condition groups combine multiple conditions using AND or OR logic
Adding your first condition

- Click Add condition in the builder
- Select a condition type:
- User Properties – Include or exclude users based on their user properties, such as
id,email,first_name,created_atoractive_user. - User Tags - Include or exclude users based on the custom tags they have assigned.
- Event - Include or exclude users based on actions they have taken (e.g.
purchased_product,viewed_item) - Segment – Include or exclude users from other segments
- Message – Include or exclude users based on their interaction with messages sent via Vero (e.g. SMS deliveries or Email opens and clicks)
- User Properties – Include or exclude users based on their user properties, such as
- Configure the condition using the available operators (equals, contains, greater than, etc.)
- Some conditions allow adding more filters, to access these filters, click on the More Filters button next to the condition.
- Date filter - Choose a date range for the condition to evaluate (e.g. ever, in the last x days)
- Frequency filter (Event only) - Choose a count of occurrences within the date range (e.g. “exactly x times” or “greater than y times”)
- Property filter (Event only) - Choose a property that must be present in the event data. Property filters are available by first selecting More Filters and then selecting the Add Property Filter button.
- Some conditions allow adding more filters, to access these filters, click on the More Filters button next to the condition.
- Once you’ve added your segment conditions click Save to apply them to the segment. After saving, the segment will automatically refresh. The resulting list of profiles will appear underneath the segment.
Step 3: Preview your audience
Once you’ve saved your conditions, the segment will refresh and will show matching profiles below. View them in the table below the builder: The profile list shows the count of All , Subscribed and Unsubscribed profiles, with options to filter each subgroup and Search the full list by email or id. You can click Refresh to recalculate the segment after adding or modifying conditions. Use the preview to verify your segment captures the intended audience before using it in campaigns or workflows.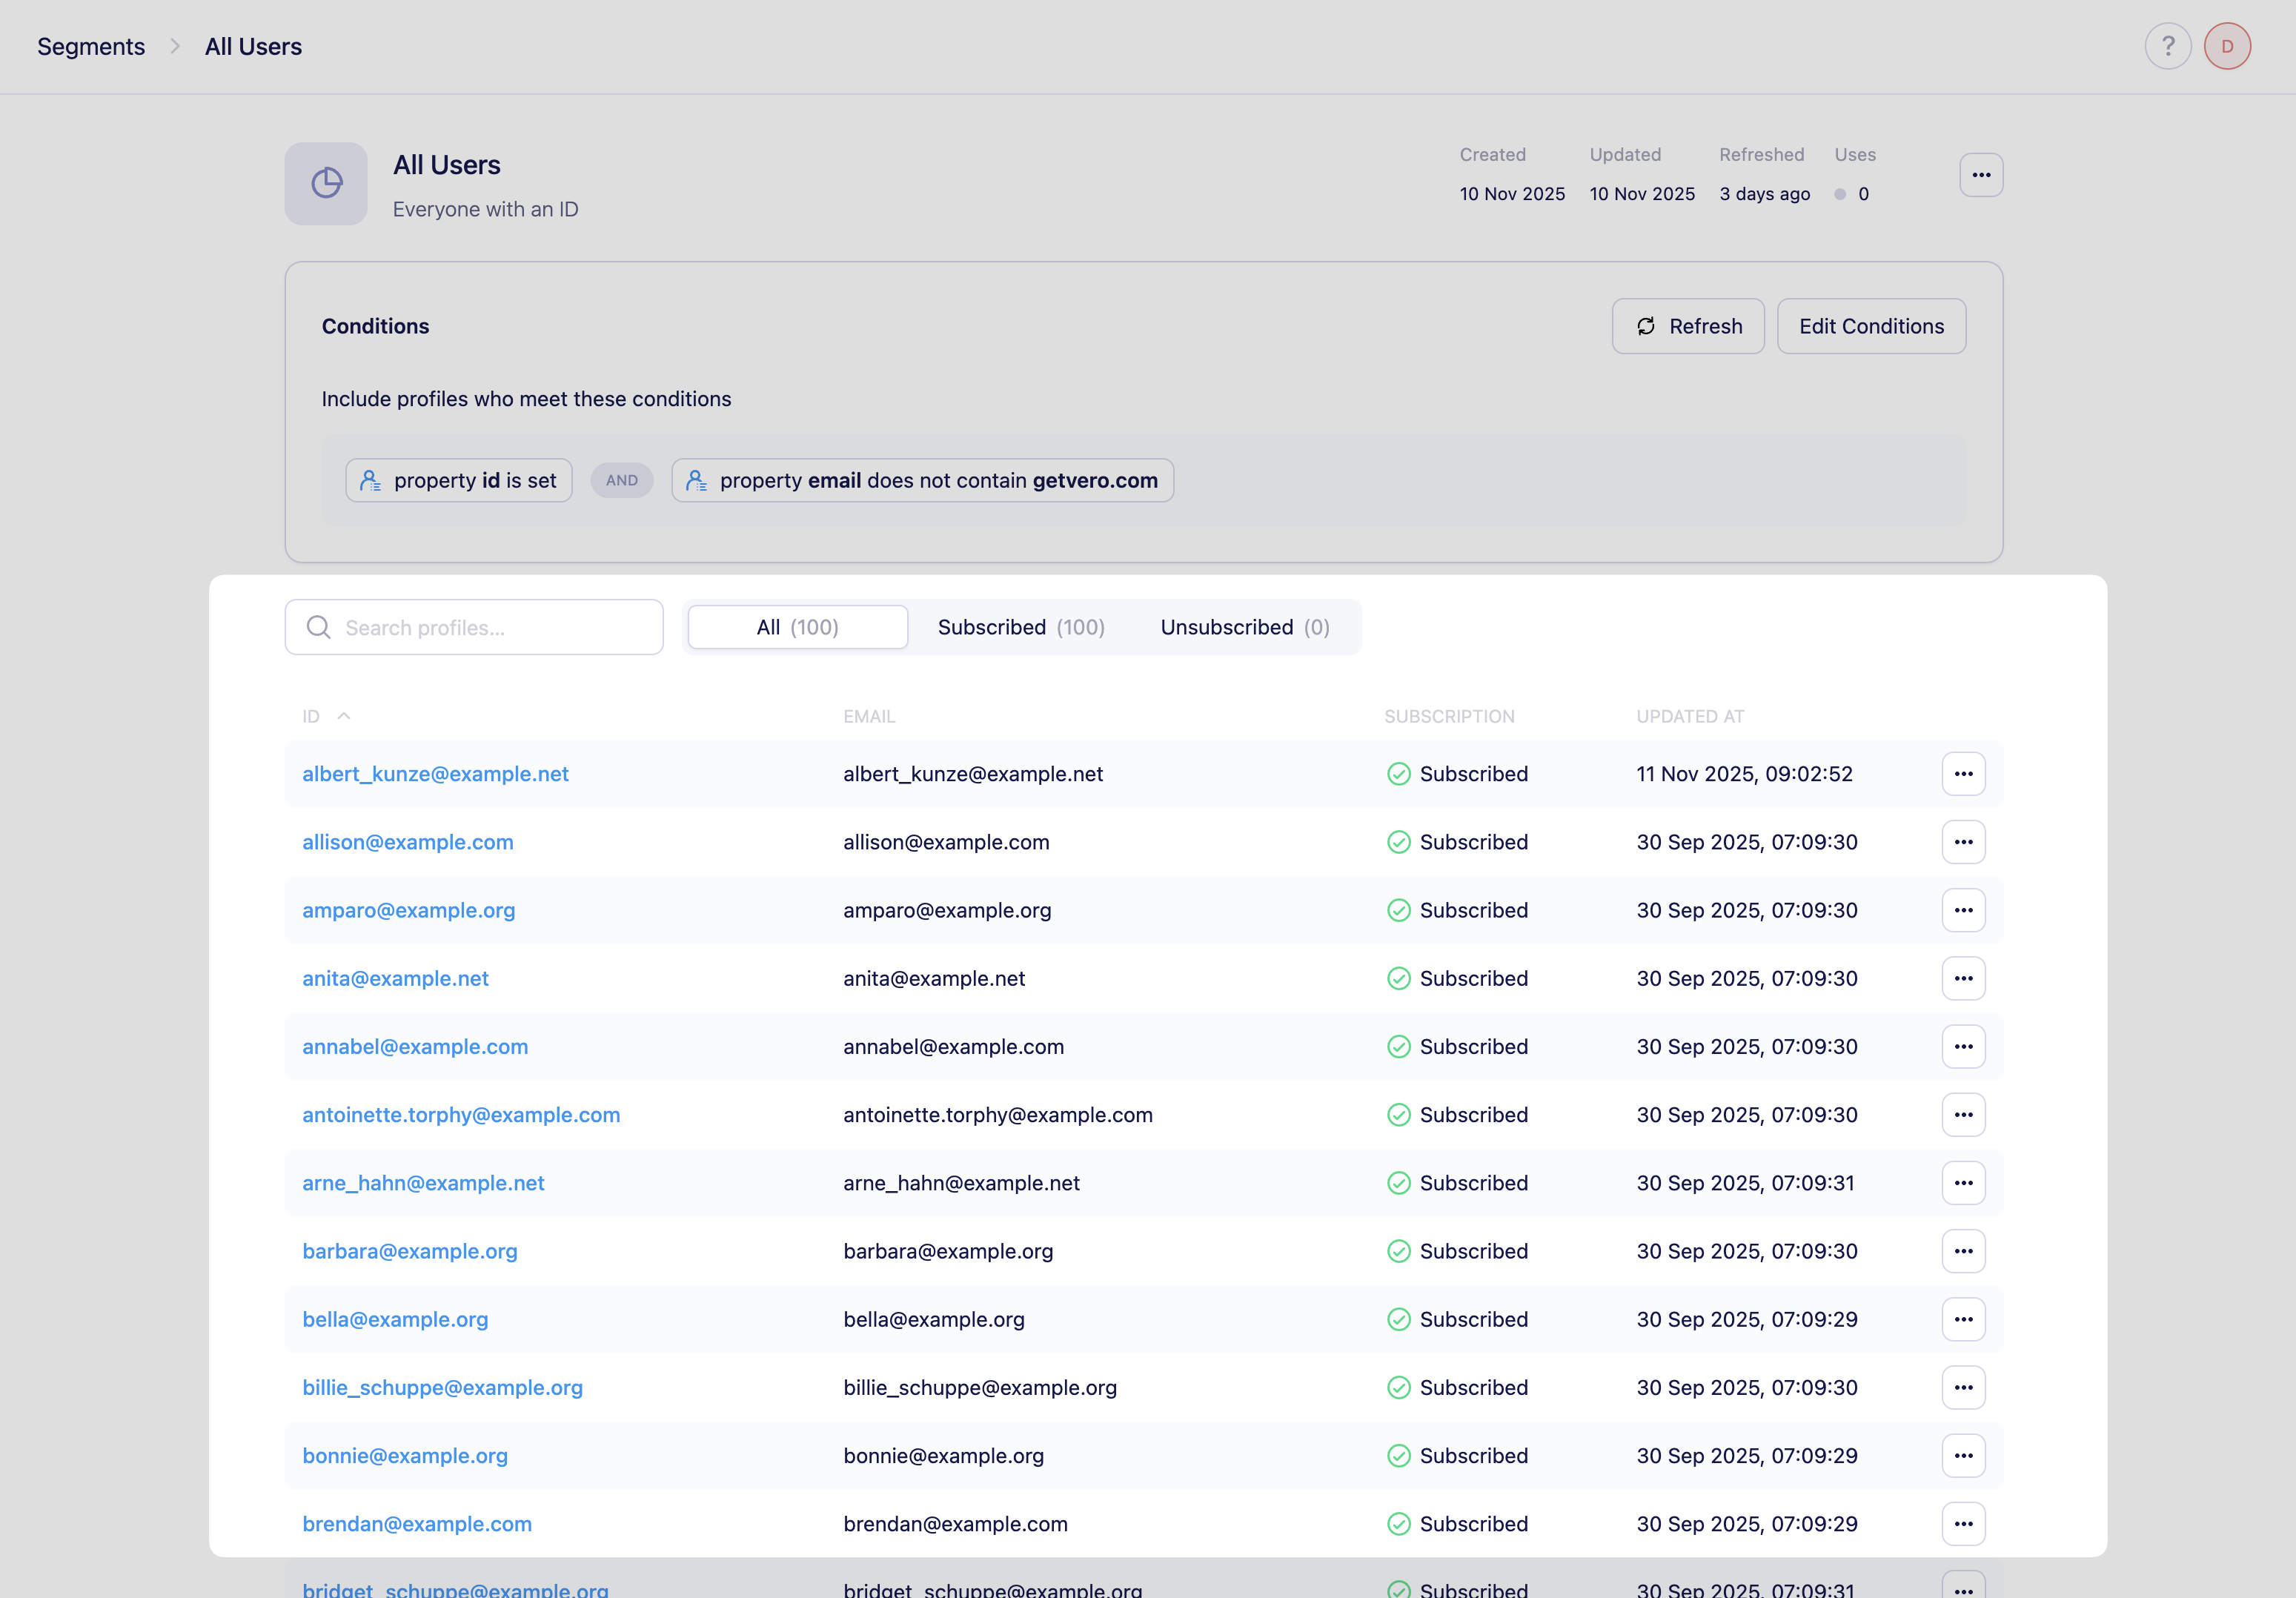
Editing an existing segment
Once you’ve created a segment, you can modify it at any time to adjust your audience criteria or update its name and description.How to edit a segment
- Navigate to Segments from the main menu
- Find and click on the segment you want to edit
- Make your changes:
- Edit segment name or description – Click the segment name or description at the top of the page to edit it inline.
- Modify conditions – Click on any existing condition to edit its settings, or use the Add condition button to add new conditions.
- Remove conditions – Click the Trash can icon on any condition to remove it.
- Duplicate conditions - Click the Duplicate icon to create an exact copy of the condition to quickly create a similar condition.
- Click Save to apply your changes
- The segment will automatically refresh to show your updated audience.
Important considerations when editing
Active usage Before making significant changes to a segment, check where it’s being used by clicking Show usage from the ••• menu. Changes to a segment will immediately affect:- Campaigns targeting this segment
- Workflows using this segment in triggers or branch logic
- Other segments that reference this segment
- Creating a duplicate segment to test your new logic first
- Comparing the profile counts between the original and modified versions
- Verifying a sample of profiles match your expectations before using the segment in active campaigns
Troubleshooting
My segment shows 0 profiles
Possible causes:- Your conditions are too restrictive (try loosening criteria or using OR instead of AND)
- The required customer data hasn’t been tracked yet
- Attribute names or values don’t match exactly (check for typos or extra spaces)
The profile count doesn’t update
Solution: Click the Refresh button to recalculate the segment. Changes to customer data don’t automatically trigger refreshes.I can’t delete a segment
Reason: The segment is referenced in active campaigns, workflows, or other segments. Solution: Click Show usage to see where it’s used, then remove those references first.My segment logic seems wrong
Solution: Break down complex conditions into smaller segments first to test each part of your logic, then combine them once you’ve verified they work as expected. Read more about each of our conditions to learn how each condition works.My segment won’t stop Refreshing
Possible causes:- The segment is too large or complex
- There’s an error in the segment definition