

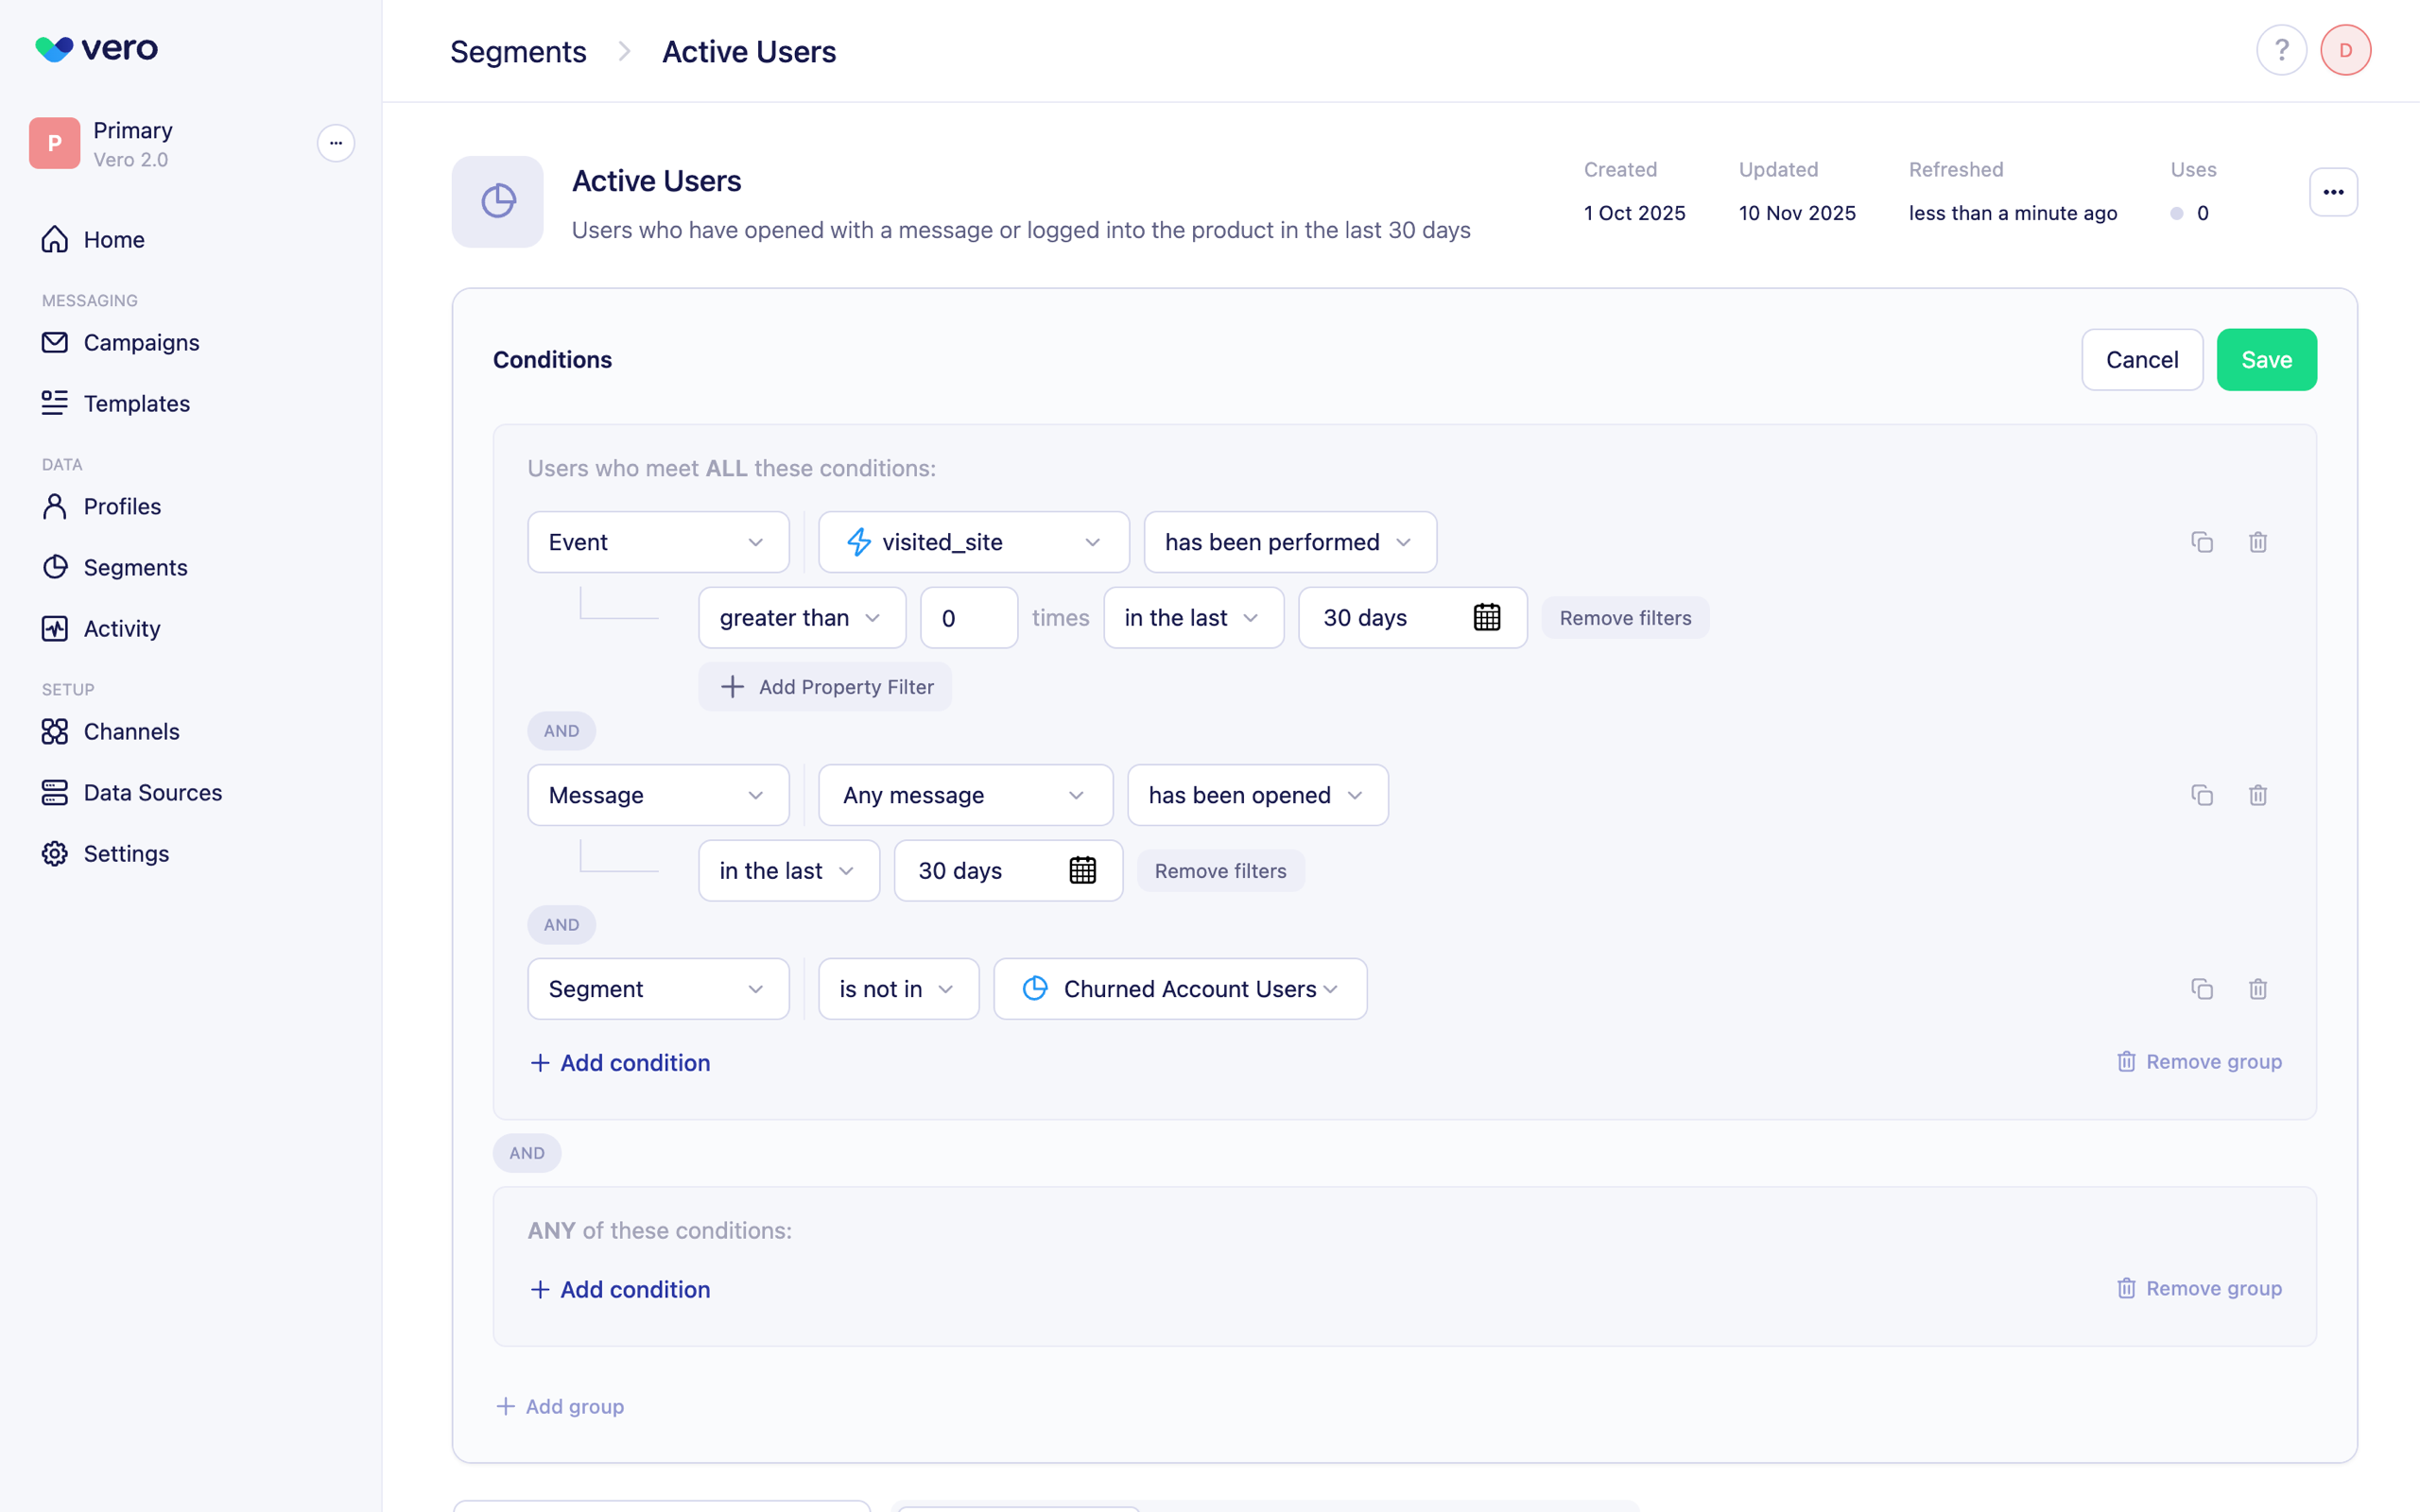
Available conditions
Here’s a list of all available conditions: Base conditionsUser property condition

id, email, first_name, created_at, or any custom properties you’ve tracked.
Operators
Choose an operator to define how the property value should be evaluated. The table below describes each available operator and when to use it:
Value
Enter the specific value to compare against the selected property. The format depends on the property type:
- Text properties – Enter plain text (e.g., “Premium” for a plan name)
- Number properties – Enter a numeric value (e.g. “500” for lifetime value)
- Date properties – Use ISO 8601 format (e.g.,
YYYY-MM-DDfor dates like 2025-11-11,YYYY-MM-DDTHH:MM:SSfor date-times like 2025-11-11T20:58:00, orYYYY-MM-DDTHH:MM:SSZfor UTC date-times like 2025-11-11T09:58:00Z). This ensures consistency when comparing dates across different timezones and systems. - Boolean properties – Enter “true” or “false”
User tags condition

Tag name
Select an existing tag from your account. The dropdown will show all tags currently assigned to user profiles in your workspace. You can only select tags that already exist—to use new tags, first assign them to profiles through your integration or the Vero interface.
Example use cases
- Target customers interested in specific product categories by including profiles tagged with “shoes”, “skirts”, or “trousers”
- Create a segment of customers who attended specific events by including profiles tagged with “webinar_2024” or “conference_attendee”
Event condition
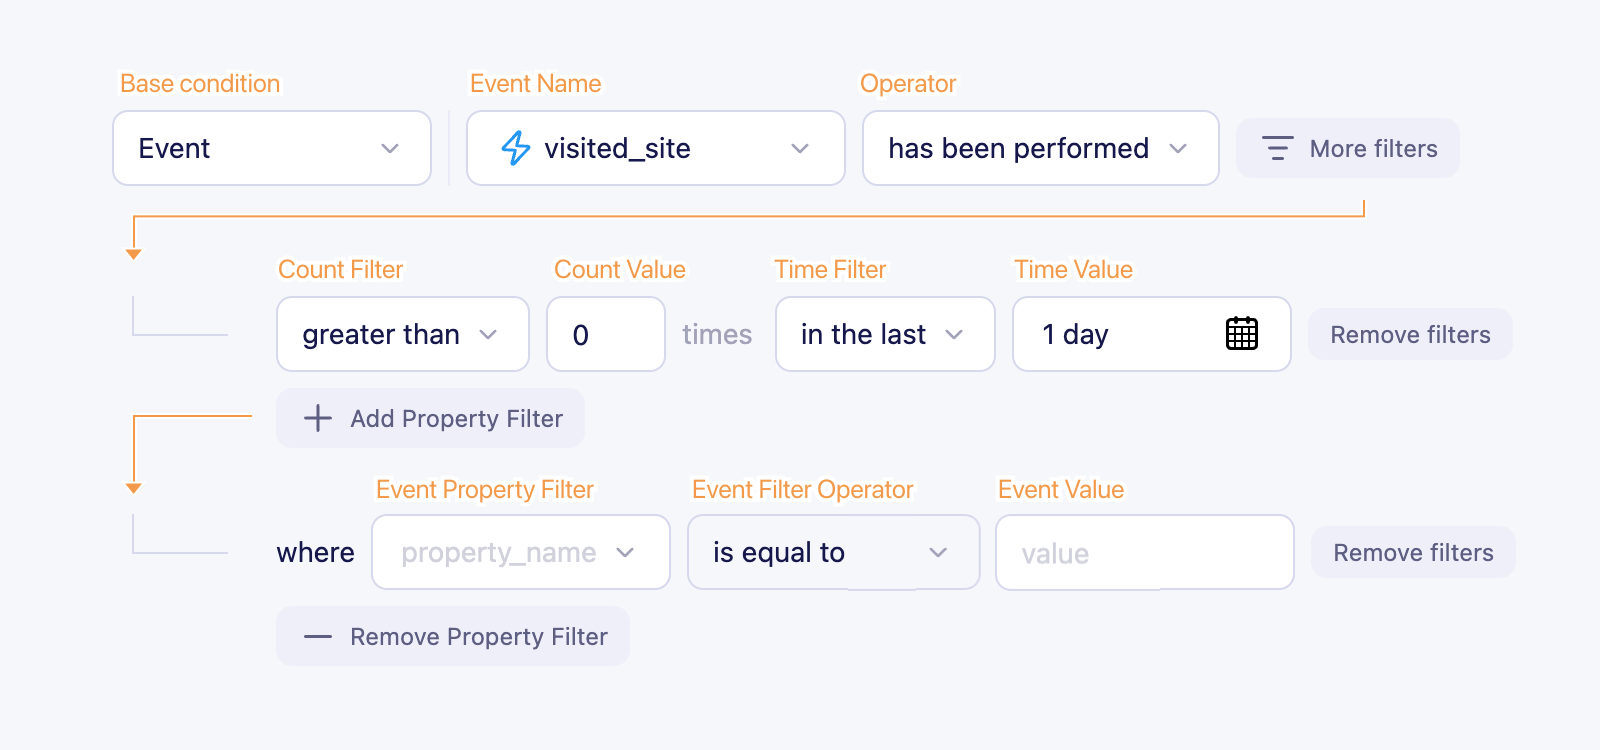
More Filters
By default, the event condition checks if the event has been tracked “ever” (at any point in time).
Click the More Filters button to add more detailed filters for counting occurrences, specifying timeframes, or filtering by event properties.
Count filter
Define how many times the event must have occurred. Select from the following operators and specify a numeric value:
Time filter
Define the time period for evaluating the event:
| Option | Description | | ever | Check the profile’s entire event history with no time limit (this is the default when More Filters hasn’t been clicked) | | in the last | Check only within a specific recent time period (requires setting a time value in days) |
Property filter
Filter events based on specific properties that were tracked with the event. To add a property filter:
- Click More Filters
- Click Add Property Filter below the count and time filters
- Select an event property from the dropdown (this shows all properties that have been tracked on any event—you may need to check which properties exist on the selected event before choosing)
- Choose an operator (same operators as user property condition)
- Enter the value to compare against (see user property condition for value format details)
- Find customers who have purchased more than once:
has been performed "purchased_product"with count filter “greater than 1 times” - Target users who viewed a specific product recently:
has been performed "viewed_item"with property filterproduct_id = "12345"and time filter “in the last 7 days” - Create a segment of customers who haven’t made a purchase yet:
has not been performed "purchased_product"with time filter “ever”
Segment condition

Example use cases
- Create a “VIP customers in North America” segment by combining your “VIP customers” segment with a location condition
- Build a “Engaged non-purchasers” segment by including your “Highly engaged” segment while excluding your “Recent purchasers” segment
Message
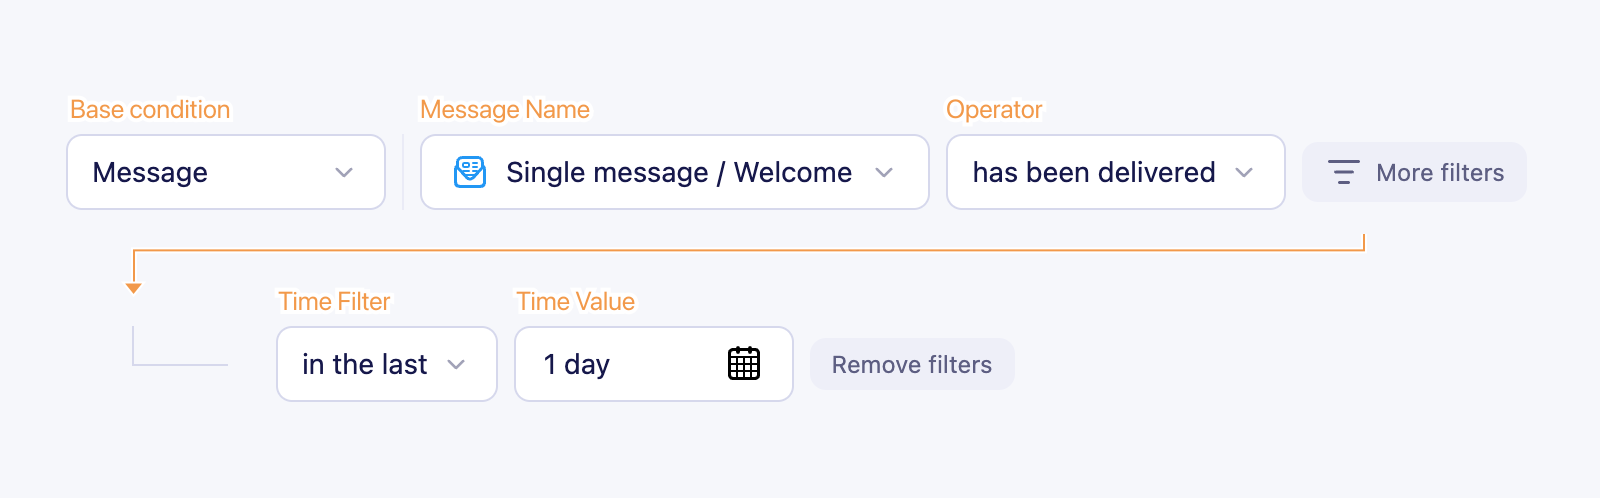
Time filter
Define the time period for evaluating message interactions:
- ever – Check the profile’s entire message history with no time limit (note: this may take longer to calculate as it checks all historical data)
- in the last – Check only within a specific recent time period (requires setting a time value).
- Re-engage customers who were sent your welcome series but never opened it:
has been sent "Welcome Email 1"ANDhas not opened "Welcome Email 1"with time filter “ever” - Create a highly engaged segment of customers who clicked your last promotion:
has clicked "Summer Sale 2025"with time filter “in the last 30 days” - Build a win-back campaign for customers who haven’t engaged recently:
has not openedany message with time filter “in the last 90 days” - Identify customers with delivery issues:
has not been deliveredwith time filter “in the last 7 days”
Using AND and OR logic
- AND – All conditions in the group must be true. Use this to narrow your audience.
- Example:
Country = "United States"ANDLifetime value > 500finds high-value US customers only.
- Example:
- OR – Any condition in the group can be true. Use this to broaden your audience.
- Example:
Country = "United States"ORCountry = "Canada"finds customers in either country.
- Example: