Configure or create a project and enable the BigQuery API
- Login to your Google Account.
- Configure your Google Cloud Platform:
- If you don’t have a Google Cloud Platform project setup already, create one.
- Once you have a project, enable the BigQuery API for it.
- Store your Project ID for later use.
Create a service account
For the most up-to-date documentation on creating a service account, follow the Google Cloud Platform (GCP) documentation. A summary of the steps is below:- In the Google Cloud Console, navigate to IAM & Admin → Service Accounts.
- Select Create service account.
- Enter a name for the service account (e.g.,
vero-bigquery-sync) and click Create and Continue. - In the second step, grant the service account the BigQuery User role. This allows the service account to run jobs and queries.
- Click Done.
- Once created, find your new service account in the service accounts list and click on it to view the details.
- Make note of the service account email (it will look like
vero-bigquery-sync@your-project.iam.gserviceaccount.com). You’ll need this later.
Grant access to your new service account
The GCP documentation outlines how to manage access for your service account. By default, your GCP service account doesn’t have permission to read any data from BigQuery. When configuring your service account, you can choose to either give the service account full access to BigQuery or limit access to the minimum required for Vero to view your tables and run queries against the relevant datasets.Granting full access
The easiest way to get started is to grant full access by assigning thebigquery.user and bigquery.dataViewer roles to your service account at the project level. You can do this in the Google Cloud Platform console (under IAM).
Granting limited access
Alternatively you can grante the least required access to the service account you’ll use with Vero. This is our recommendation. Whilst this takes a little more configuration it ensures good data hygiene. To setup the minimum access required by Vero:- Grant the
bigquery.dataViewerrole only to the specific datasets, tables, or views you want to use with Vero. - Create a new role (we suggest ID
custom.bigquery.vero.roleand nameCustom BigQuery Vero Role).- Add all of the permissions from the
bigquery.jobUserrole to your new, custom, role. - Also explicitly grant the
bigquery.tables.list,bigquery.datasets.getandbigquery.tables.getpermissions to the new role.- Vero needs these to query the list of datasets, schemas and tables available. Whilst Vero will be able to see the names of other datasets, schemas and tables, Vero can only query data from tables assigned the
bigquery.dataViewerrole. Tables that weren’t assigned this role return an error if you attempt to query them.
- Vero needs these to query the list of datasets, schemas and tables available. Whilst Vero will be able to see the names of other datasets, schemas and tables, Vero can only query data from tables assigned the
- Add all of the permissions from the
Generate a JSON key
Adding your BigQuery connection
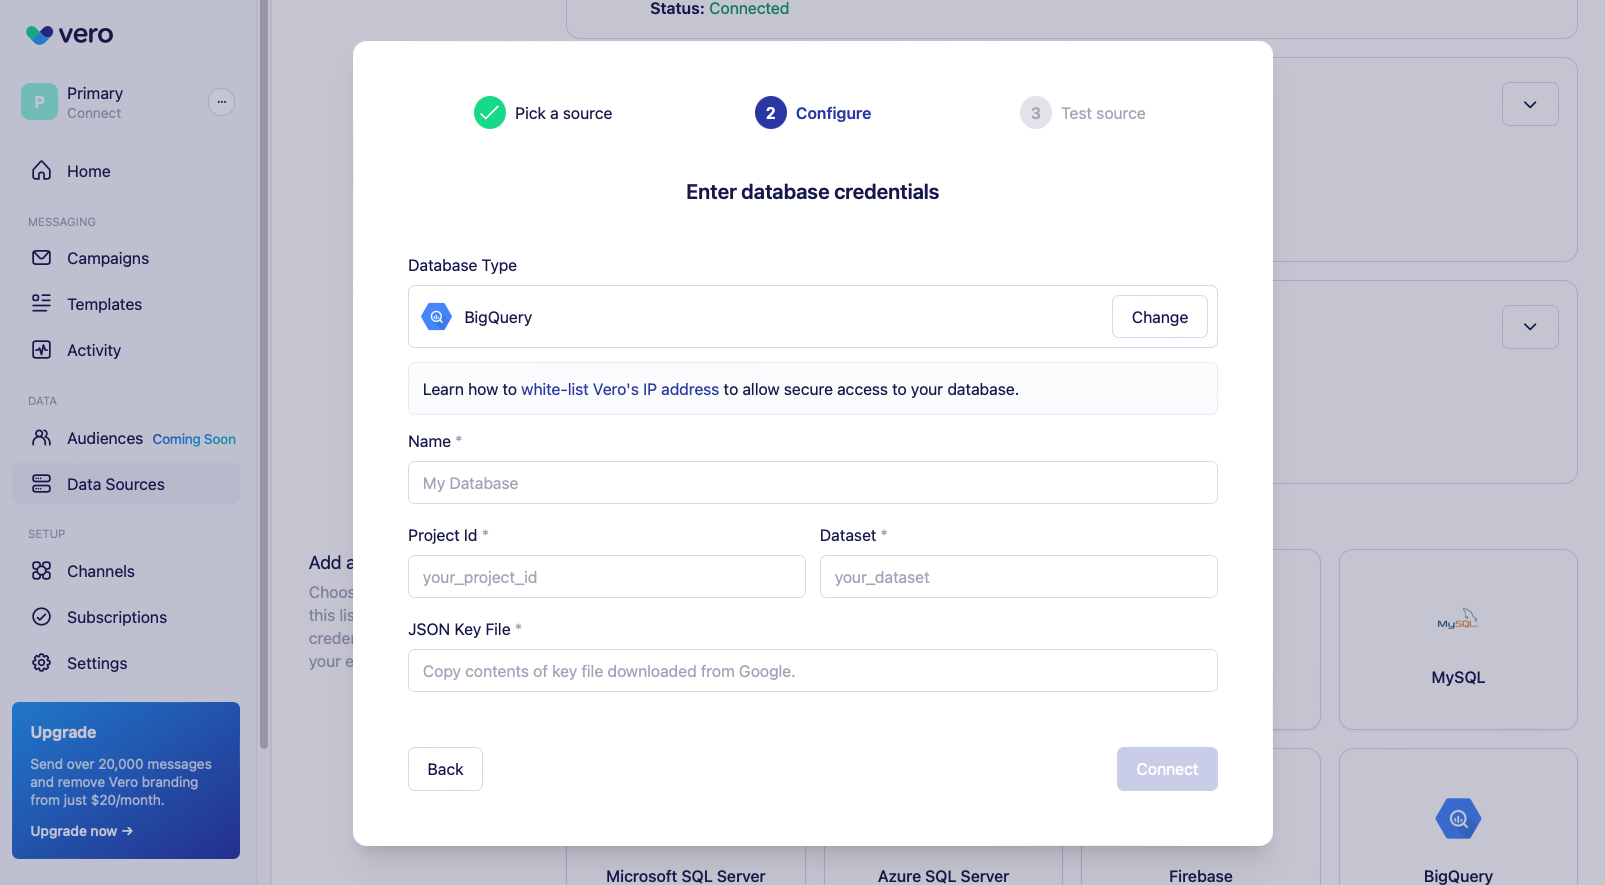
Once your service account is setup with the correct role you can add your service account credentials to Vero to access your BigQuery data warehouse. To add a BigQuery instance, click Data Sources and Add Data Source. In the menu that appears, choose BigQuery: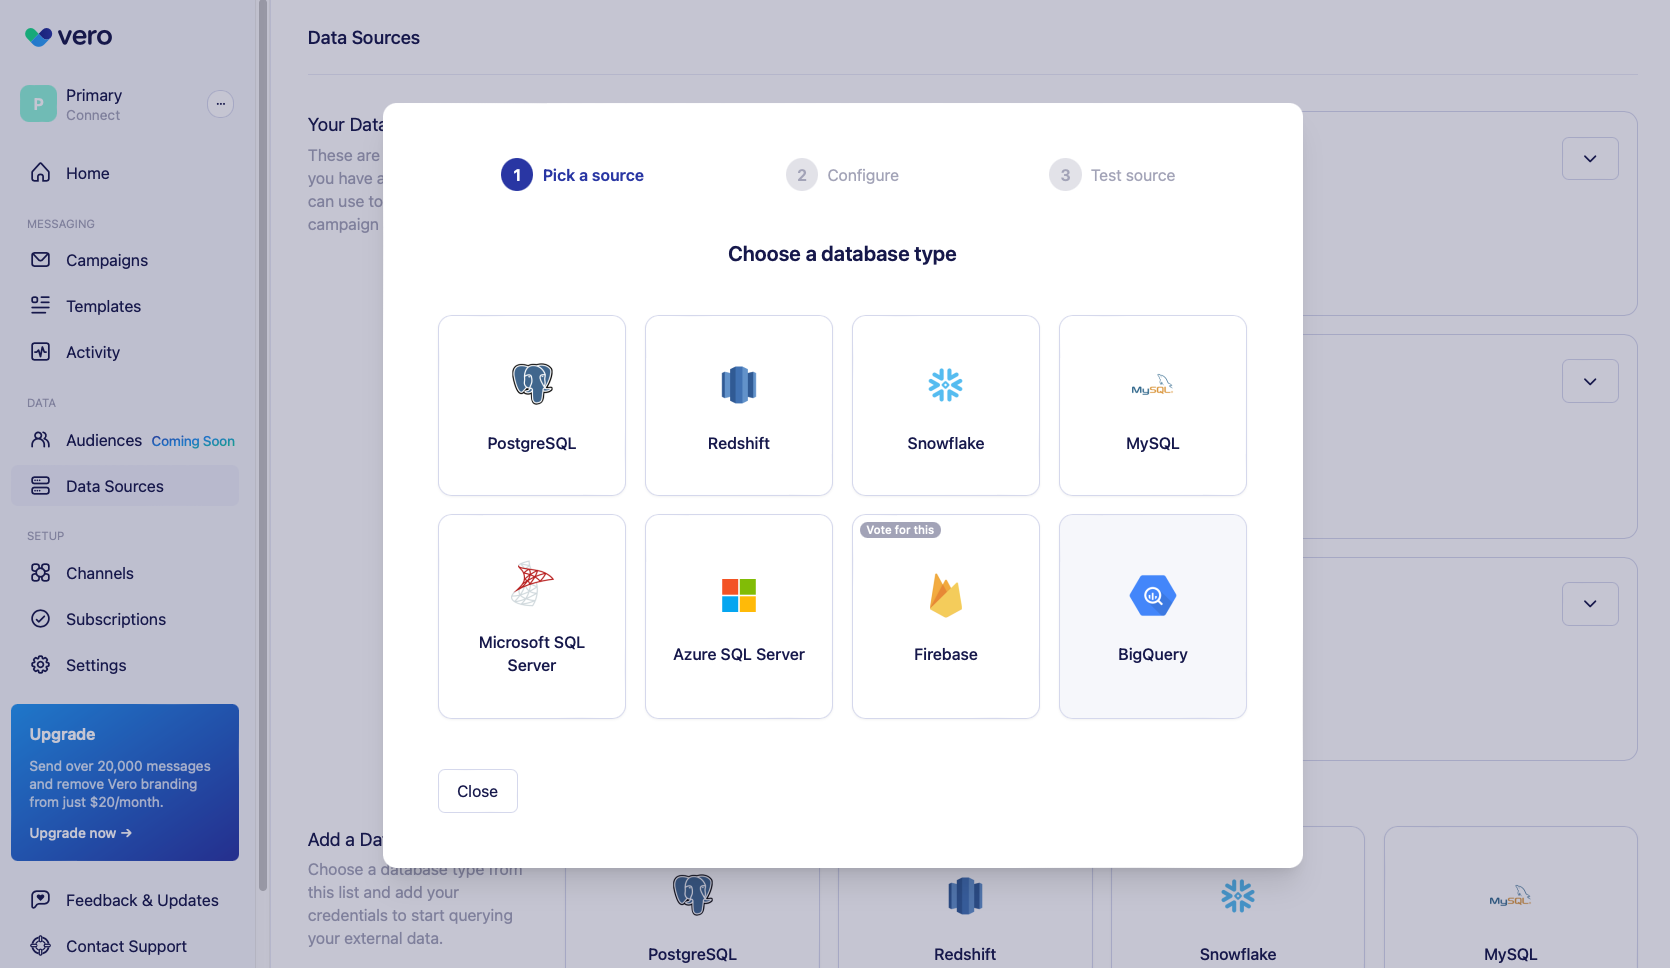
- Project ID. The Project ID of the Google Cloud Platform project containing the BigQuery instance you want to access.
- Dataset. The ID of the dataset
- JSON Key. Copy/paste the full contents of the service account key. Make sure your key is in the JSON format (not the P12 format).
Supported regions
Vero supports datasets created in both the US and EU regions.Testing your connection
Once you’ve entered your database credentials, select Connect. Vero will automatically test the connection. Once the connection test is successful, your new connection is saved and ready to go! You can now use your connection to add audiences to your campaigns.Securing your connection
Manage your service account
When used as a Data Source, Vero will only executeSELECT queries against your database: it is read only by design.
Vero will show users all available tables when using the SQL editor in our UI. Limiting the tables and columns that Vero has access to is good practice.
FAQs
Query limits
Vero will show your query results in blocks of 100 in the UI. In order to load an audience you will need to load your entire query (without aLIMIT clause).
There is no technical limit to the number of rows you can query using Vero’s UI but we have currently tested up to one million rows consistently.