Prerequisites
Before you can add push content to a campaign, make sure you’ve configured a push channel on the Channels page.Choose your push channel and platform
- In your campaign, navigate to the Channels panel and select Push as the channel type.
- Choose the push channel (provider) you want to send through. If no push channels are configured, Vero will prompt you to add one.
- Select the Platform for your message — iOS, Android, or both.
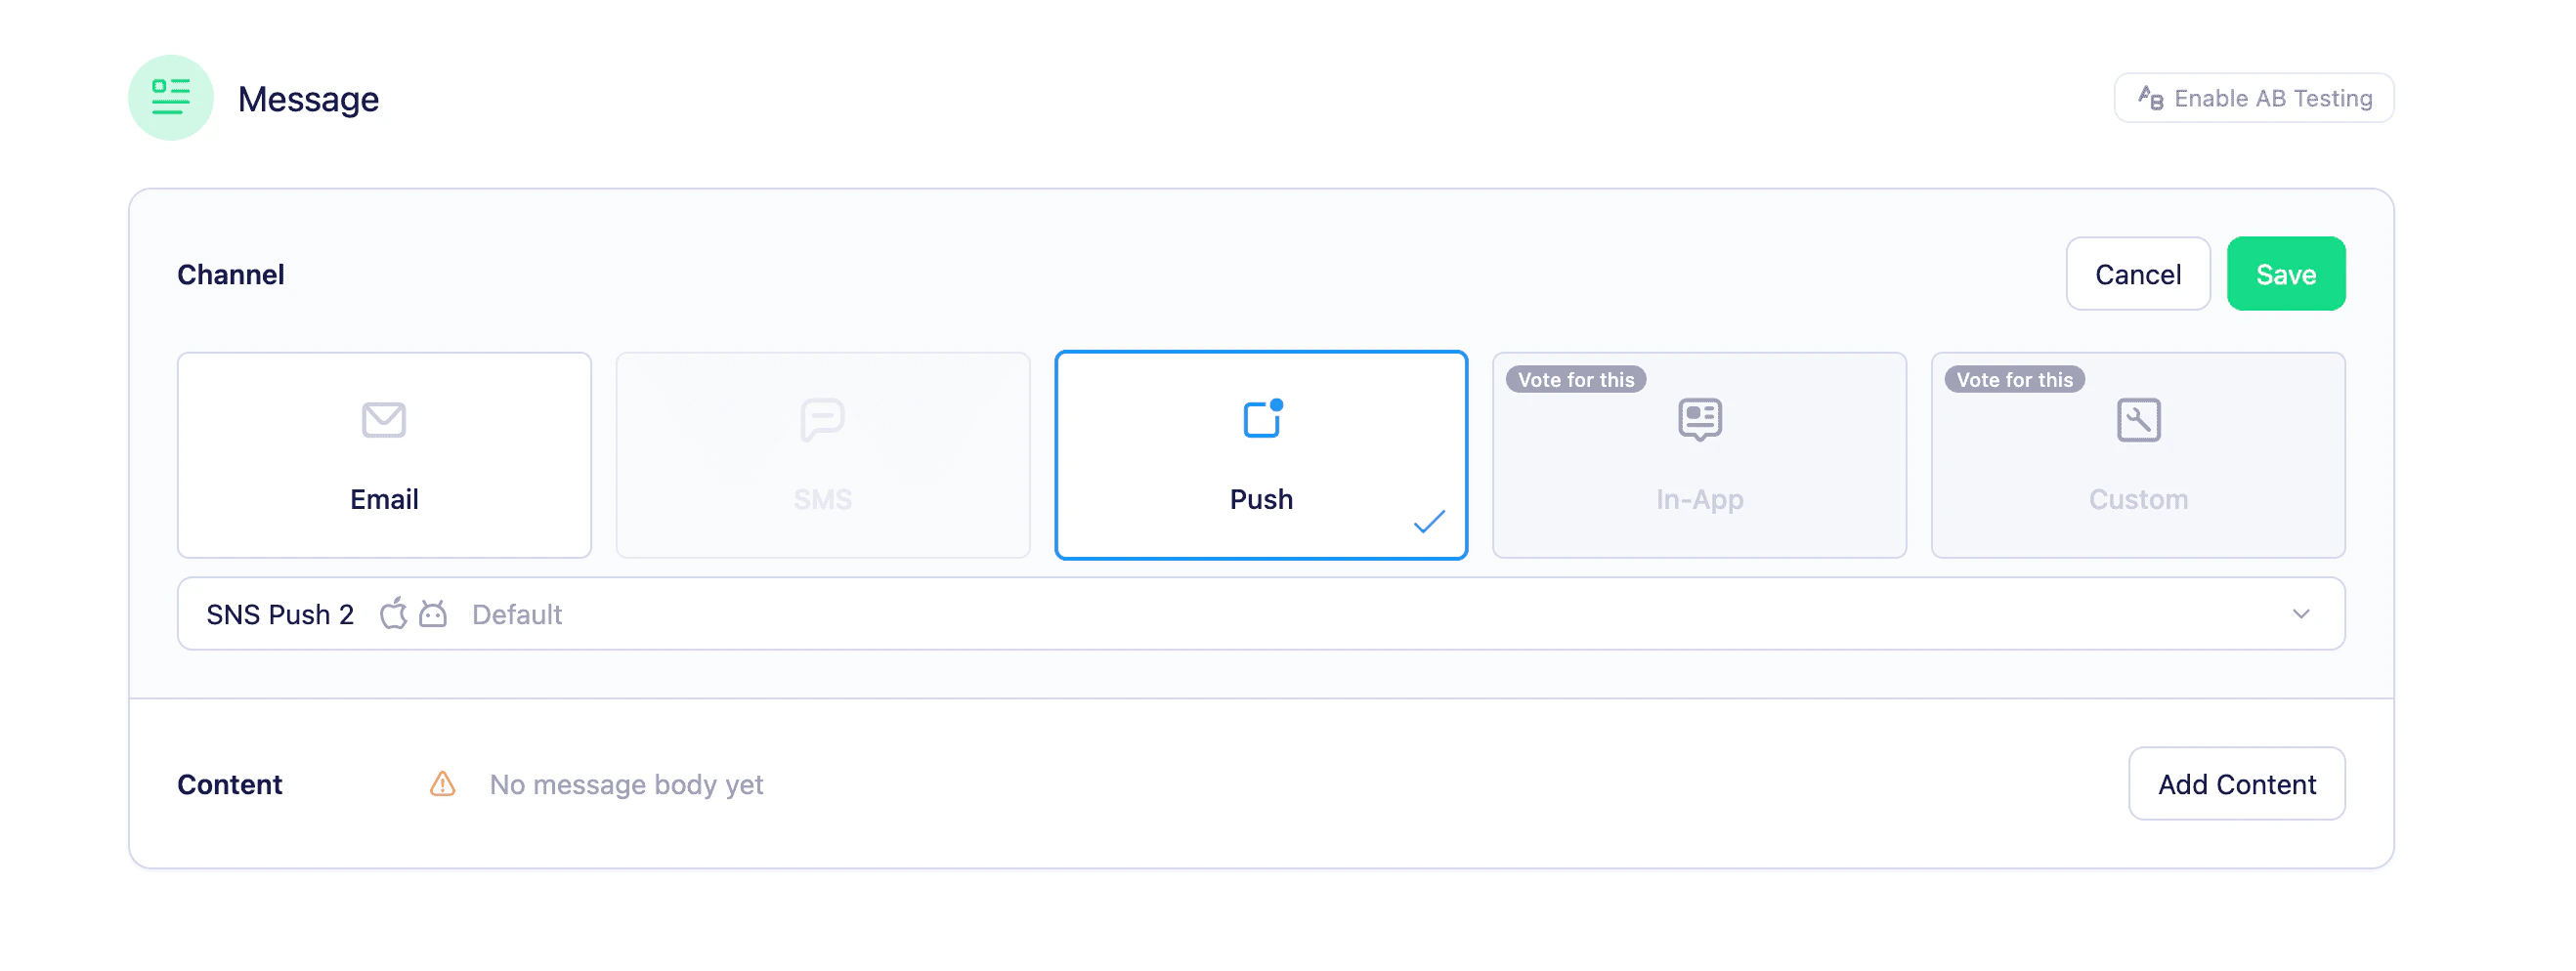
Vero only sends to users with a
device_token matching the selected platform. For example, if you select iOS as the only platform, Android users won’t receive the message.Adding push content
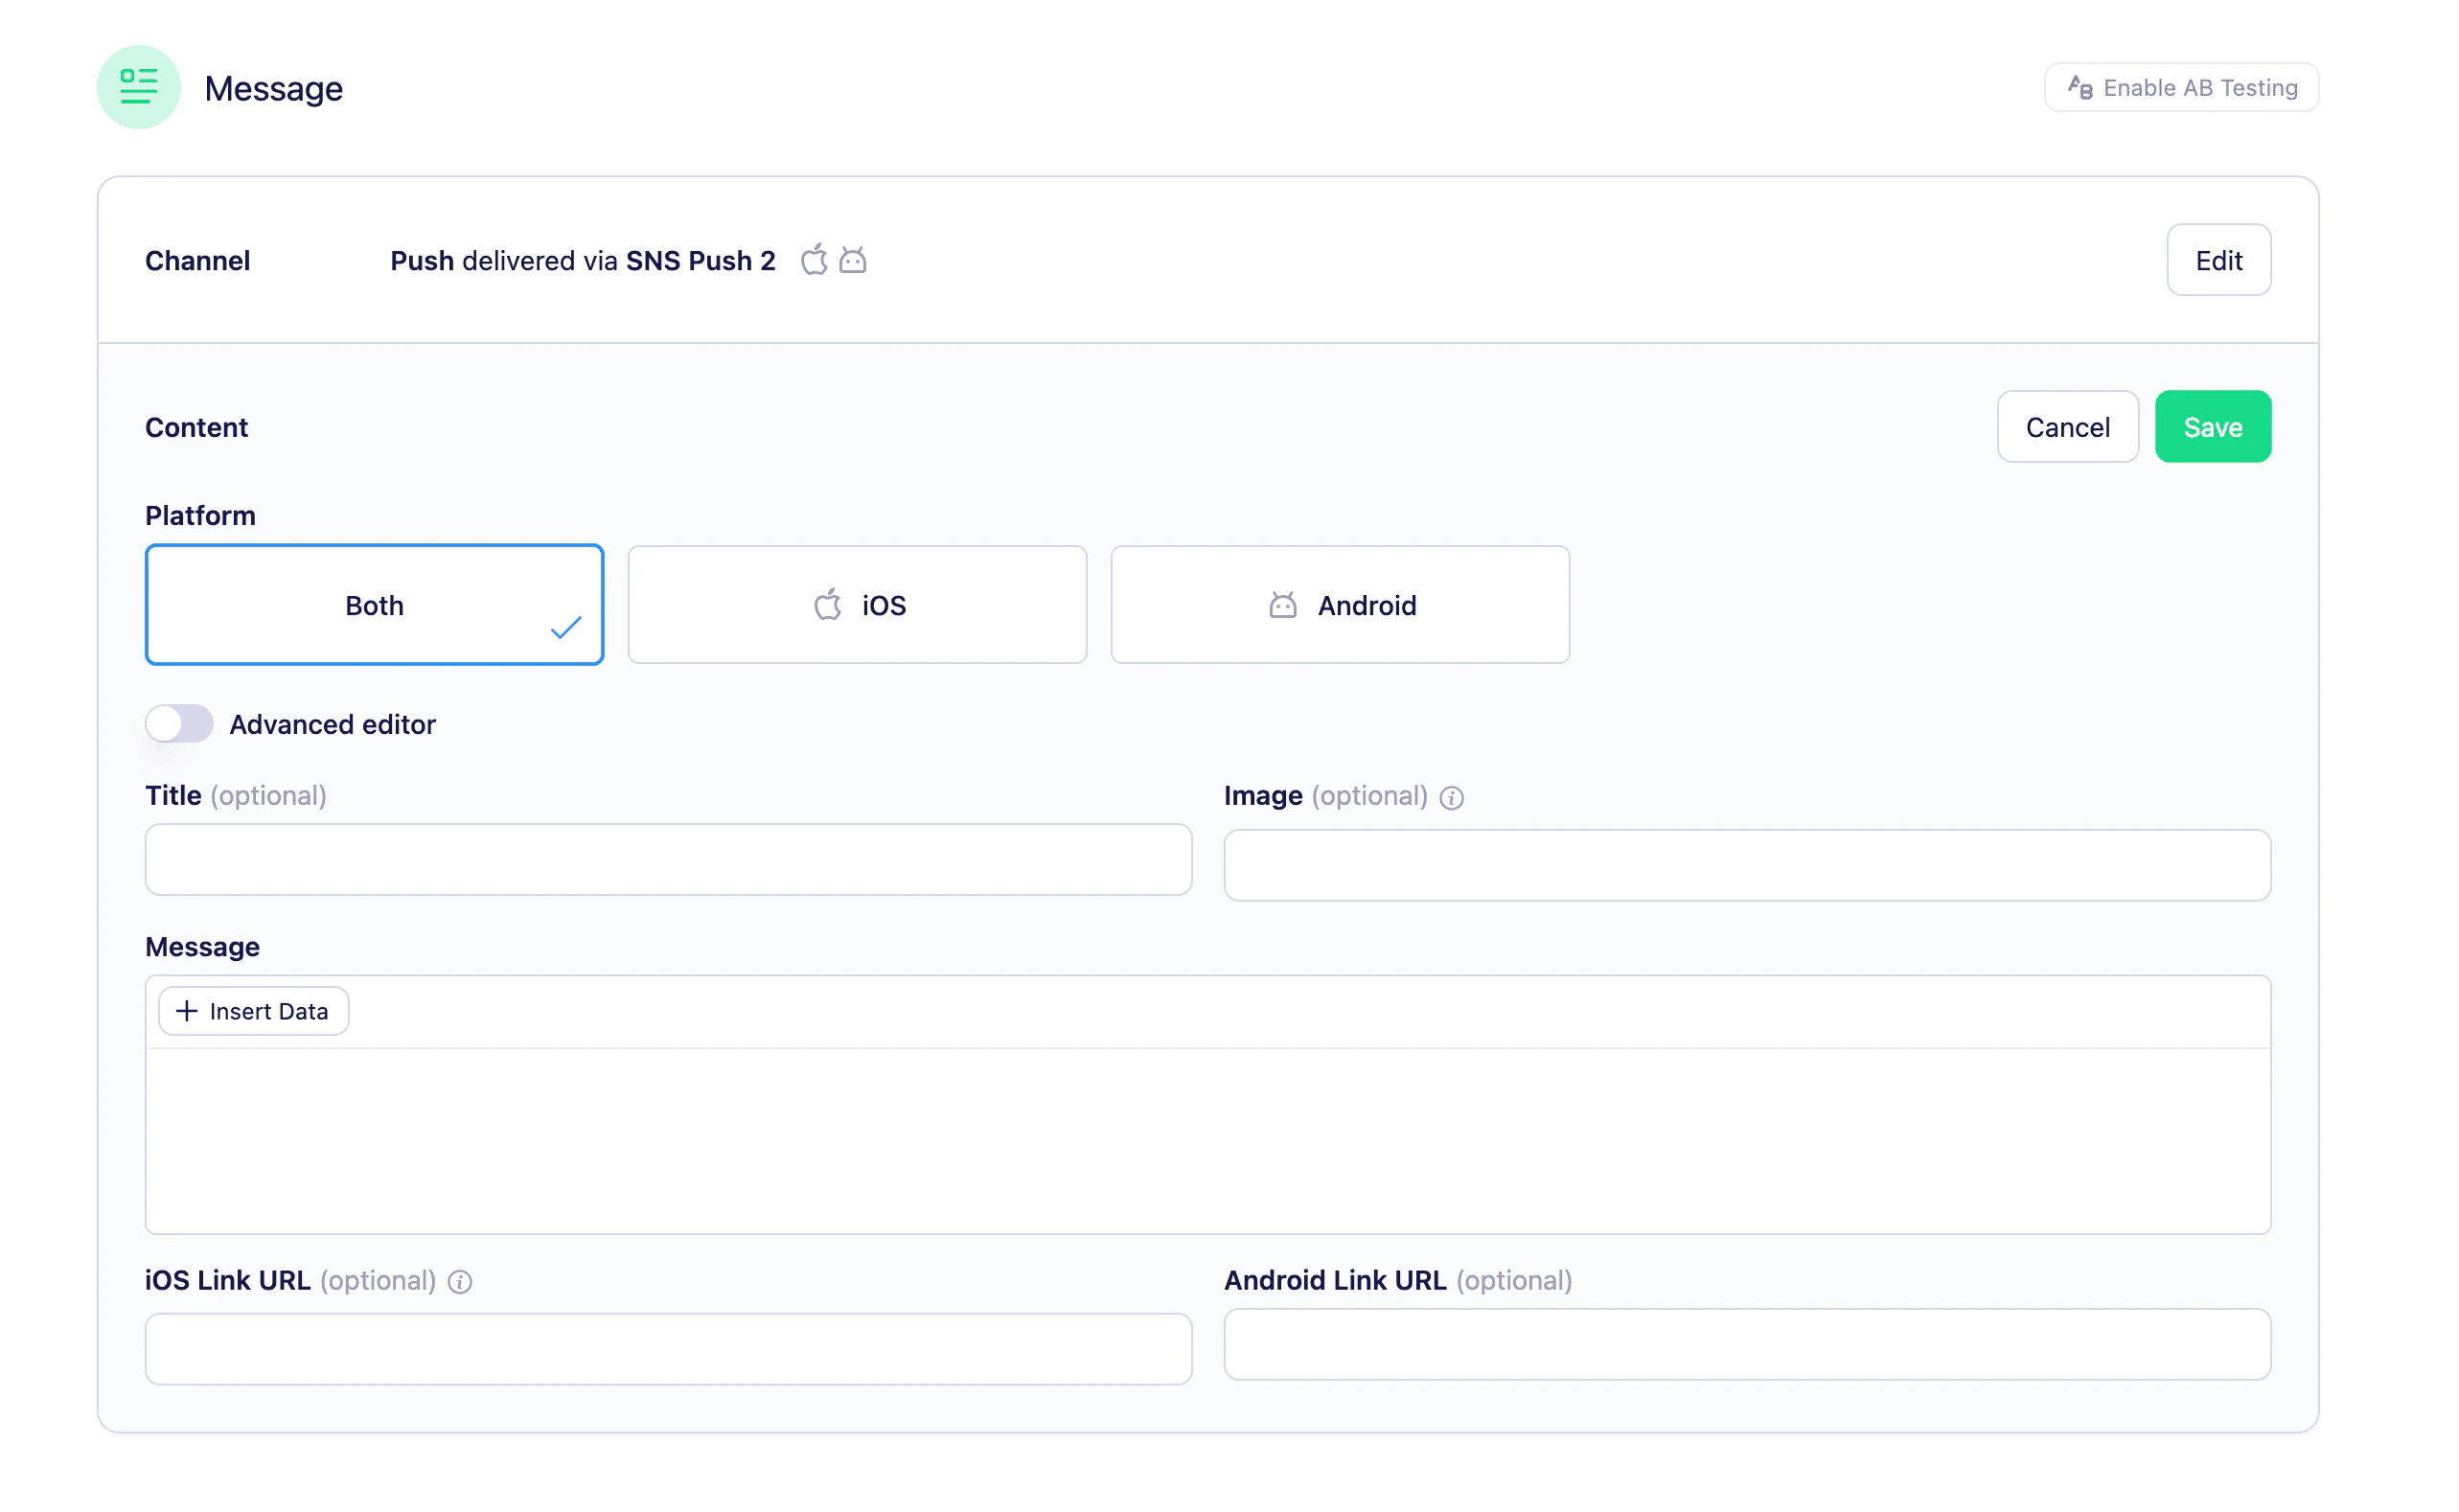
In the Content section, click Edit to open the editor. You can switch between the basic and advanced editors using the toggle in the top-right of the editor.Basic editor
The basic editor gives you a guided form for setting up a standard push notification. Available fields:- Title — The headline of the push notification.
- Message — The body text of the notification.
- Image — An optional image to display in the notification (max file size 10MB).
- iOS link — The URL or in-app destination to open when the notification is tapped on iOS.
- Android link — The URL or in-app destination to open when the notification is tapped on Android.
Advanced editor
The advanced editor lets you write the raw JSON payloads for iOS and Android, giving you fine-grained control over the notification structure (for example, settingaps keys, custom data fields, or platform-specific behaviour).

Personalising content using Liquid
Liquid is the templating language Vero uses for merge tags such as{{user.first_name}}. Merge tags personalise the message based on each recipient’s data. Learn how to personalise content using Liquid.
You can use Liquid in any field of the basic editor (title, message, image URL, links) and anywhere in the iOS or Android payloads in the advanced editor. Use the + Insert data button to quickly find merge tags for properties available to your audience.
Previewing your content
When you save your push content, Vero shows a summary preview in the campaign content section so you can see your title, message, image, and links at a glance without re-opening the editor.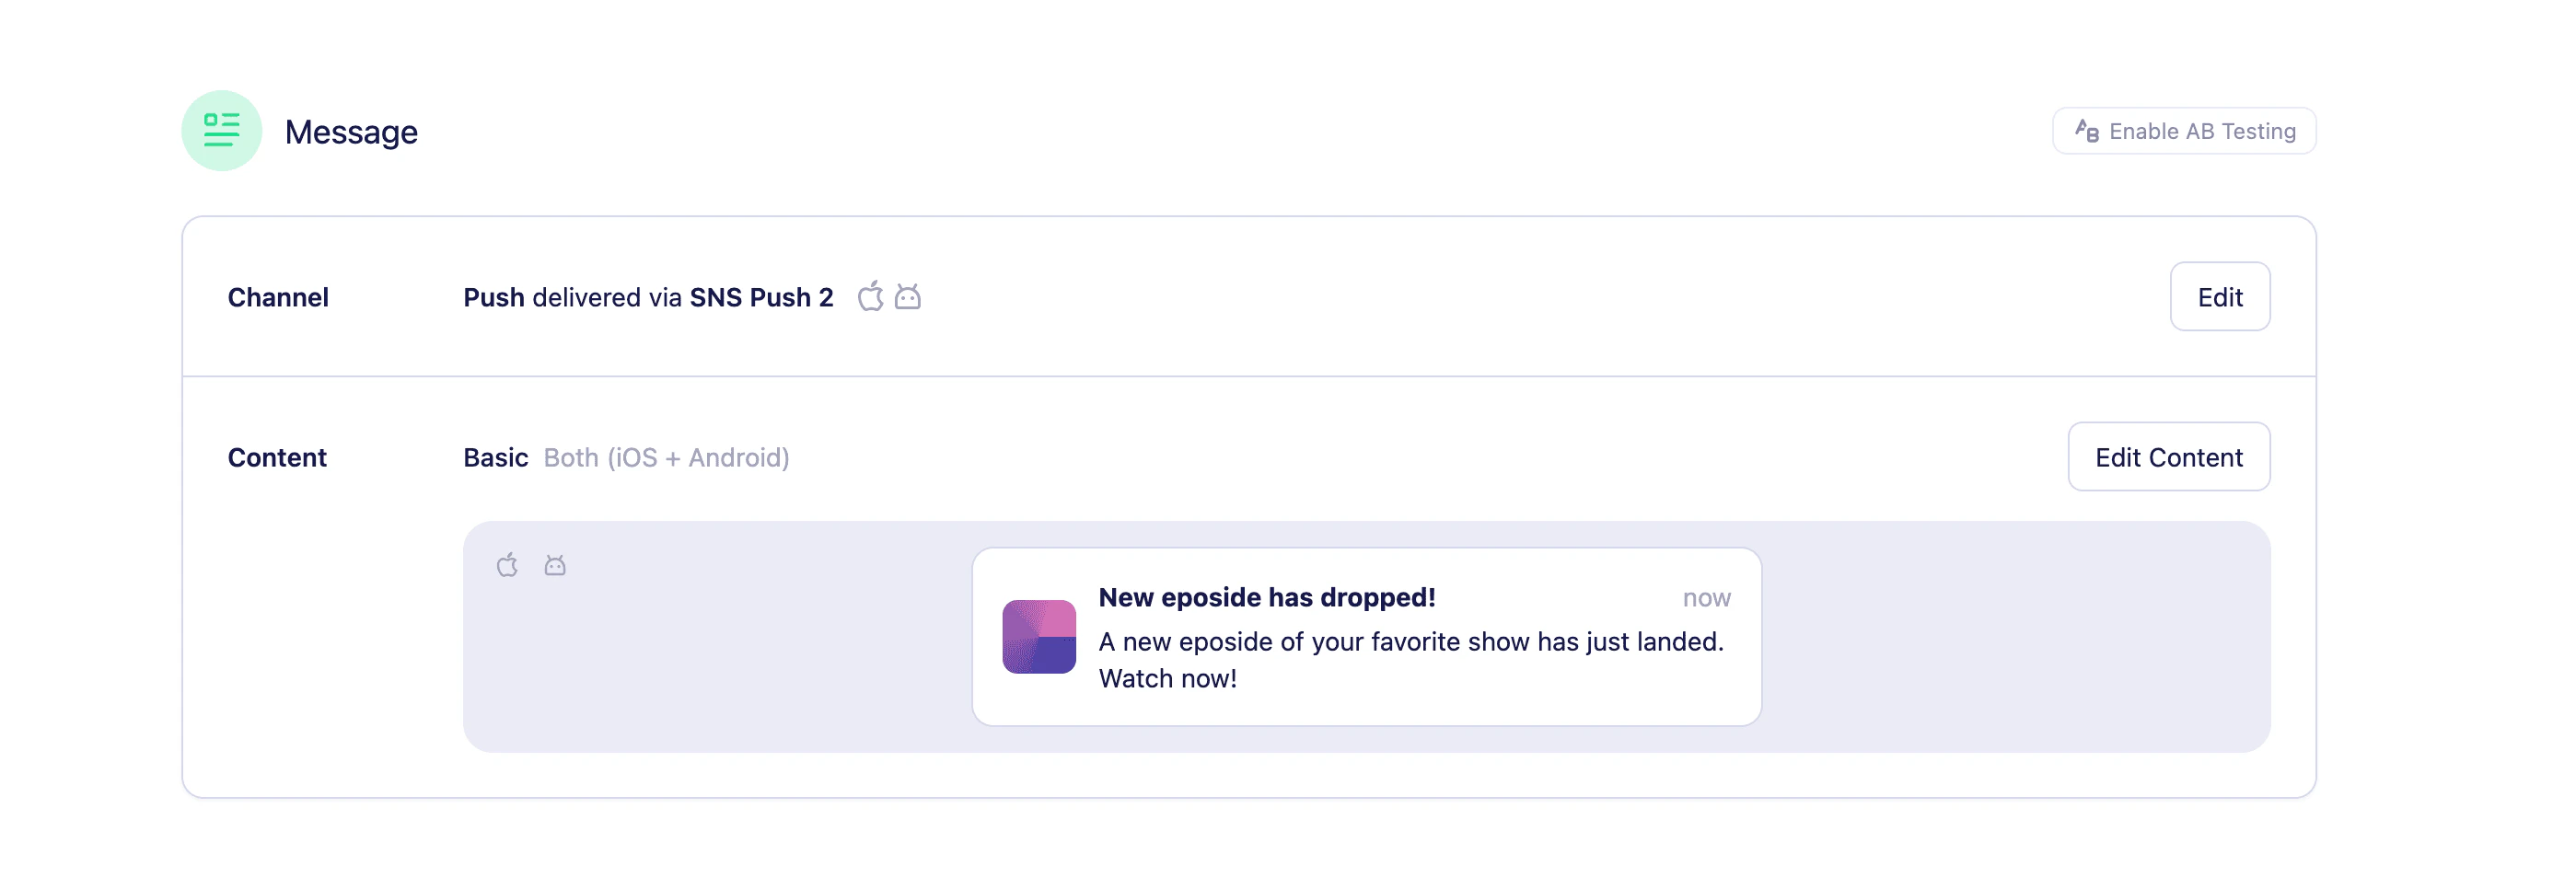
Vero doesn’t currently render a phone-style preview of how the message will look on iOS or Android devices. To test a real device delivery, send a test push to a profile that has a
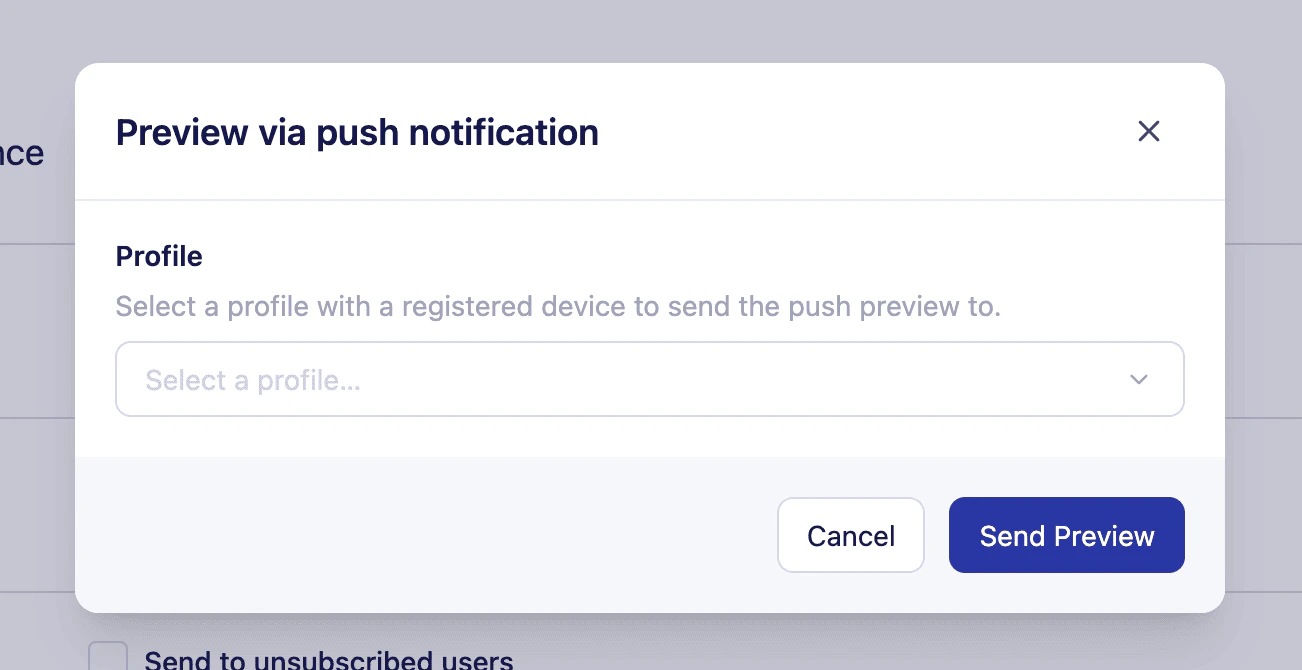
device_token set.Send a preview push
You can send a preview push to a specific profile to test how the message will look and behave on a real device. This requires your app to be up and running and accepting push notifications from Vero.- Select the ‘preview push’ option in from the ‘actions’ menu
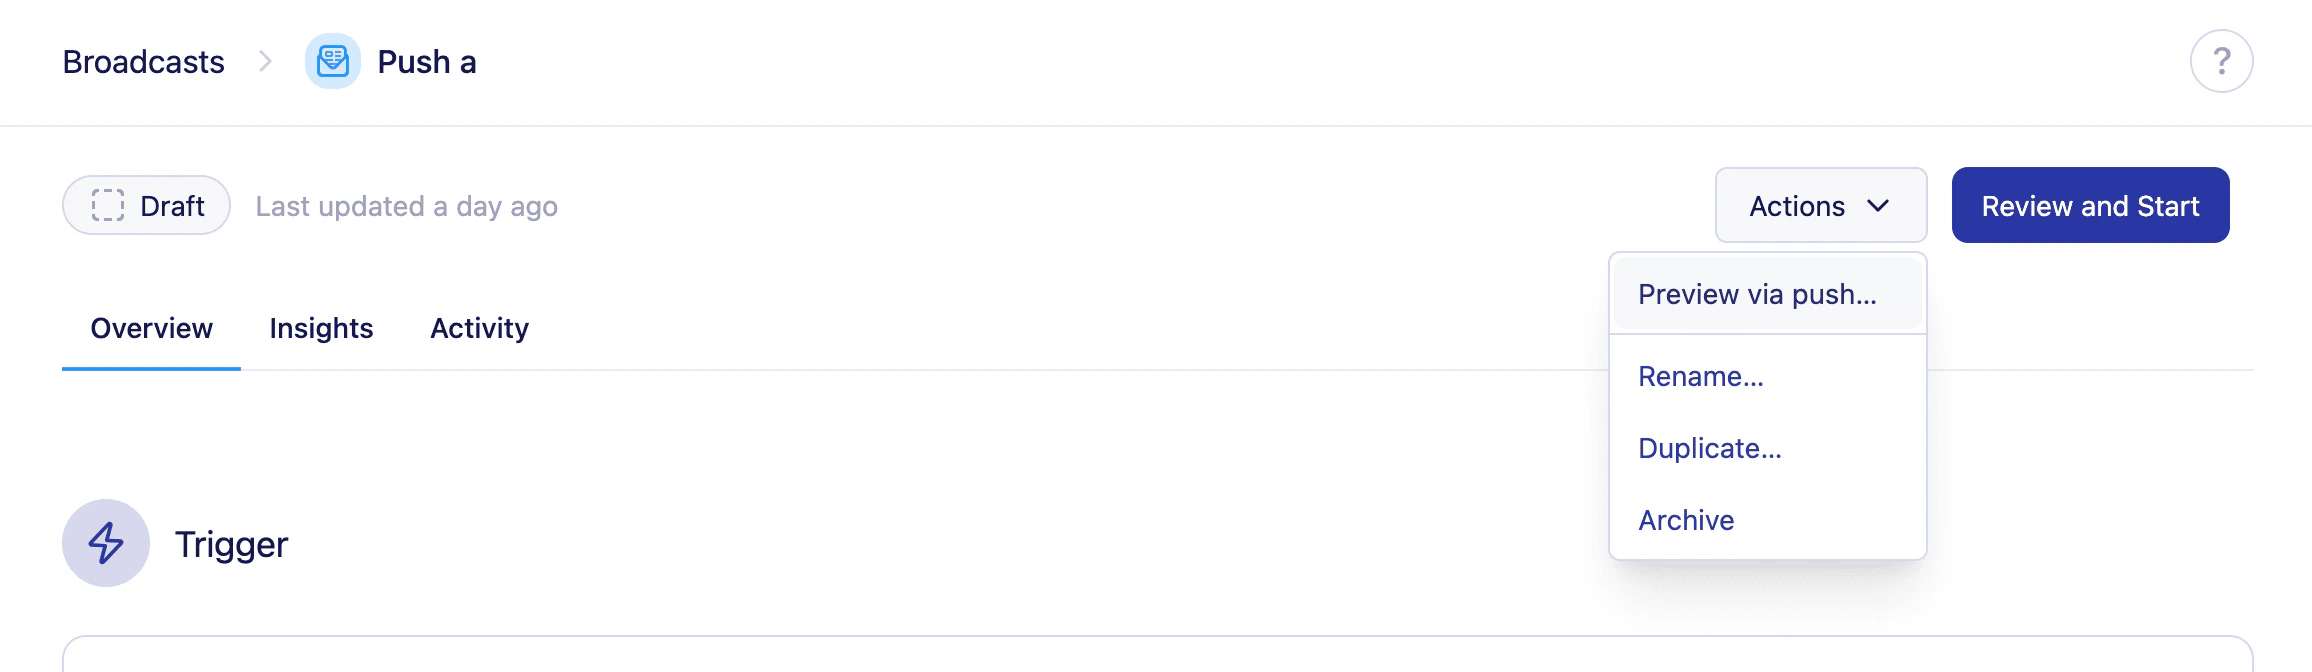
- Select a profile to send the preview push to. They must have a
device_tokenset in their profile for the push to be delivered.
Saving incomplete content
You can save push content even if it’s incomplete — for example, if you’ve added a title but not the message yet. The content section will be saved with a warning icon so you can come back and finish it before launching the campaign.Next steps
- Push channel — configure an Amazon SNS or Twilio Notify provider.
- Push journey node — use push content in a multi-step event-triggered Journey.
- Personalize content with Liquid — full guide to merge tags and Liquid functions.