In Vero 1.0 this was configured under Settings → Push Delivery. In Vero 2.0, push providers are managed alongside email and SMS on the Channels page.
Prerequisites
Before adding a push channel in Vero, you’ll need:- An Amazon SNS or Twilio Notify account with your APNs and/or FCM certificates already configured. Each provider has its own documentation on managing certificates with Apple and Google.
- Your application configured to register device tokens with your delivery provider, and a plan to send those tokens through to Vero via the API. See the Mobile push integration guide for details.
Supported push providers
Vero 2.0 supports the following push delivery providers:- Amazon SNS — recommended for new integrations.
- Twilio Notify — supported as a legacy provider for existing customers. If you’re setting up push for the first time, we recommend Amazon SNS.
Add a push channel
- Navigate to Channels in Vero 2.0.
- Under the Push heading, select Add next to the provider you want to configure.
- Follow the steps below for your chosen provider.
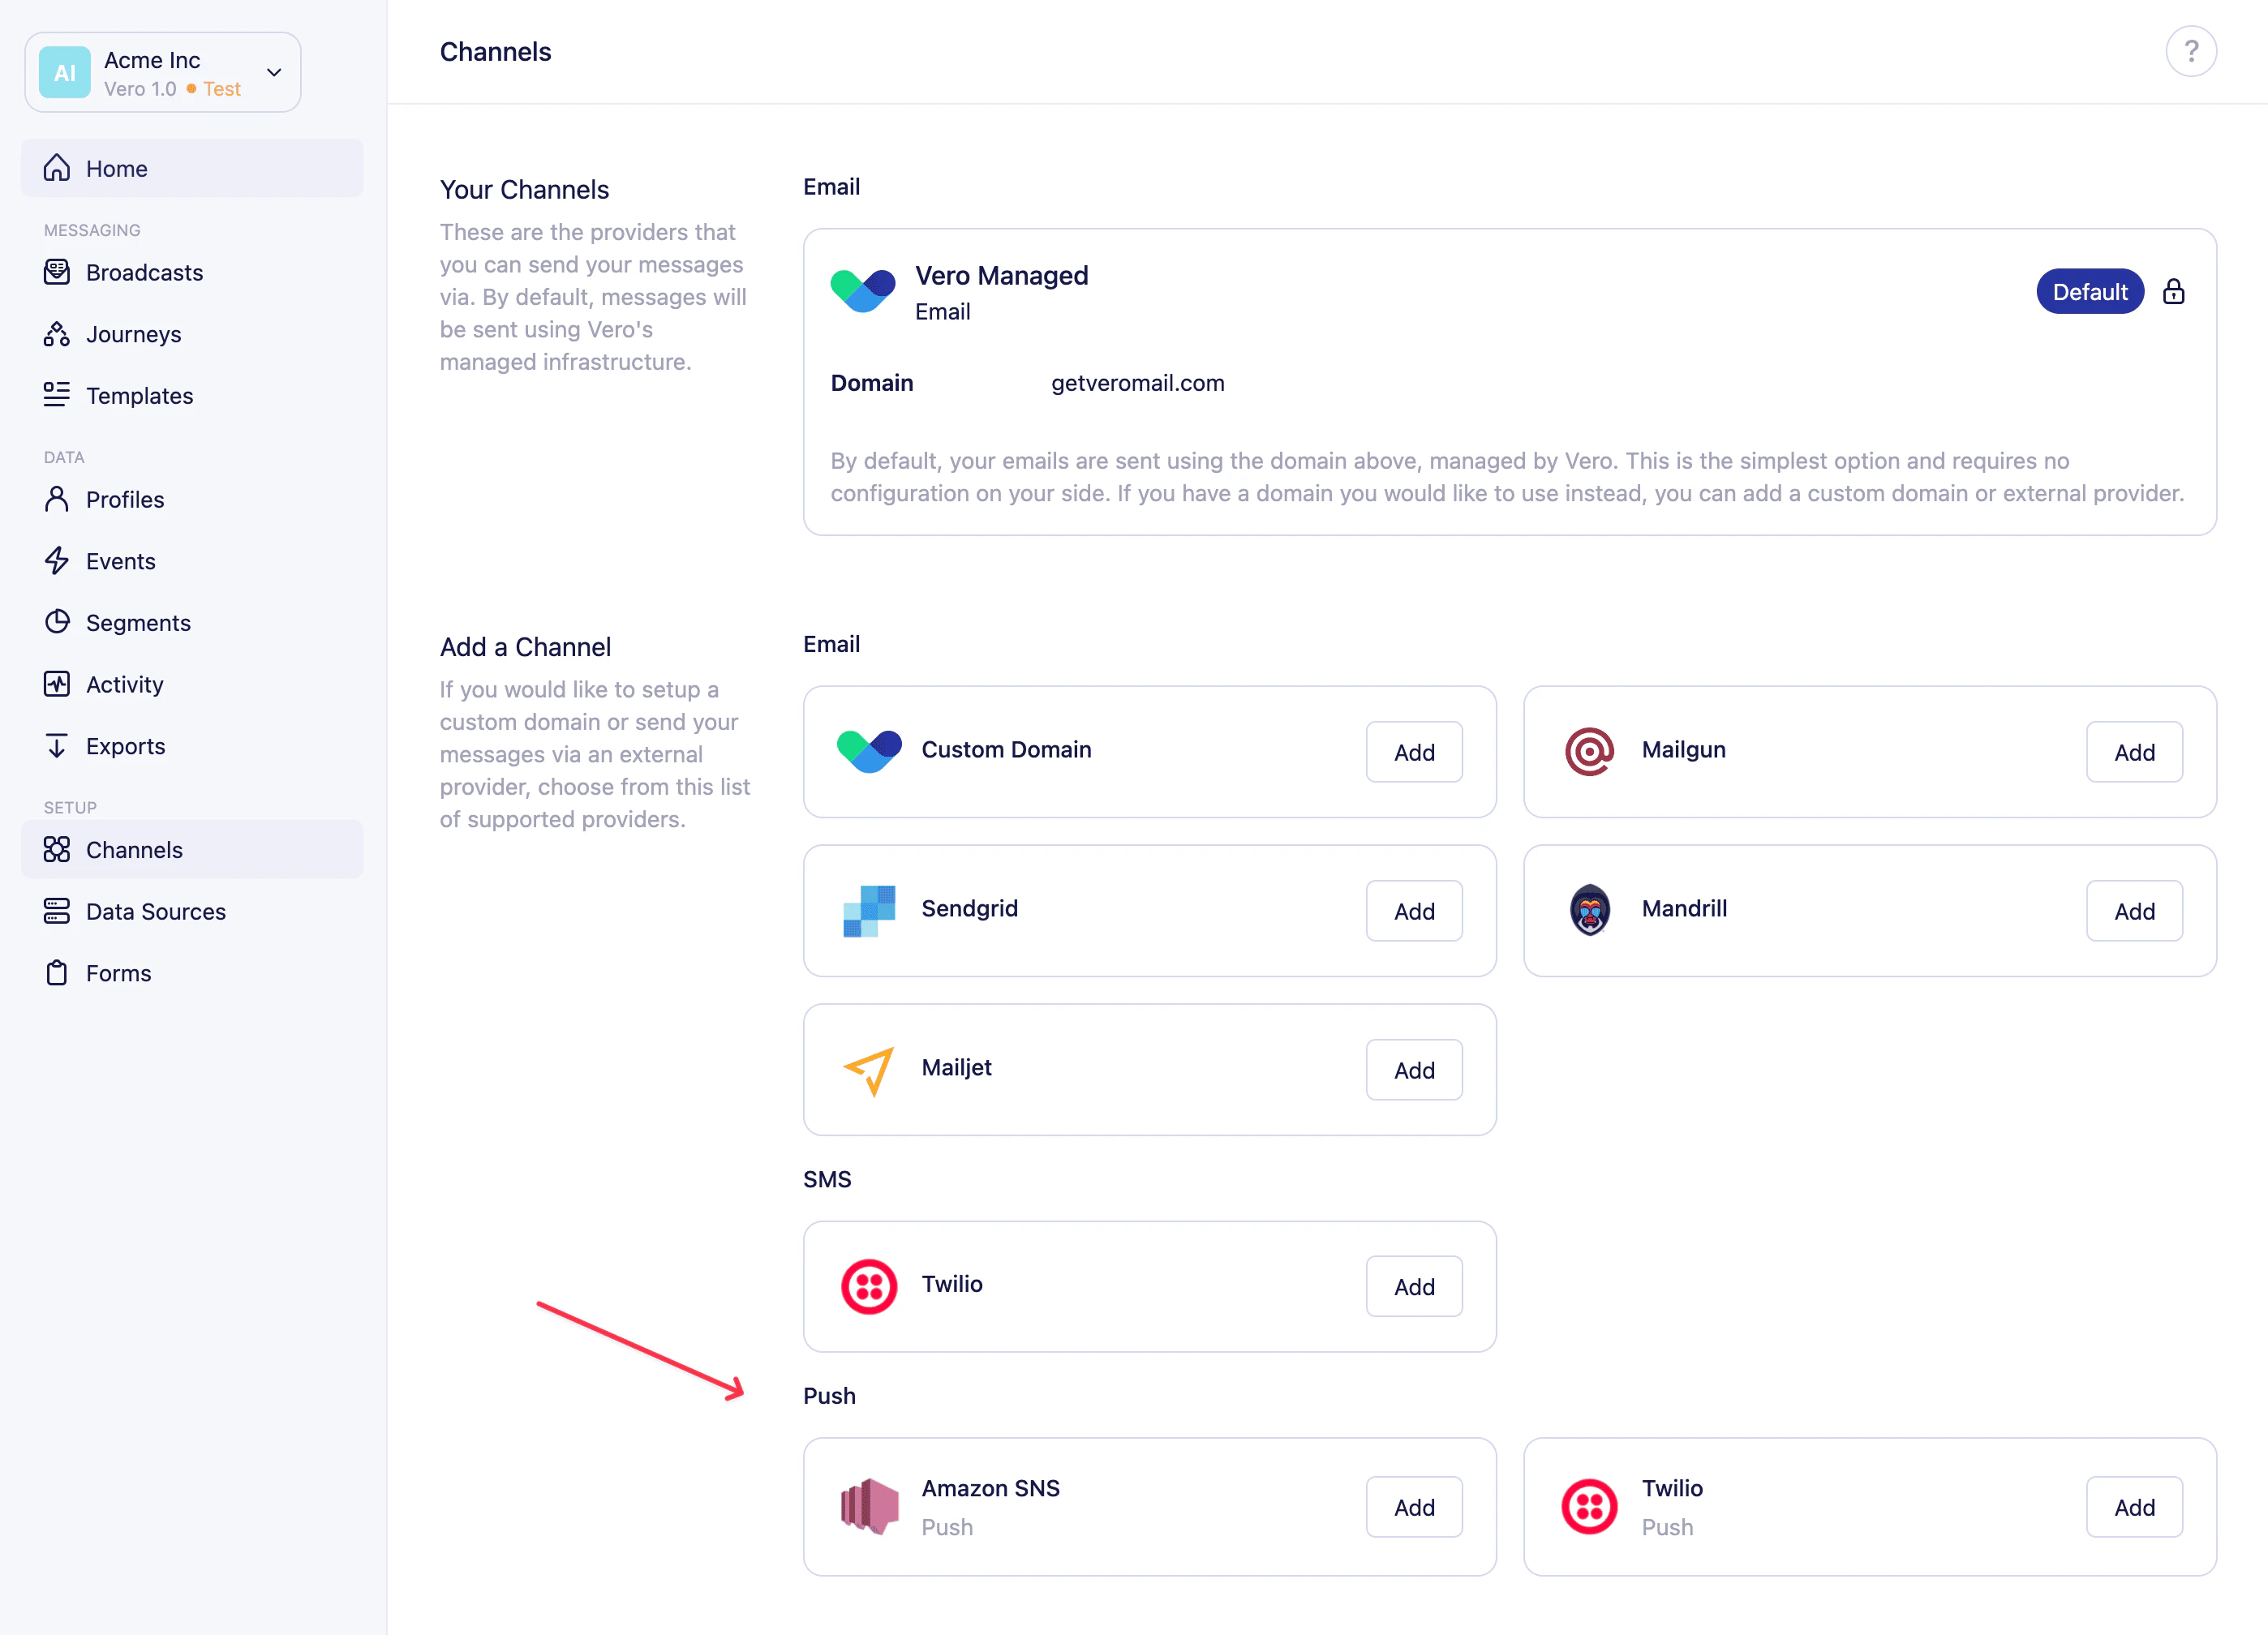
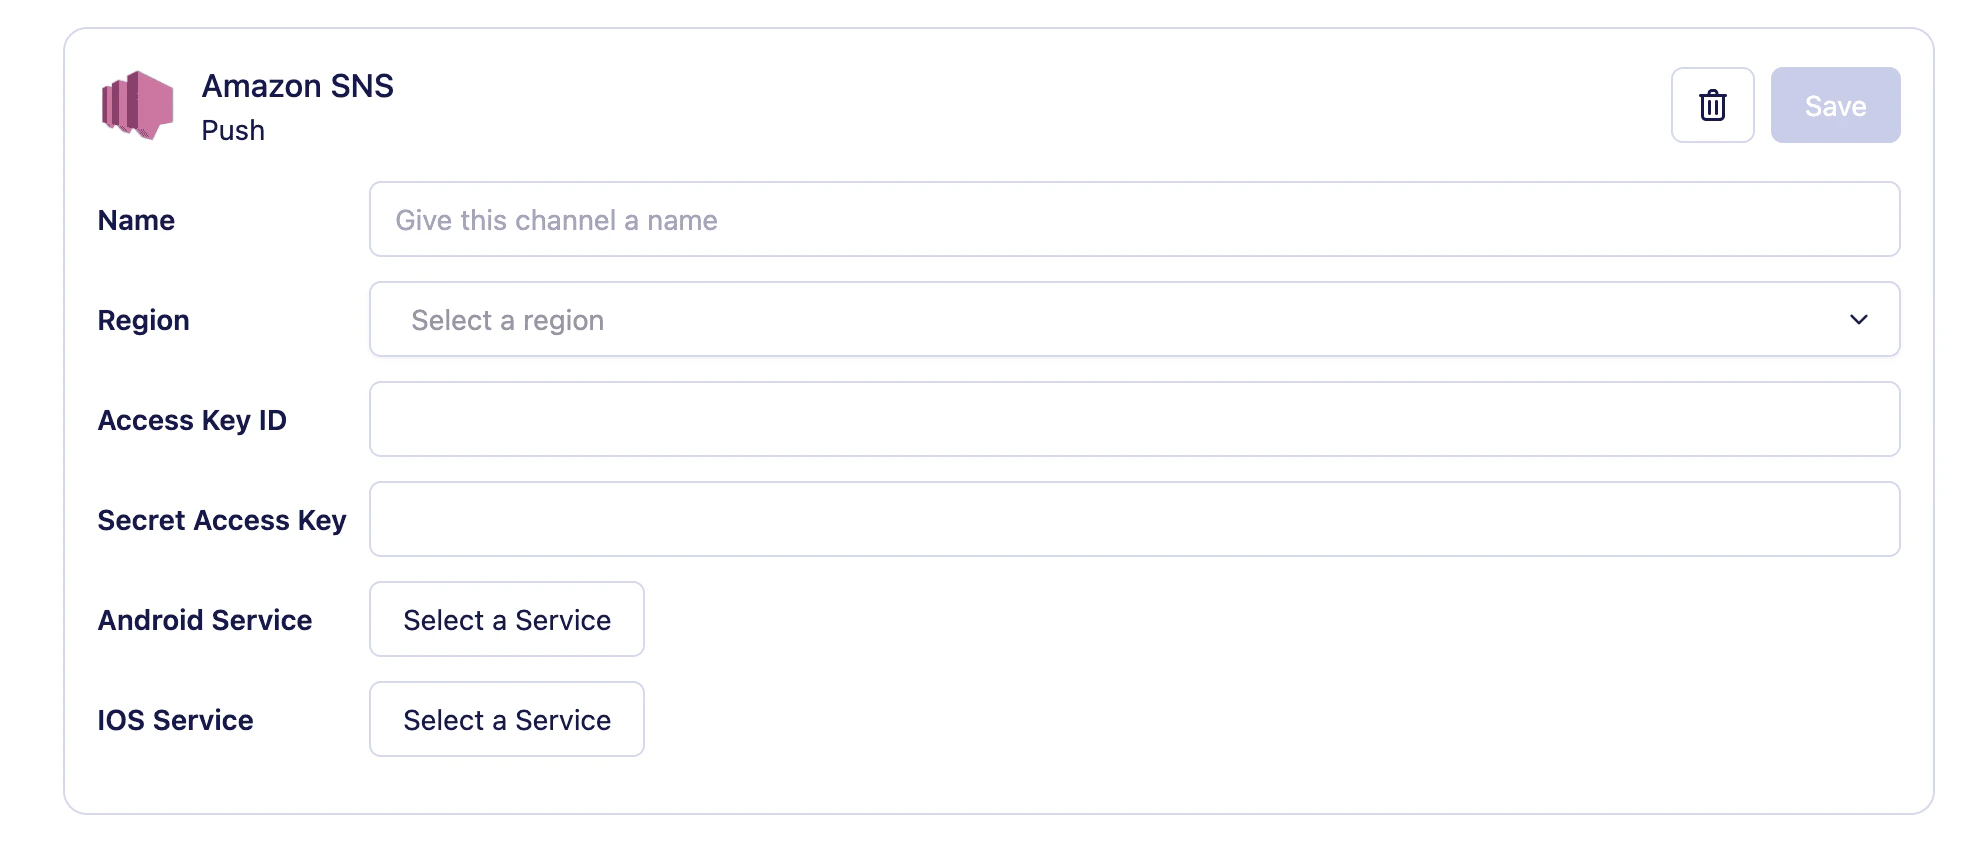
Amazon SNS
- Give your new channel a Name. This is an internal name to help you identify the channel when building campaigns — your customers won’t see it.
-
Select the Region where your AWS SNS account is configured (for example,
us-east-1). - Add your Access Key ID and Secret Access Key.
- Once your credentials are valid, Vero will query AWS to retrieve the available services. Use the Select iOS service and Select Android service dropdowns to link Vero to the correct SNS services.
- Click Save to store your channel.
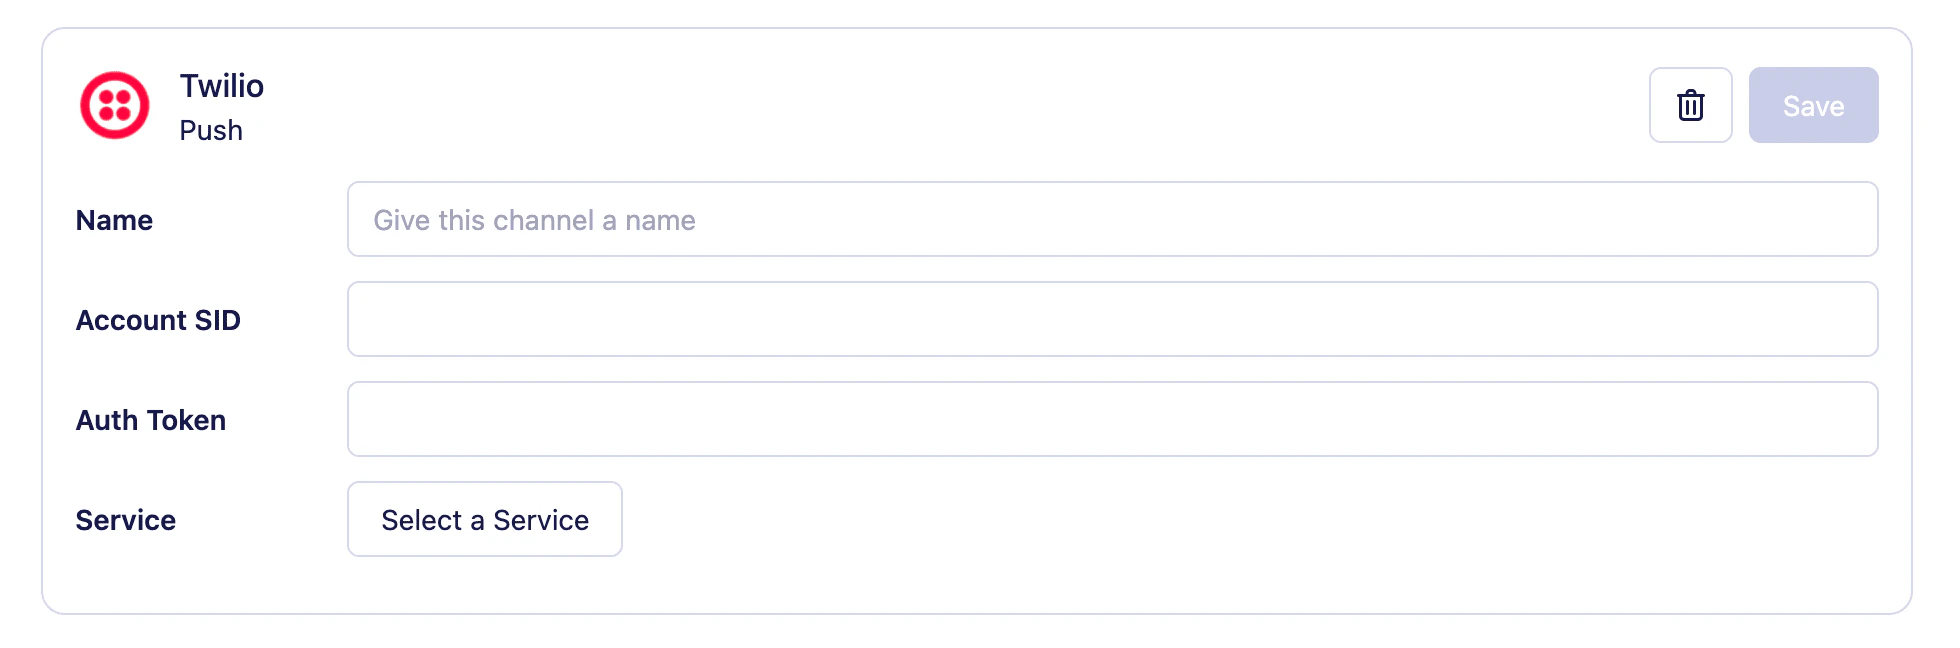
Twilio Notify
- Give your new channel a Name.
- Add your Account SID and Auth Token. You can find these in your Twilio Console.
- Once your credentials are valid, Vero will retrieve the Twilio Notify Services you’ve configured. Use the Select service dropdown to choose the service Vero should send through.
- Click Save to store your channel.
Editing or deleting a push channel
After a push channel is saved, only the channel Name can be edited. To change the region, credentials, or service, you’ll need to delete the channel and create a new one.Next steps
- Create a push message to send through your new channel.
- Learn how the push journey node lets you send push notifications as part of an automated journey.
- Set up the mobile push integration guide to register device tokens against your user profiles.