

Before you attach a file
Whenever you can, host the file on your website or a file-hosting service and link to it in the email instead. Links keep the message small and let you track clicks. If you do attach a file:- Keep it small and use a common format, such as PDF.
- Use a clear, recognizable file name.
- Mention the attachment in the email body so the recipient knows what it is.
Adding an attachment
Attachments require an email channel that uses a custom domain or third-party provider. The default Vero Mailer email channel does not allow attachments.Learn how to configure your email channel
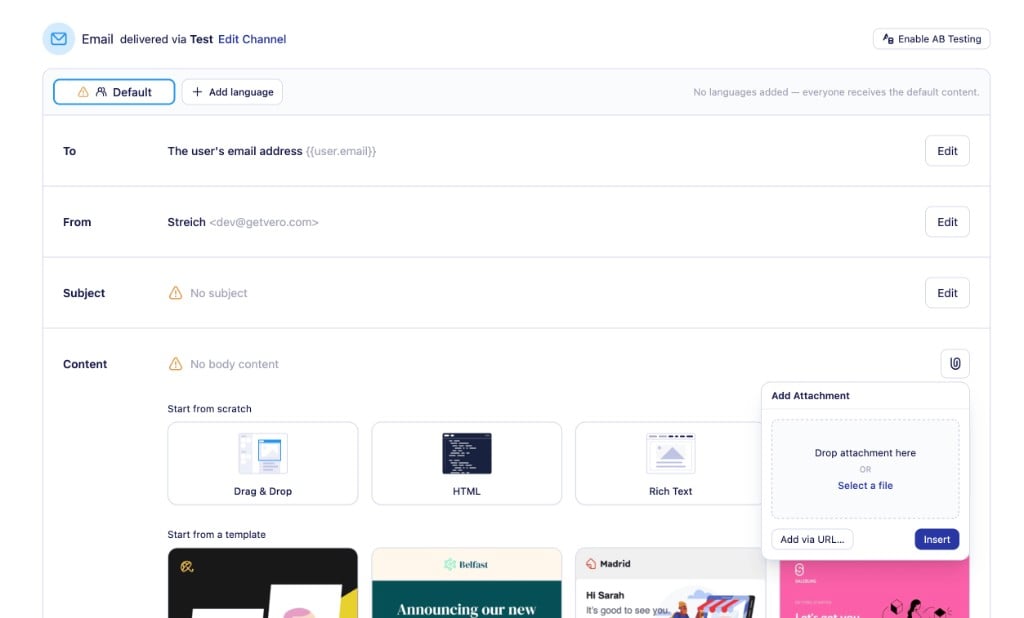
- Open the email content for your campaign or Journey email step.
- Click the attachments icon to open the Add Attachment panel.
- Add a file in one of two ways:
- Upload a file – drop a file onto the panel, or click Select a file.
- Add via URL – click Add via URL…, enter a Name and URL, then click Insert.
Personalizing attachments with Liquid
The Name and URL fields support Liquid, so you can attach a different file for each recipient. For example, to attach each user’s invoice:Removing an attachment
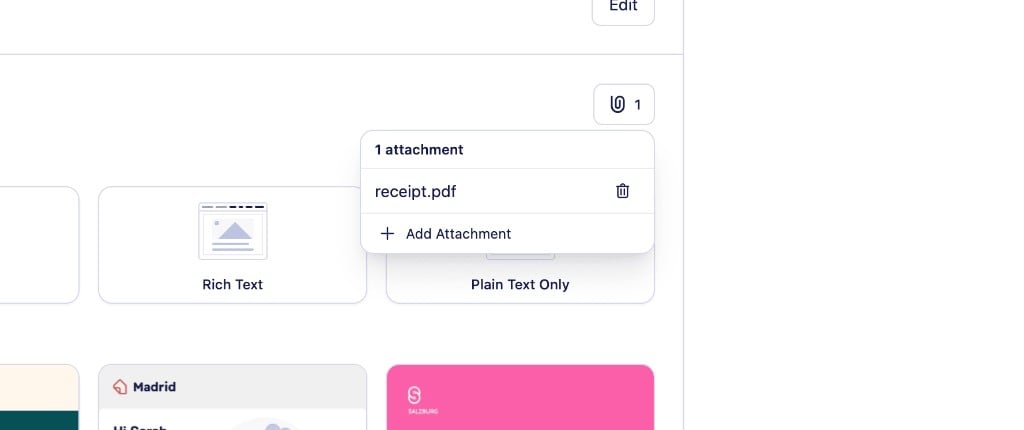
- Open the attachments panel.
- Click the trash icon next to the attachment you want to remove.
Limitations
- Attachments are only available for email. SMS and push messages don’t support them.
- The total size of all attachments on an email can’t exceed 10MB.
- Uploaded files must be one of these formats: PDF, DOC, DOCX, XLSX, CSV, ICS, VCF, EPUB, PNG, JPG, JPEG, GIF, PSD, MP3, WAV, OGG, AU, MP4, MPG, MPEG, AVI, MKV.
- Attachment URLs must be publicly accessible
httporhttpsURLs. - If Vero can’t fetch an attachment URL, or the attachments exceed the size limit, the email isn’t sent to that user.