- Verify your account You’ve tested us out and now you’re ready to dive in. We’re ready to verify you!
- Set up your project Still need to do additional testing on some workflows? Ready to go live with newsletters? Have a subsidiary and a parent company? Set up multiple live, test, or offline projects so you can manage it all.
- Add team members Add your team members to various projects with different access levels. Add an engineer or your entire marketing team, as Vero doesn’t put a limit on user logins.
- Set up Domain Authentication We take deliverability seriously at Vero. Add your domain and verify your DNS records so we can send your emails with the highest levels of success.
- Integrate with Vero’s API Curious what your customers are up to? Install the Vero Javascript library to track data about your customers and their activities in your application or website, in real-time.
- Import your data Have access to all your customer’s data history with a quick CSV import.
- Import and create your first templates Creating new email designs takes a lot of effort, so we’ve made it easy for you to upload your existing templates into Vero and can start sending emails quickly.
- Set up webhooks and integrations Gather data about your customers from day one by setting up webhooks or by using a simple Zapier integration.
Verify your account
You’ve enjoyed setting up campaigns, segments, and templates and now you’re ready to start sending out some emails. Your next step is to be verified! We manually verify all new accounts to ensure that only reputable senders use our infrastructure, which is beneficial to all of our customers. It also gives us a chance to connect with you. Simply click the Verify your account button in the upper right-hand corner of your screen. We will manually verify your account within a few hours.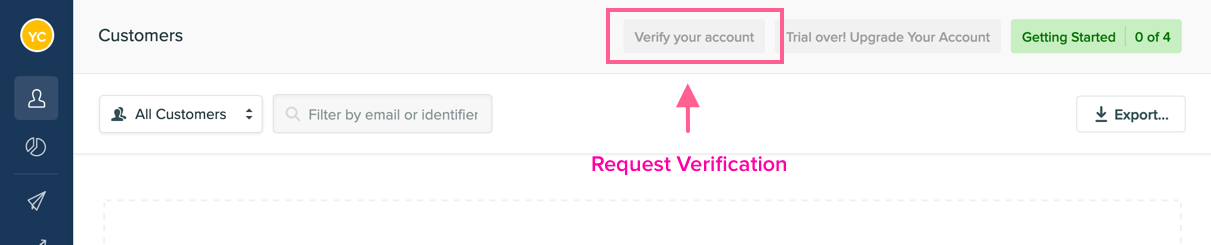
Set up your project
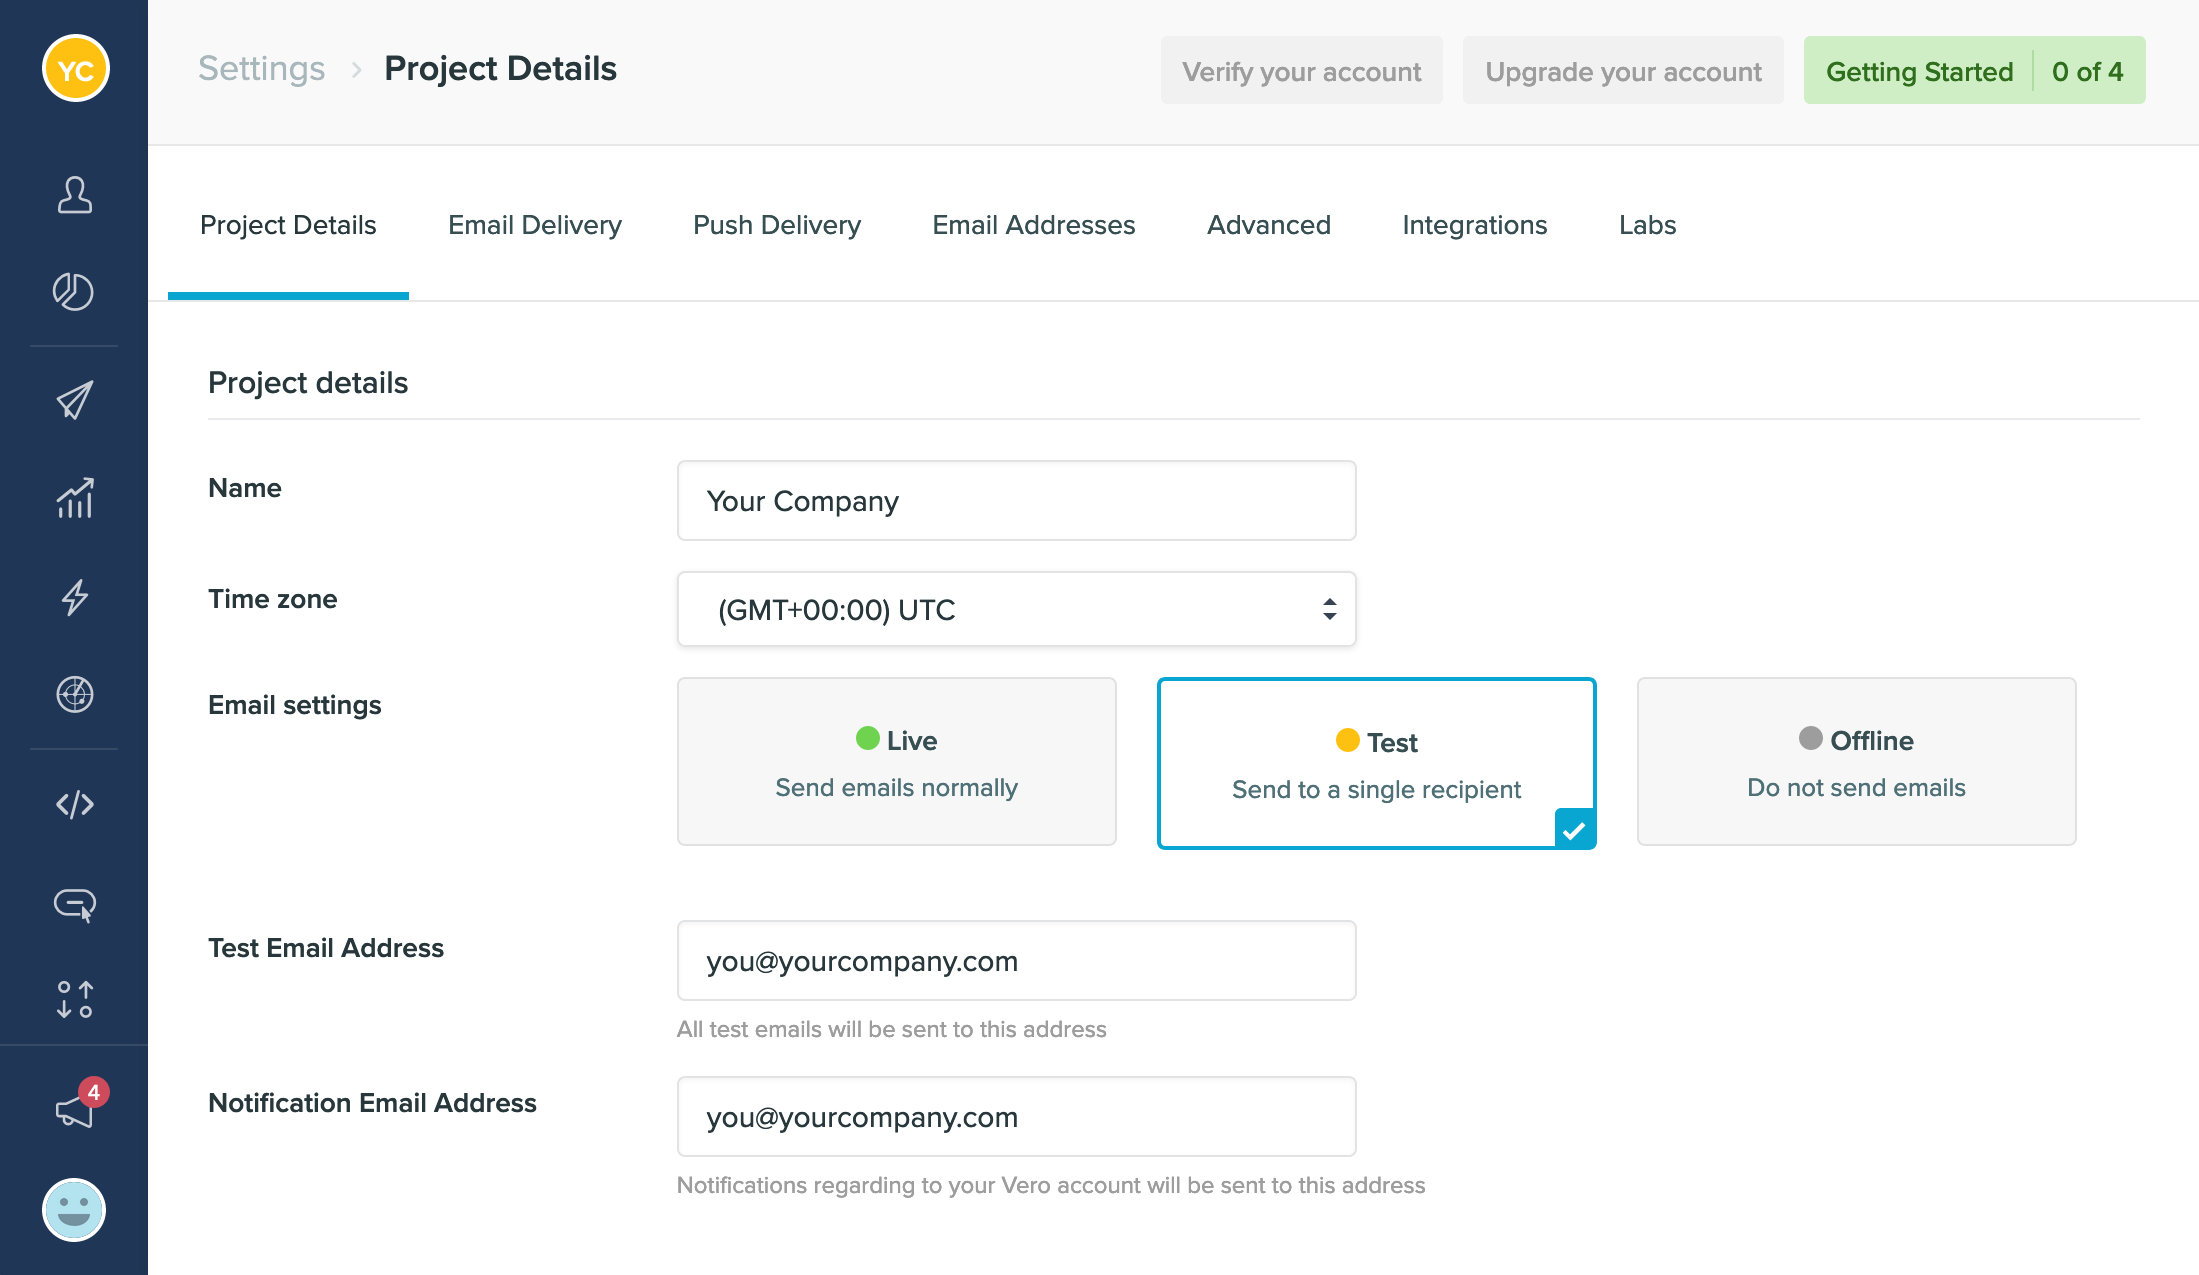
- Live All emails are triggered and sent normally.
- Test Send all emails triggered by customers to a single email address (for testing). For newsletters, only a single email is sent to your test address.
- Offline Data is still captured and emails are ‘triggered’, just not sent, so you can see them in the logs.
- You can have as many projects as you like. For example, you can have a ‘Sandbox’ project (Test mode) linked to your test environment as well as a ‘Production’ project (Live mode) linked to your live environment.
- You can also clone campaigns between projects by selecting ‘Clone’ in the dropdown menu. However, please note that customer data is isolated to each project and can not be cloned across to other projects.
Add team members
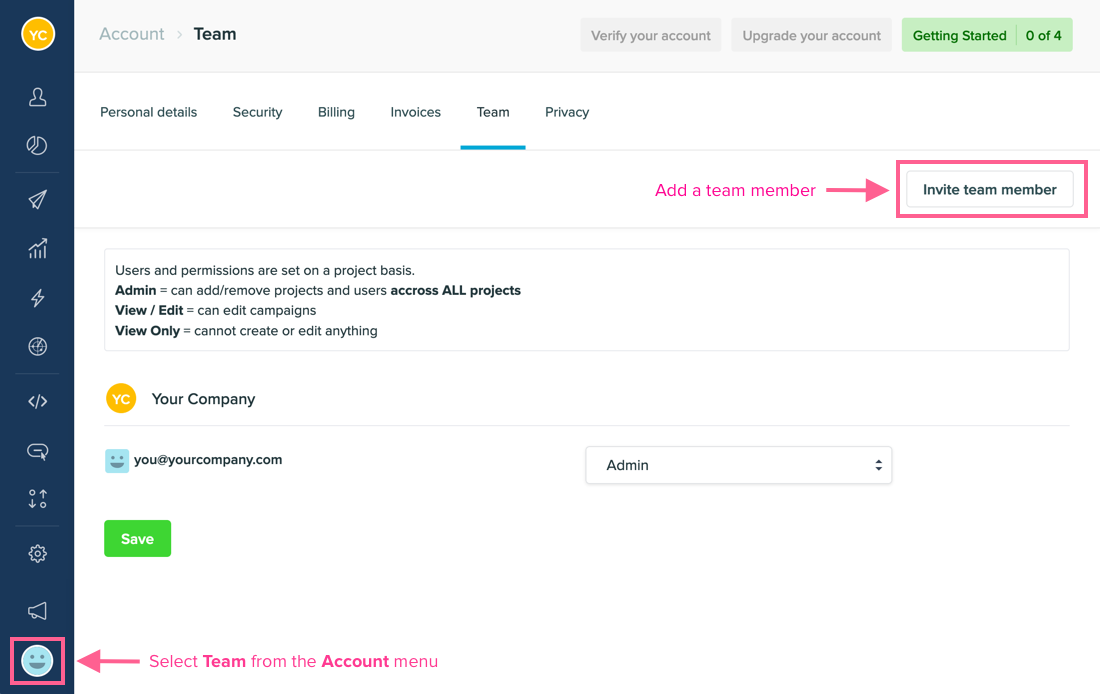

- Administrator – users with this access level can manage your subscription, add other users, and have full access to data and campaigns.
- View / Edit – users with this access level can create, delete, and otherwise manage all of your campaigns. They cannot manage your Vero subscription or add other team members.
- Deny customer data – users will have the same access as “View and Edit but removes access to customer data.
- Deny customer data and deny publish – users have the same access as “Deny customer data” but further removes ability to publish/unpublish all campaign types.
- View only – users with this access level can view campaigns and campaign results, but cannot make changes.
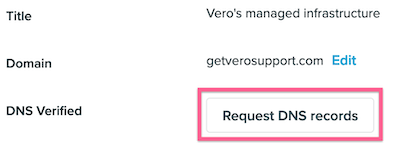
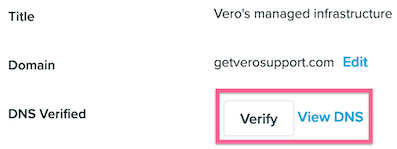
Set up Domain Authentication
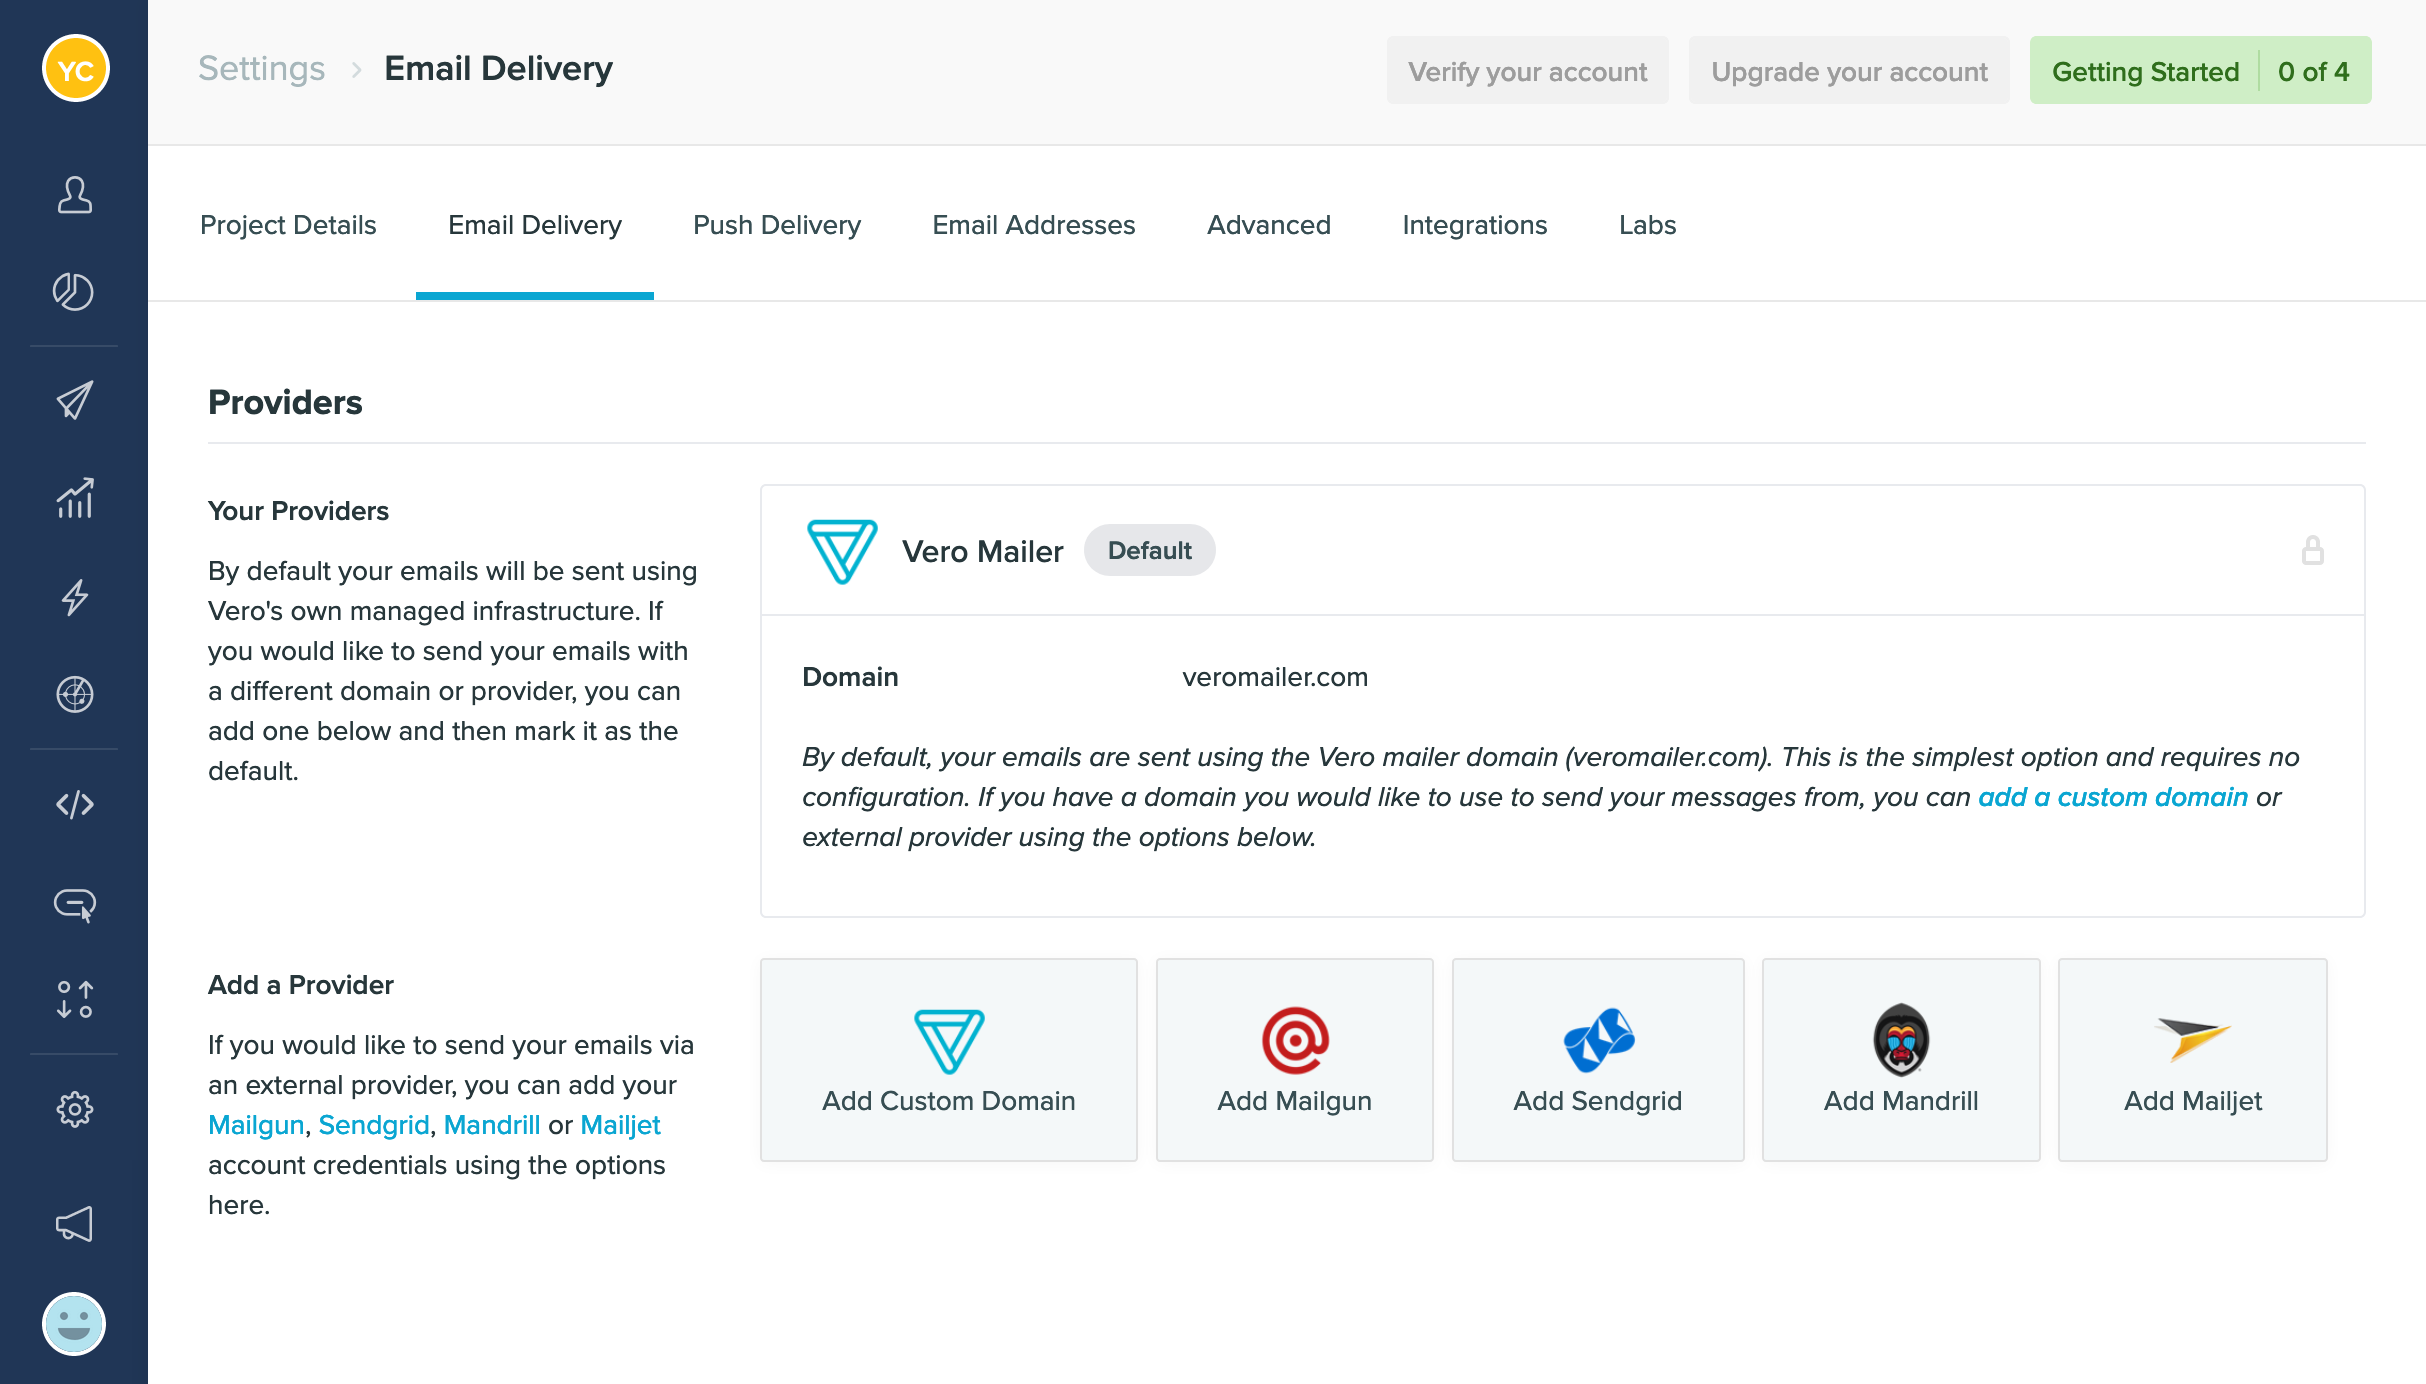
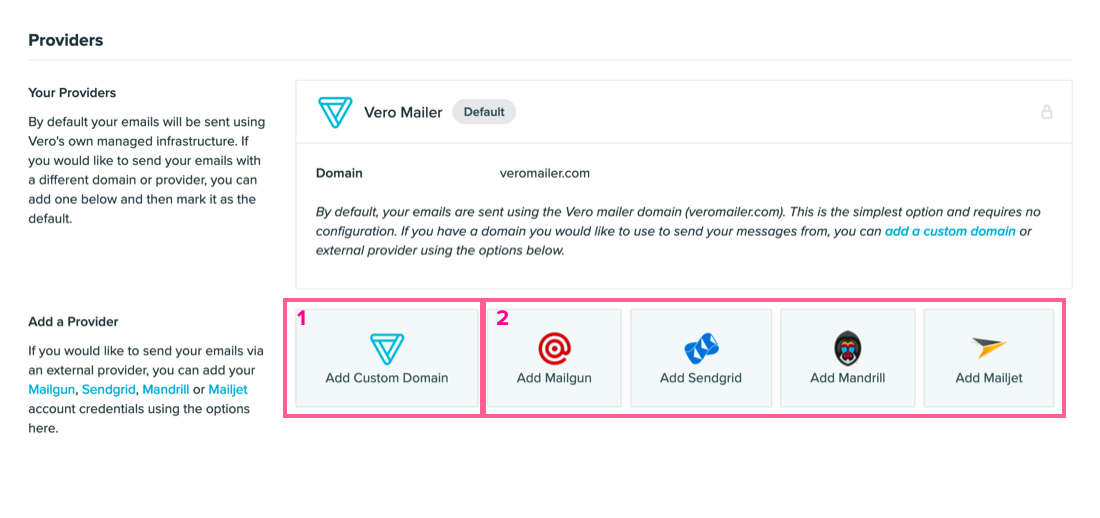

- You may receive a yellow error sign next to your MX records. While MX records are not mandatory, we highly recommend adding them as they can affect delivery. Please note that you can bring your own MX records or use those provided by Mailgun. However, you cannot use both on your domain.
- As a best practice, we also strongly advise that you configure DMARC. You can find more on this setup here.
Integrate with Vero’s API
One of the reasons Vero is so powerful is its ability to track customer data and how they are interacting in your application or website, in real-time. Traditional email tools typically synchronize with databases or static lists at set intervals, however, tracking customer properties and customer events with Vero is where you’ll see the biggest wins. To get the most out of Vero, we recommend integrating with our API. Most customers install our Javascript library on their website, which automatically manages cookie tracking and other benefits, such as automatically managing API call failures You can find the Javascript library and installation instructions as part of our API library documentation. Our library is built so that it loads after your pages with redundancy in mind, so it will not slow down your site in any way. Many people also track extra customer properties or events using our backend API libraries, in Python, Ruby, PHP, Java, Perl and iOS. These can all be found in our API library documentation. You may use both the front-end Javascript library and extra API calls in tandem. Tip: The key to using our API is to identify customers using a unique identifier or ID (interchangeable terminology in the world of Vero). If you do not have a unique ID per customer, you can use the email address as the ID itself. 🚩 What you will do:- Install the Vero Javascript library on your website. This includes making a Vero identify call whenever a customer signs up, fills out a form, or otherwise gives you permission to email them.
- Determine whether you want to automatically track pageviews for customers that have been identified (by default, Vero does not).
- Track specific events using our Javascript library. Focus on key lifecycle events such as Signed_up, Viewed_product, Used_feature_X. Events can be named however you want and are one of the keys to using Vero with power.
- Track any extra events via our API on your backend using one of our backend libraries.
Import your data
After determining what data you are going to track on the front end, you’ll want to ensure that your data history is available in Vero. The easiest way to import data into Vero is to use a CSV. To do this, navigate to the Import/Export section from the sidebar.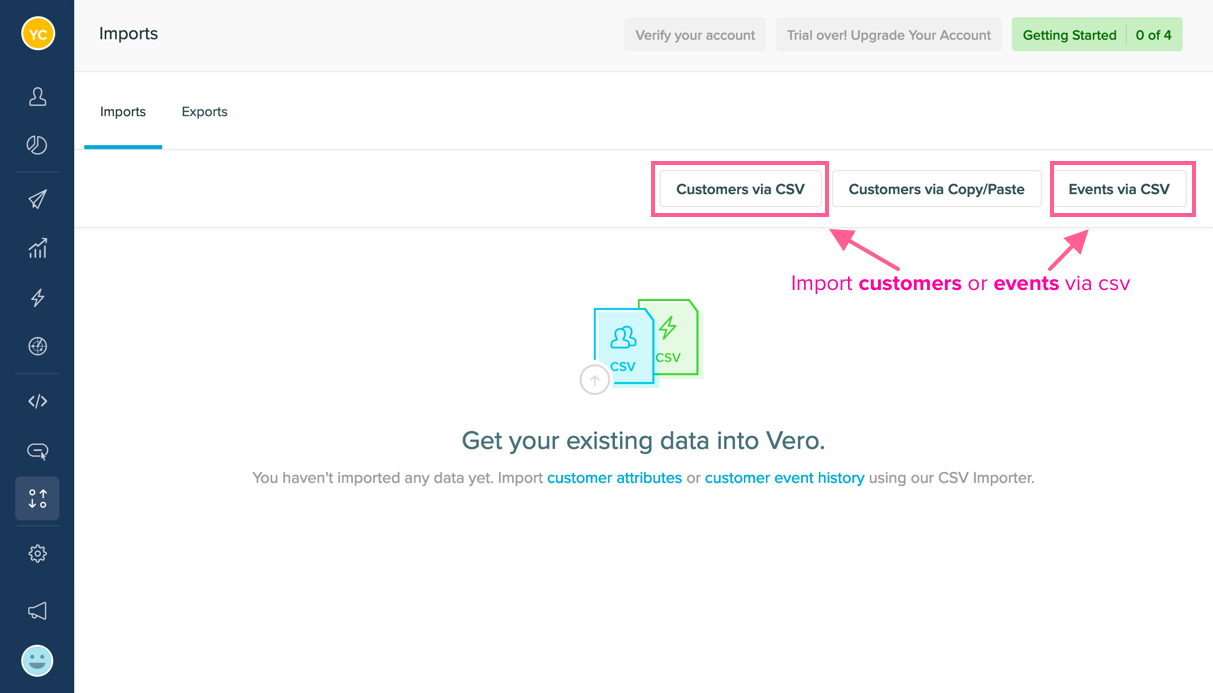
- We accept manual CSV imports up to 2GB. To import larger datasets, we recommend splitting them into separate files or contacting support@getvero.com for recommendations and assistance.
- Make sure that you save your CSV with UTF-8 encoding. Often we see files being saved with a Latin character set (ex: ISO-8859-1). At this time, Vero only accepts files with UTF-8 encoding.
- Import any customers and their properties via CSV to backfill Vero and prime your segments. You can do this via the Import Customers page or by contacting support for larger data sets.
- Import any customer activity data via CSV to backfill Vero and prime your segments. You can do this via the Import Events page.
Import and create your first templates
Import existing templates We know how much effort is required to create and maintain awesome email designs, so we’ve made it easy to upload your existing templates into Vero. Setting up templates correctly at the outset will enable you and your team to move quickly in Vero. The best place to start learning about how Vero handles templates is to read our extensive Using HTML templates in Vero help article. When you import templates, Vero will parse them and give you warning messages regarding errors you may have made that can cause conflicts. This ensures that everything is set for your marketing team to use your templates seamlessly. As a helpful summary, here are the key points to understand about Vero’s templates:- You can find your templates under Settings> Templates.
- Once a template is uploaded, you can then select this template when creating any type of campaign in Vero.
- Export your custom templates from another email platform or as created by your design team.
- Upload your templates into Vero.
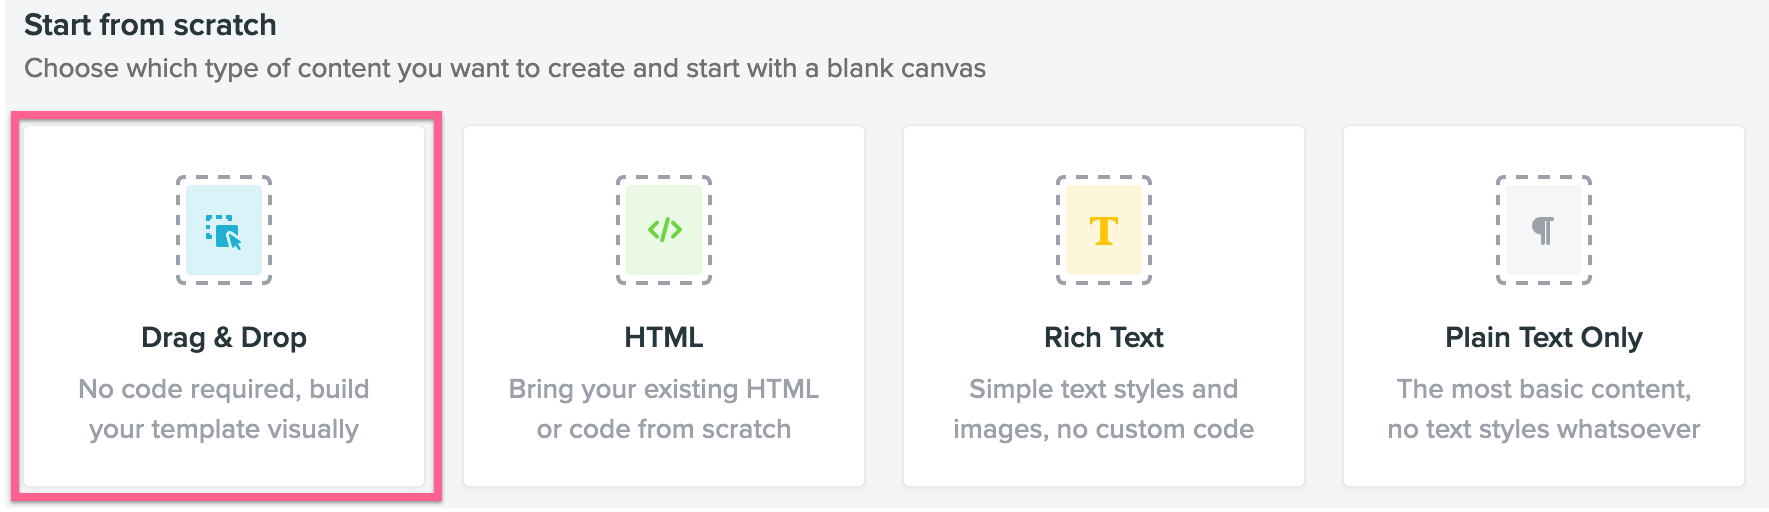
- Create new templates using our drag and drop editor.
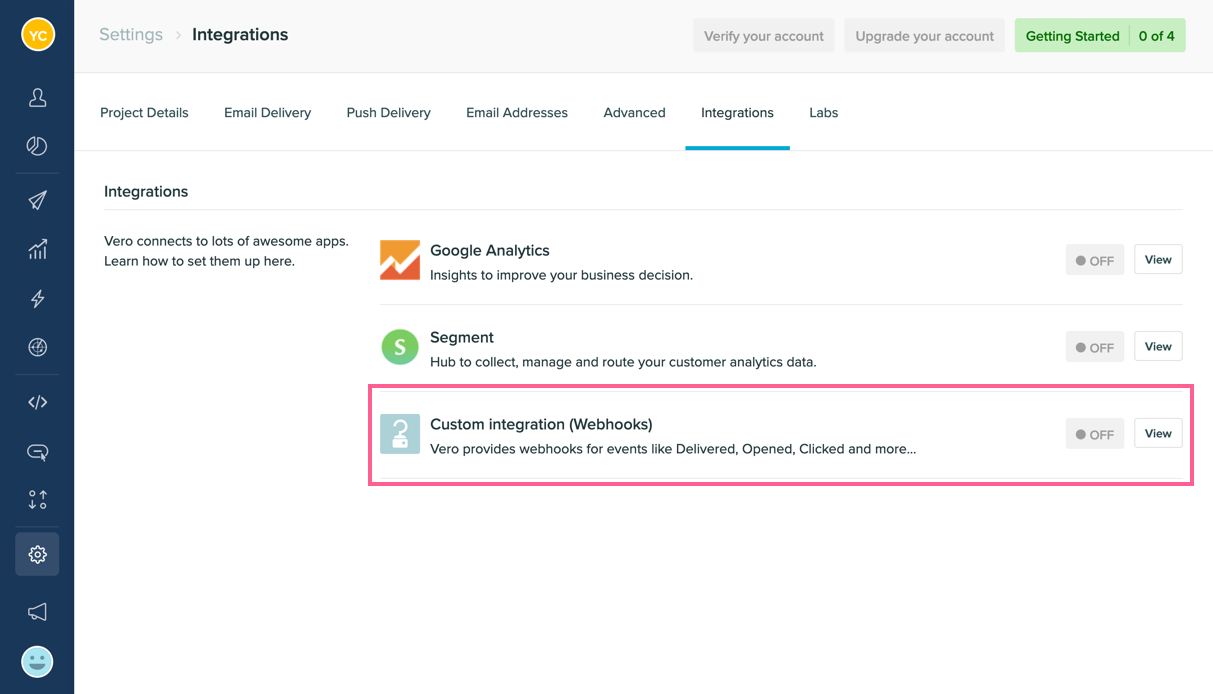
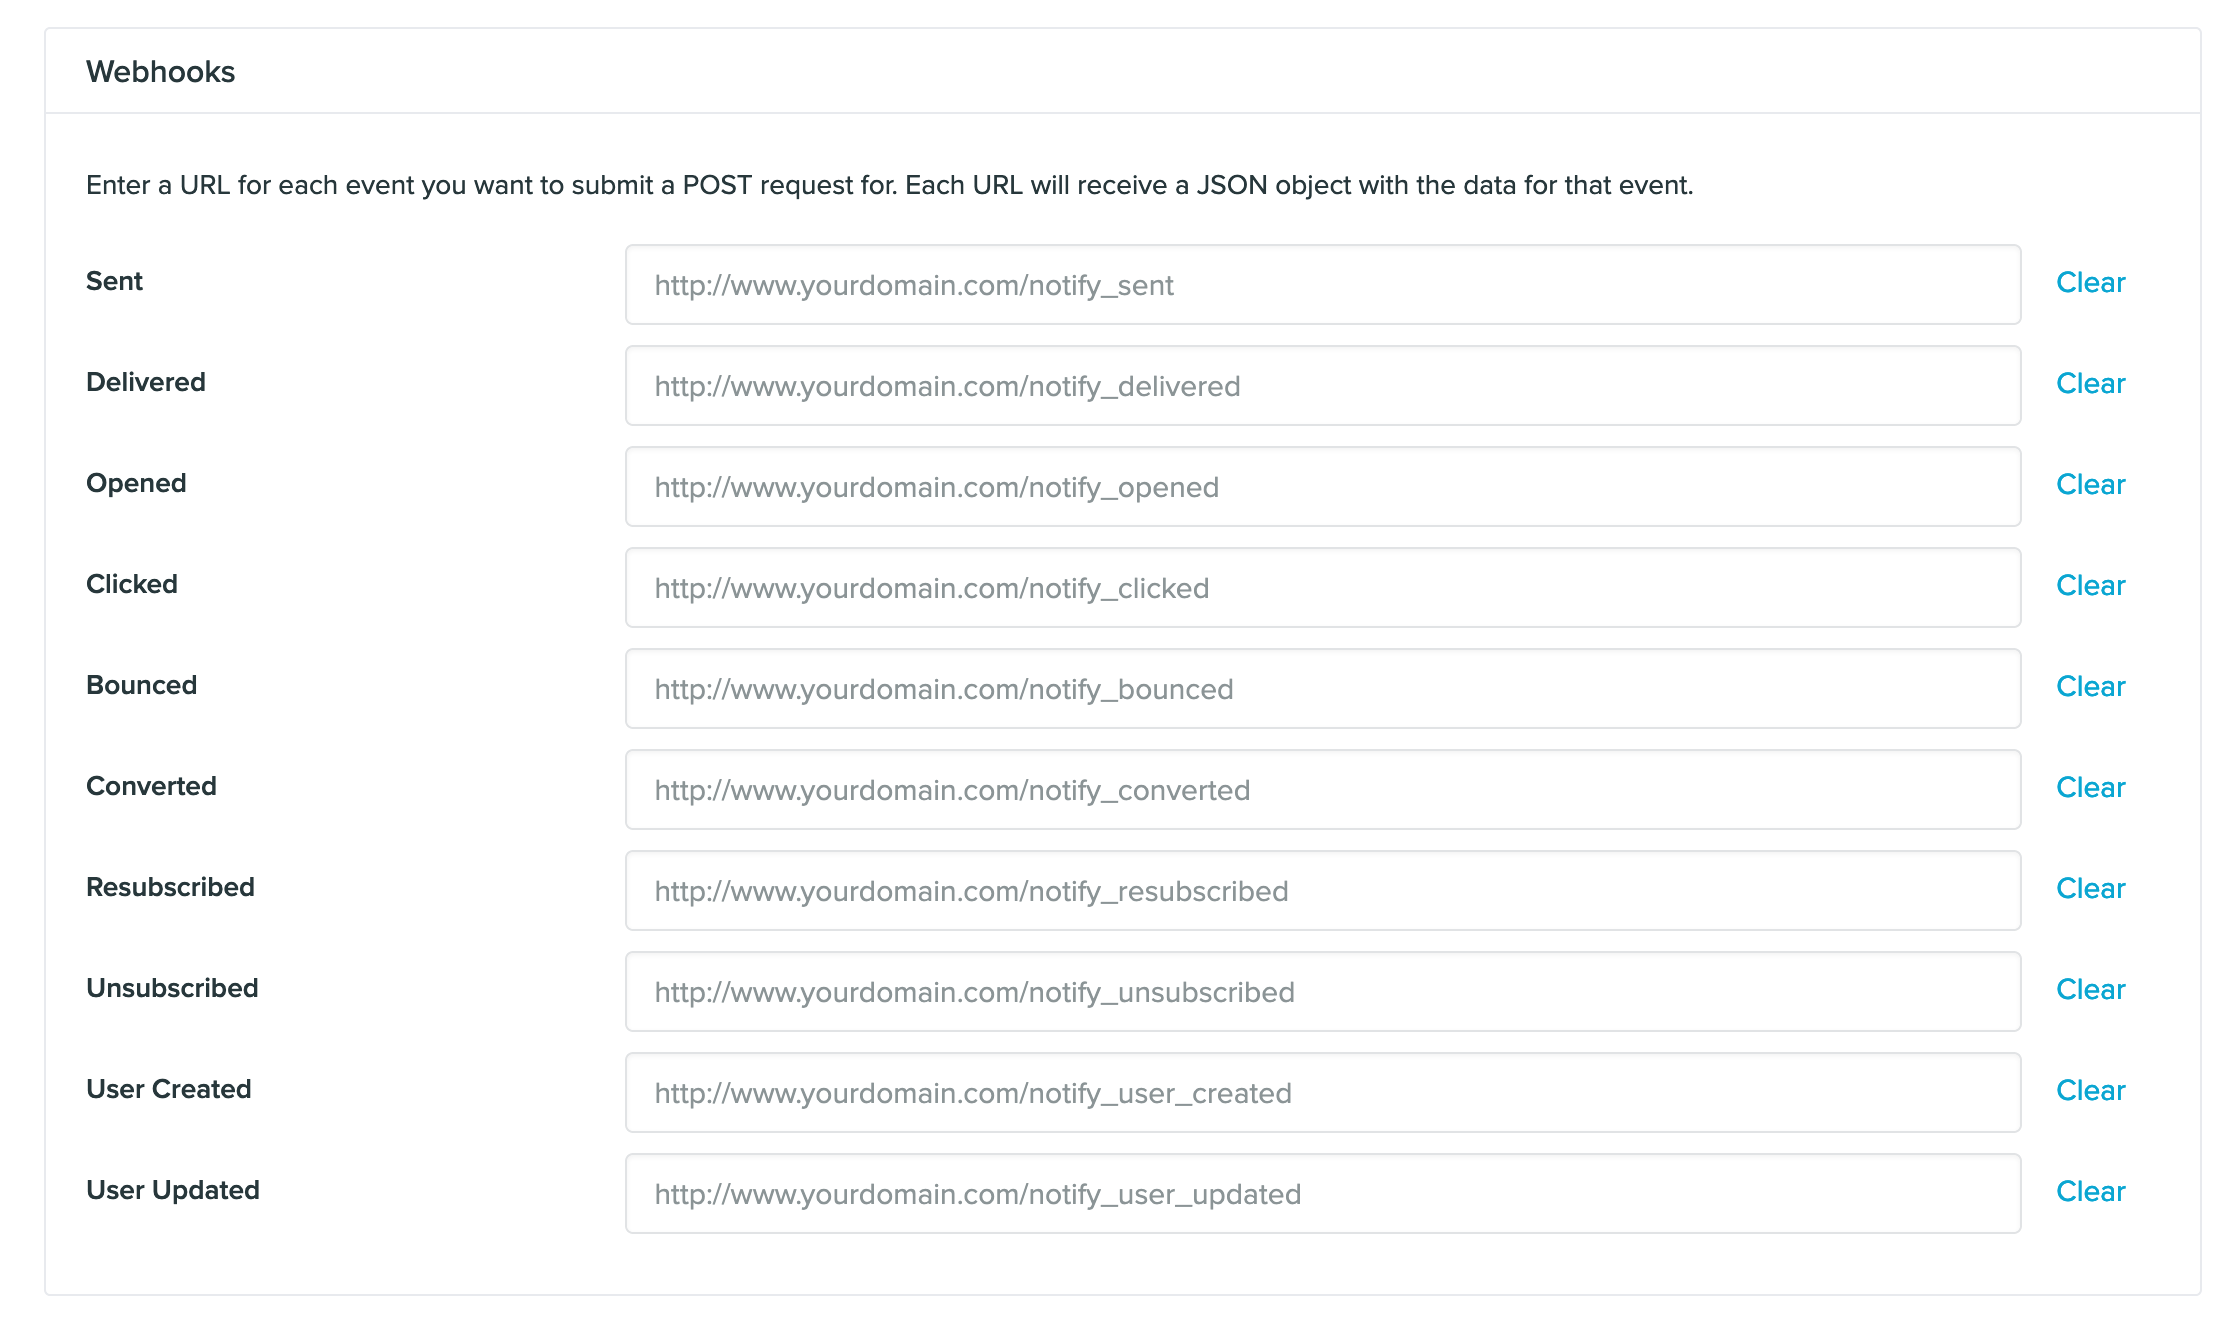
Set up webhooks and integrations
Collecting data about your customers is important, and we want you to have access to this information from the start. Which is why we’ve provided two different options to our customers:- Webhooks : For our more technical customers, our webhooks setup is easy-peasy.
- Zapier Integration : If you don’t speak “code,” don’t worry. You can easily obtain this data through a simple integration.
- Sent (email has been sent by Vero)
- Delivered (email has been delivered to the recipient email server)
- Opened
- Clicked
- Bounced (hard and soft)
- Converted
- Unsubscribed
- Resubscribed
- User Created
- User Updated
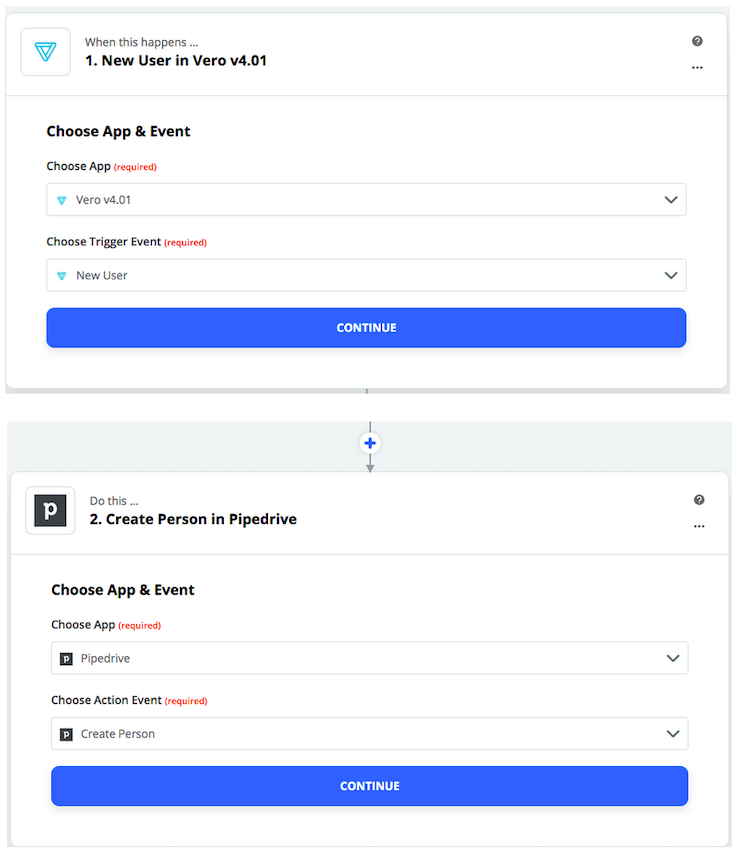
- New User
- Unsubscribe User
- Update User
- Email Delivered
- Resubscribe User
- Email Sent
- Email Opened
- Email Clicked
- Email Bounced