

Prerequisites
- Preference center access on your project – contact us to have it turned on. Until it is, the Topics section does not appear under Settings → Subscription Management.
- Edit access to your project – to create, edit, or reorder topics. Member (View only) users can see topics but not change them. See Set up team access.
Planning your topics
A topic should match a kind of message a user would reasonably want to keep or drop on its own, such asWeekly digest, Product updates, or Offers and promotions.
- Keep the list short. A preference center with five topics is easier to manage than one with twenty, and less likely to end in Unsubscribe from all.
- Write descriptions for your users. The description appears under the topic name on the preference center.
- Choose each default status deliberately. A topic that is subscribed by default includes every profile that has never made a choice. A topic that is unsubscribed by default reaches nobody until they opt in, which suits topics that need explicit consent.
Creating a topic
- Go to Settings → Subscription Management.
-
Under Topics, click Add Topic.
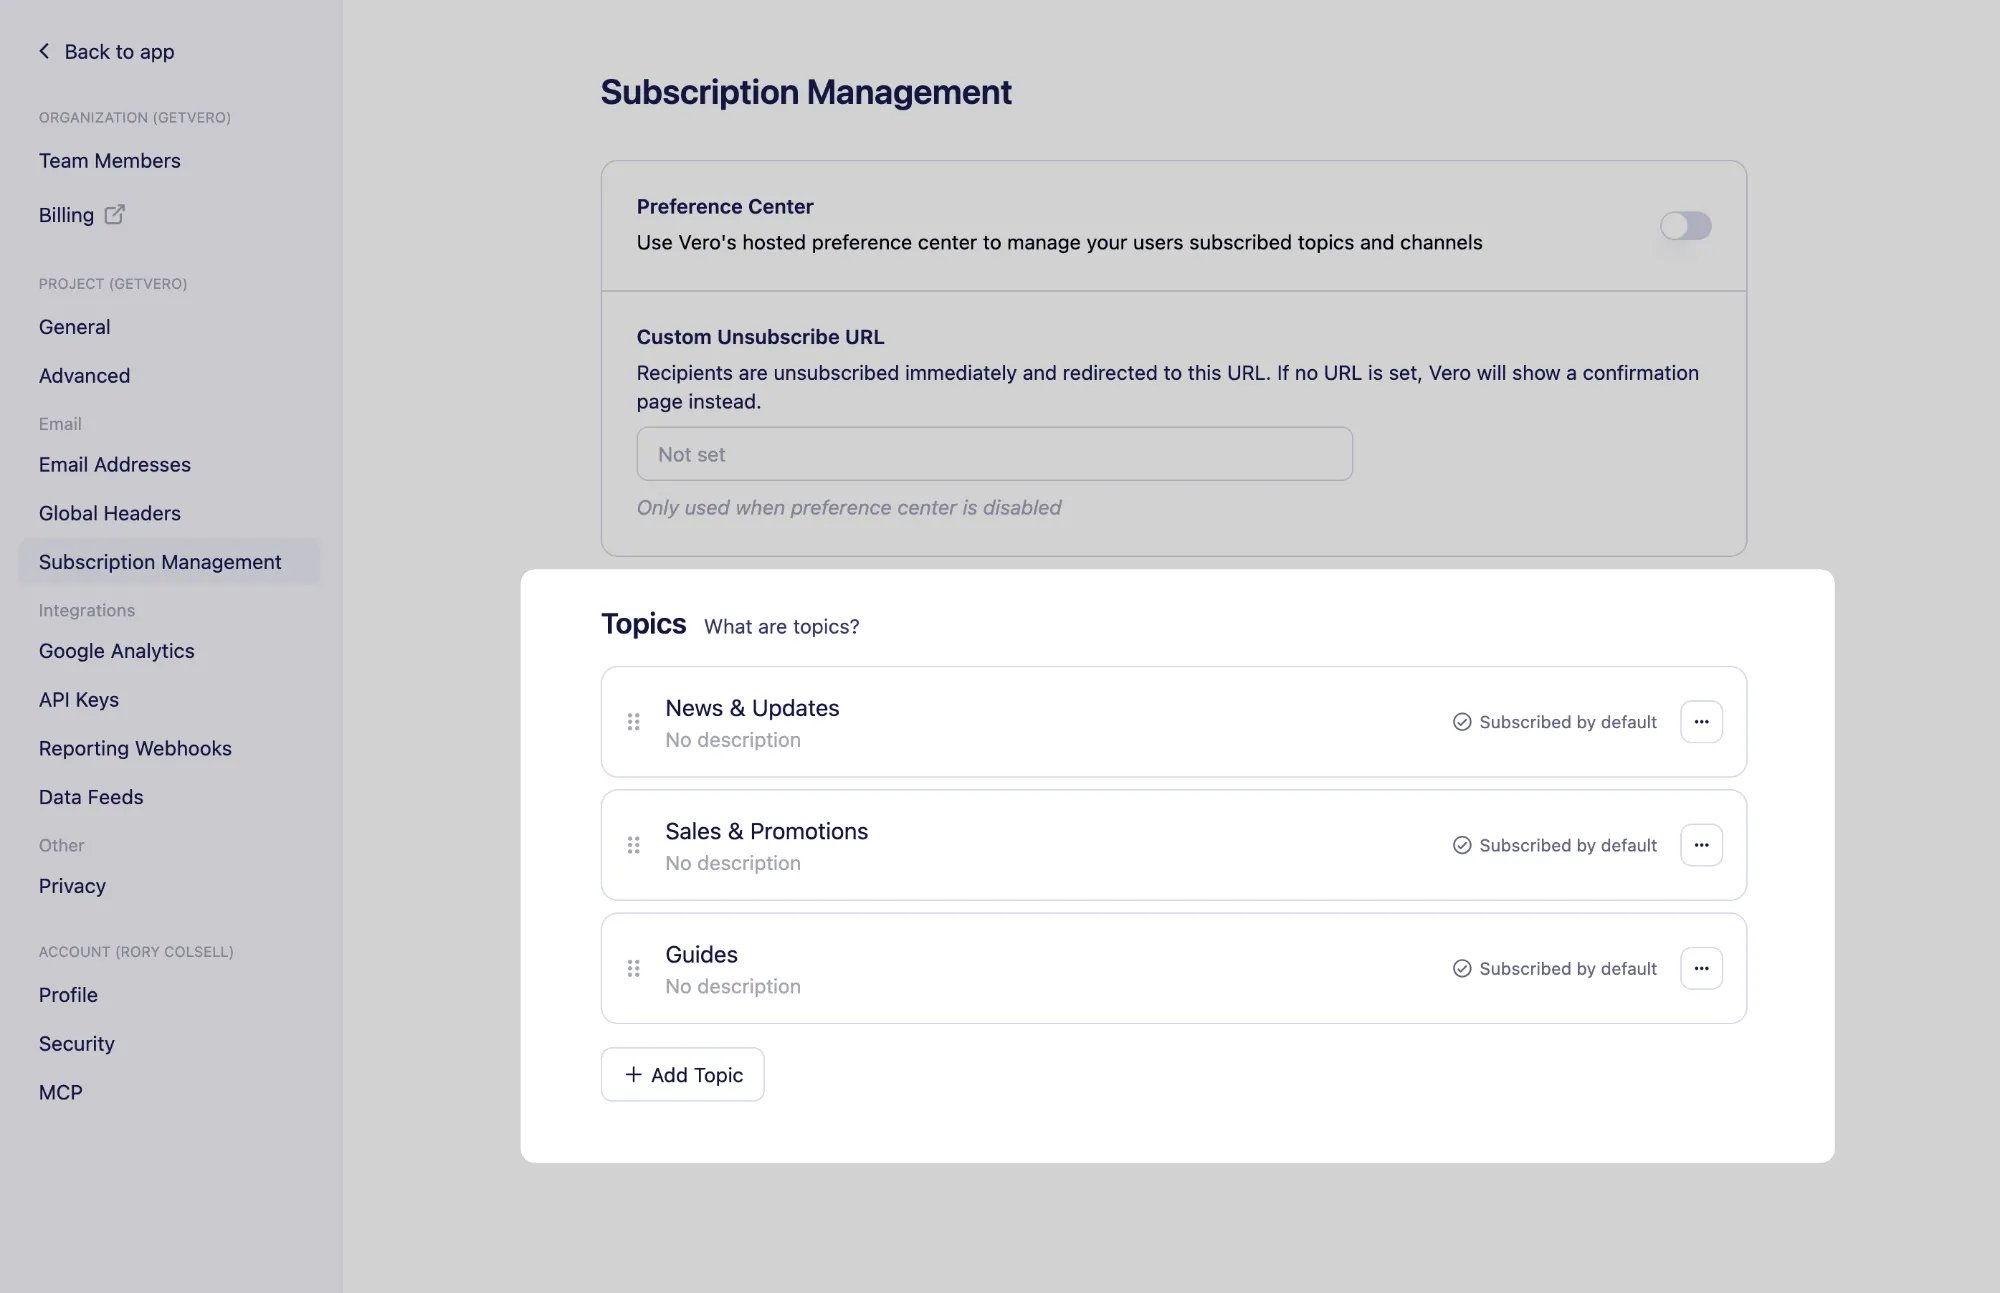
- Enter a Name and, optionally, a Description.
-
Leave Subscribe new users by default ticked to make the topic subscribed by default, or untick it to make the topic unsubscribed by default.
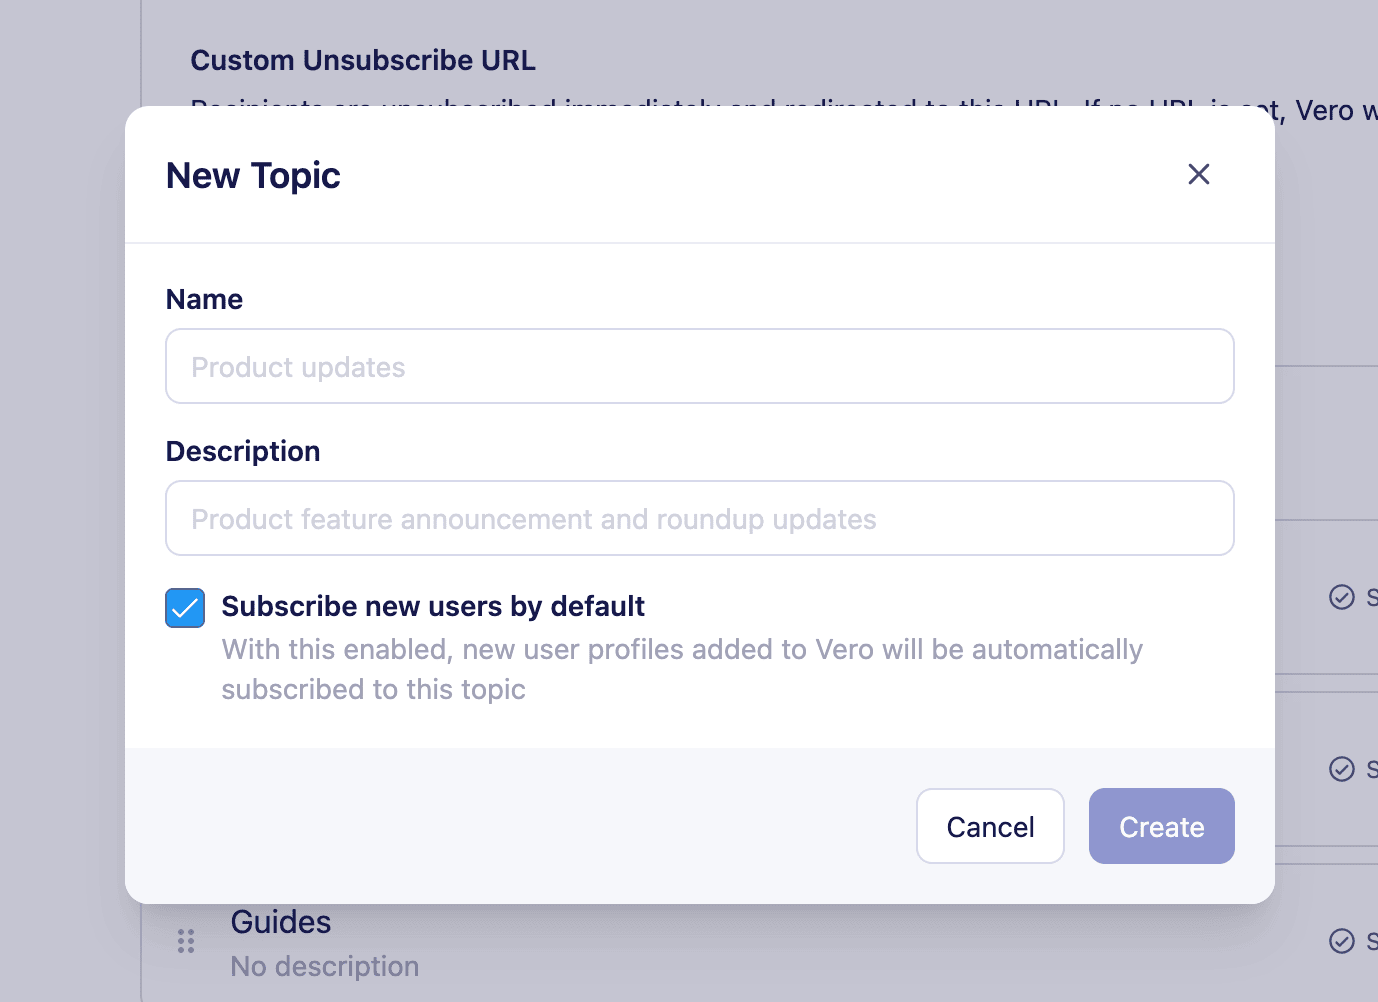
- Click Create.
- The name must be unique within the project. Names are compared ignoring case and leading or trailing spaces, so
Product updatesandproduct updatescount as the same name. - The description can be up to 200 characters.
- A project can have up to 100 topics. Once you reach 100, Add Topic is disabled.
Editing a topic
- Click the actions menu (…) on the topic.
- Select Edit.
- Update the name, description, or default status, then click Save Changes.
Topics cannot currently be deleted. If a topic is no longer needed, rename it or make it unsubscribed by default.
Ordering your topics
Drag a topic by its handle to move it up or down the list. Topics appear on the preference center in the same order.Viewing and changing a profile’s topics
Each profile’s Subscriptions tab shows its status for every topic and whether that status comes from the topic’s default or an explicit choice. With the user’s consent, your team can subscribe or unsubscribe a profile from a topic there. See Manage a profile’s topic subscriptions.Managing topics through the MCP server or API
You can also list, create, and update topics through the Vero MCP server or the Campaigns API, and set a profile’s topic statuses withpreferences.topics when you identify a user.